
301 Redirects
Link: https://support.brilliantdirectories.com/support/solutions/articles/5000682632
A 301 redirect permanently sends visitors and search engines from an old address on the website to a new one. The 301 Redirect Rules page lists every redirect on the website and is where redirects are added, edited, tested and deleted.
When member profile details are updated, such as changes to URL structure, business name, or address, the system automatically creates redirects. This ensures that existing links continue to resolve correctly and point to the updated profile.
Opening the 301 Redirect Rules Page
- Go to Developer Hub.
- On the 301 Redirect Rules card, click Manage Redirects.
The 301 Redirect Rules Page
The page shows each redirect as one row: the old address (Source URL) in green, with the new address (Destination URL) beneath it, followed by the redirect's Type and the date it was last Updated.
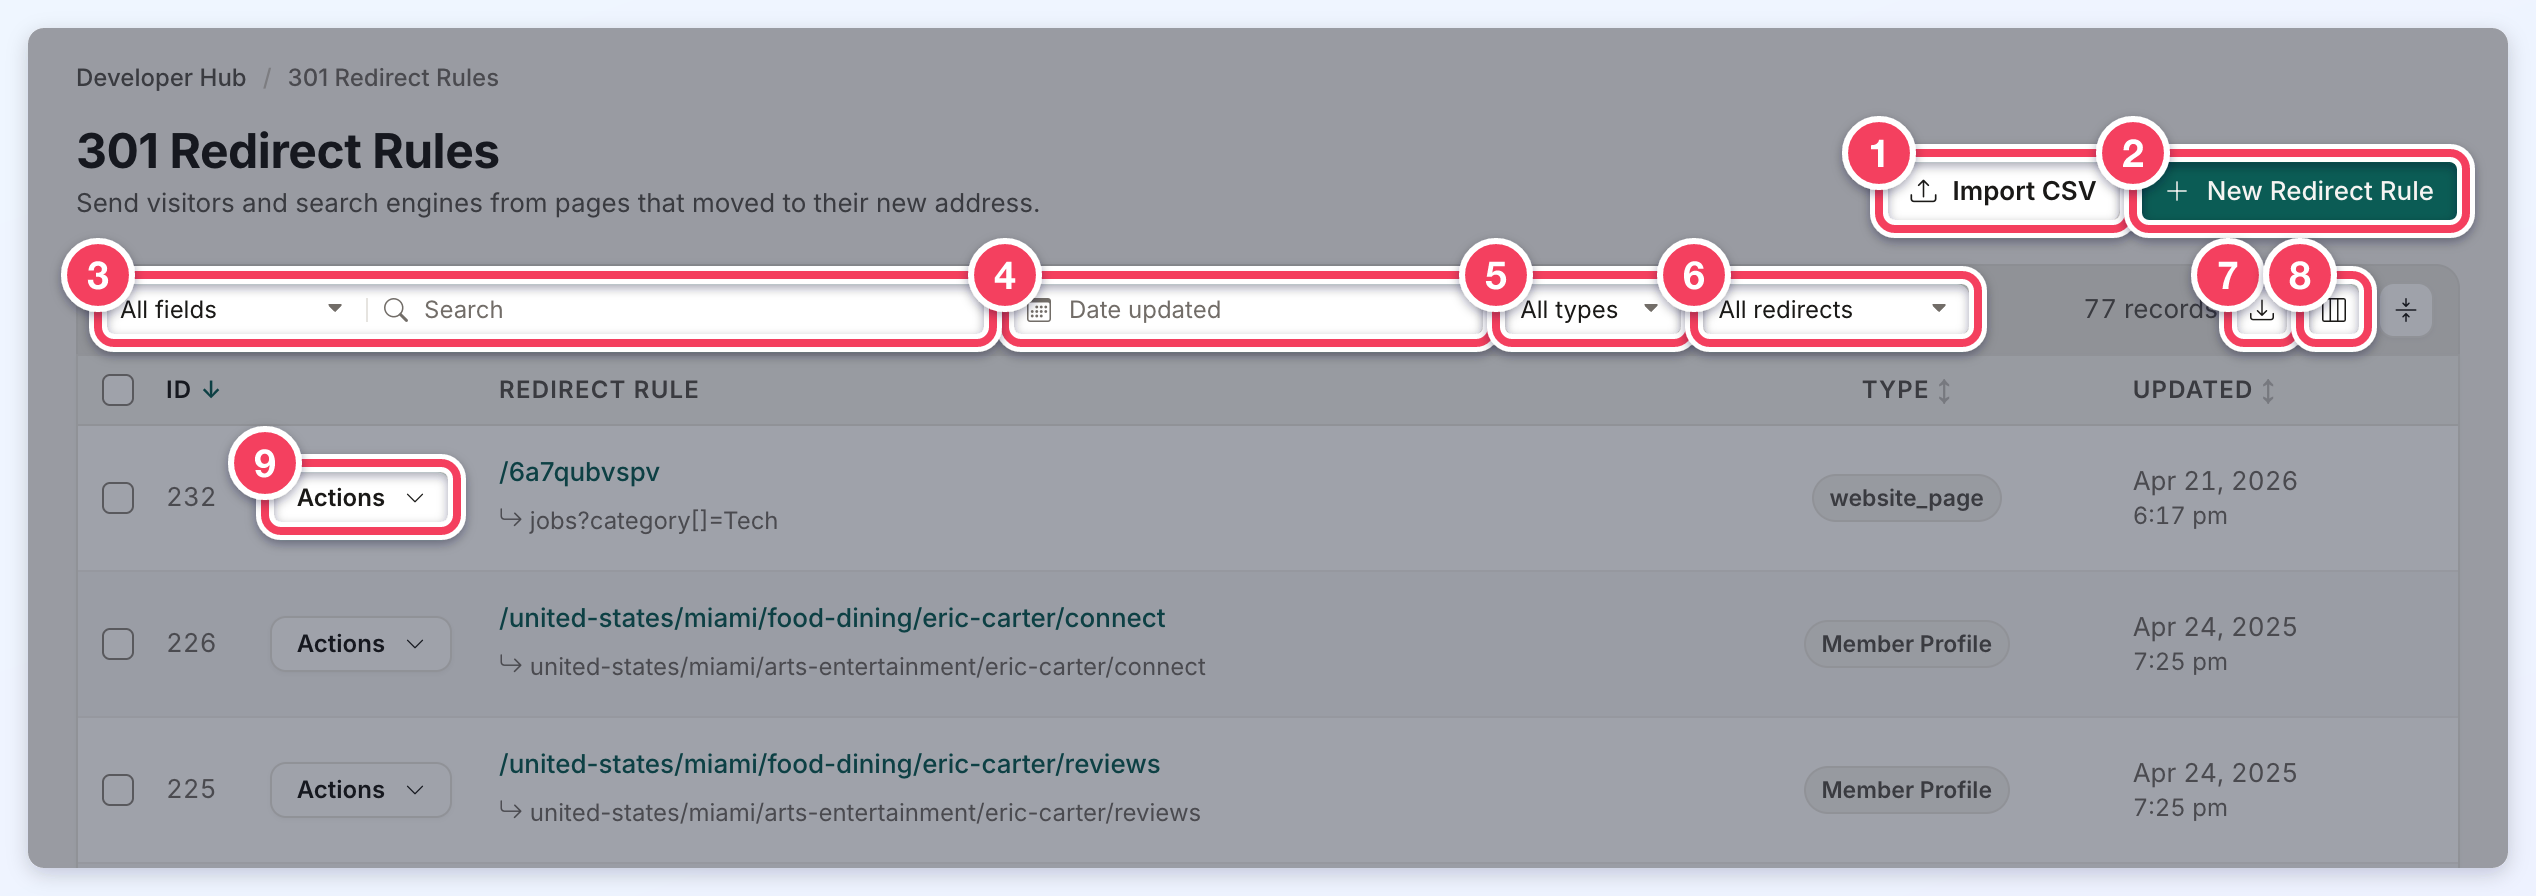
- Import CSV: adds many redirects at once from a CSV file. See Import 301 Redirects via CSV file.
- New Redirect Rule: opens a drawer for adding one or more redirects.
- Search: finds redirects by text. The menu beside the search box limits the search to All fields, Source URL, Destination URL, Admin notes or ID. A full address on the website can be pasted in; it is searched by its path.
- Date updated: shows only redirects updated on one day or within a date range.
- All types: shows only redirects of the selected types, EG Member Profile redirects created automatically, or redirects added by an admin.
- All redirects / Broken redirects: switches to the list of broken redirects (see below).
- Export CSV: downloads the redirects currently shown, with the active search and filters applied, in the same columns the CSV import uses.
- Show or hide columns: chooses which columns appear in the table.
- Actions: the menu for a single redirect.
Hovering over a row shows copy buttons beside the Source URL and the Destination URL. Clicking anywhere else on a row opens that redirect for editing.
Tables show 25 rows per page by default. The Rows per page menu below the table switches between 10, 25, 50 and 100 rows, and the browser remembers the last size picked.

Adding 301 Redirects
- Click New Redirect Rule. The New Redirect Rule drawer opens.
- In Source URL, enter the old address as a path on the website, without the domain or a leading slash. EG about/contact.
- In Destination URL, enter the new address: a path on the website (EG about/contact-us) or a full address on another website (EG https://example.com). To send visitors to the homepage, enter a single /.
- To add more redirects at the same time, click Add Another Redirect and fill in the new row. The X at the end of a row removes it.
- Click Save. A confirmation appears and the new redirects are added to the top of the list.
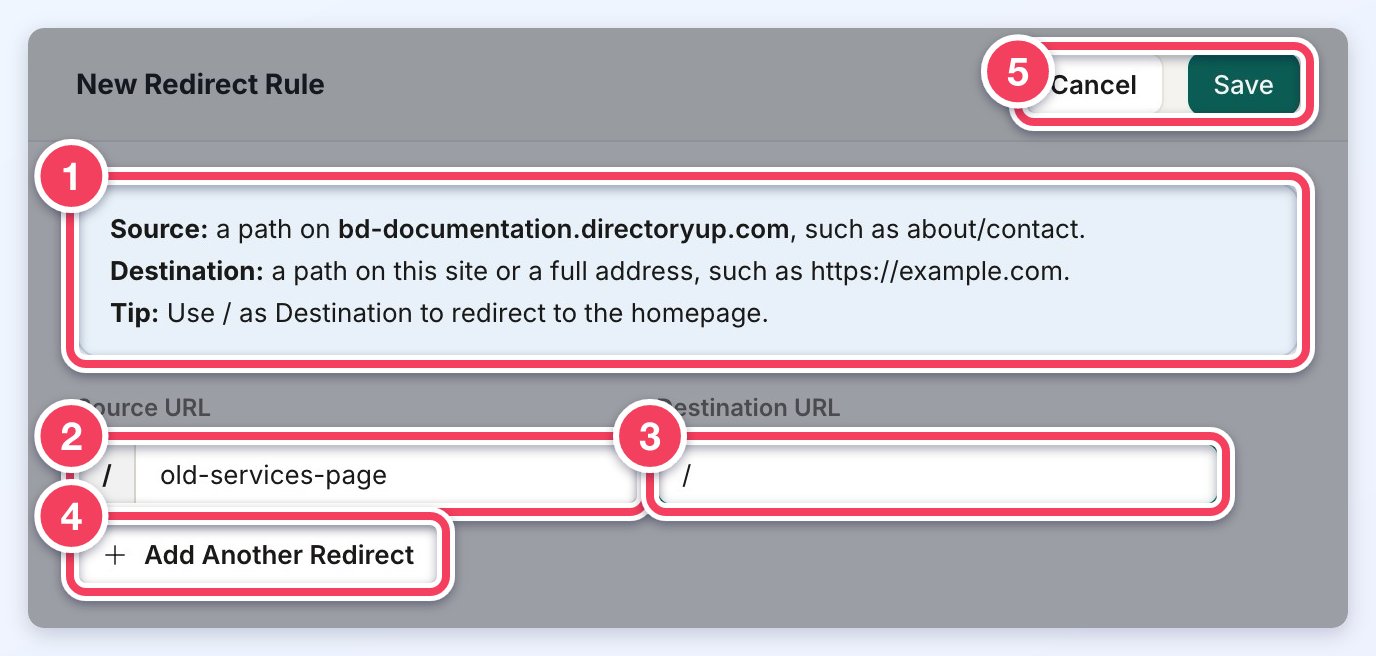
- The reminder at the top of the drawer: the Source is a path on the website, the Destination is a path on the website or a full address, and a single / as Destination redirects to the homepage.
- Source URL: the old address.
- Destination URL: the new address.
- Add Another Redirect: adds another Source and Destination row.
- Cancel and Save. If anything was typed, Cancel asks before discarding it.
The drawer checks each row before saving and shows the problem under the field. EG a Source URL that starts with http, www. or a slash is refused with a request to enter the path only, a Destination that matches its Source is refused, and quotes, angle brackets and backslashes are not accepted in either field.
The Source URL must be an address on this website. The Destination URL can be a page on this website or an address on any other website.
Editing a Redirect
Click a row, or choose Edit from its Actions menu, to open the Edit Redirect drawer.
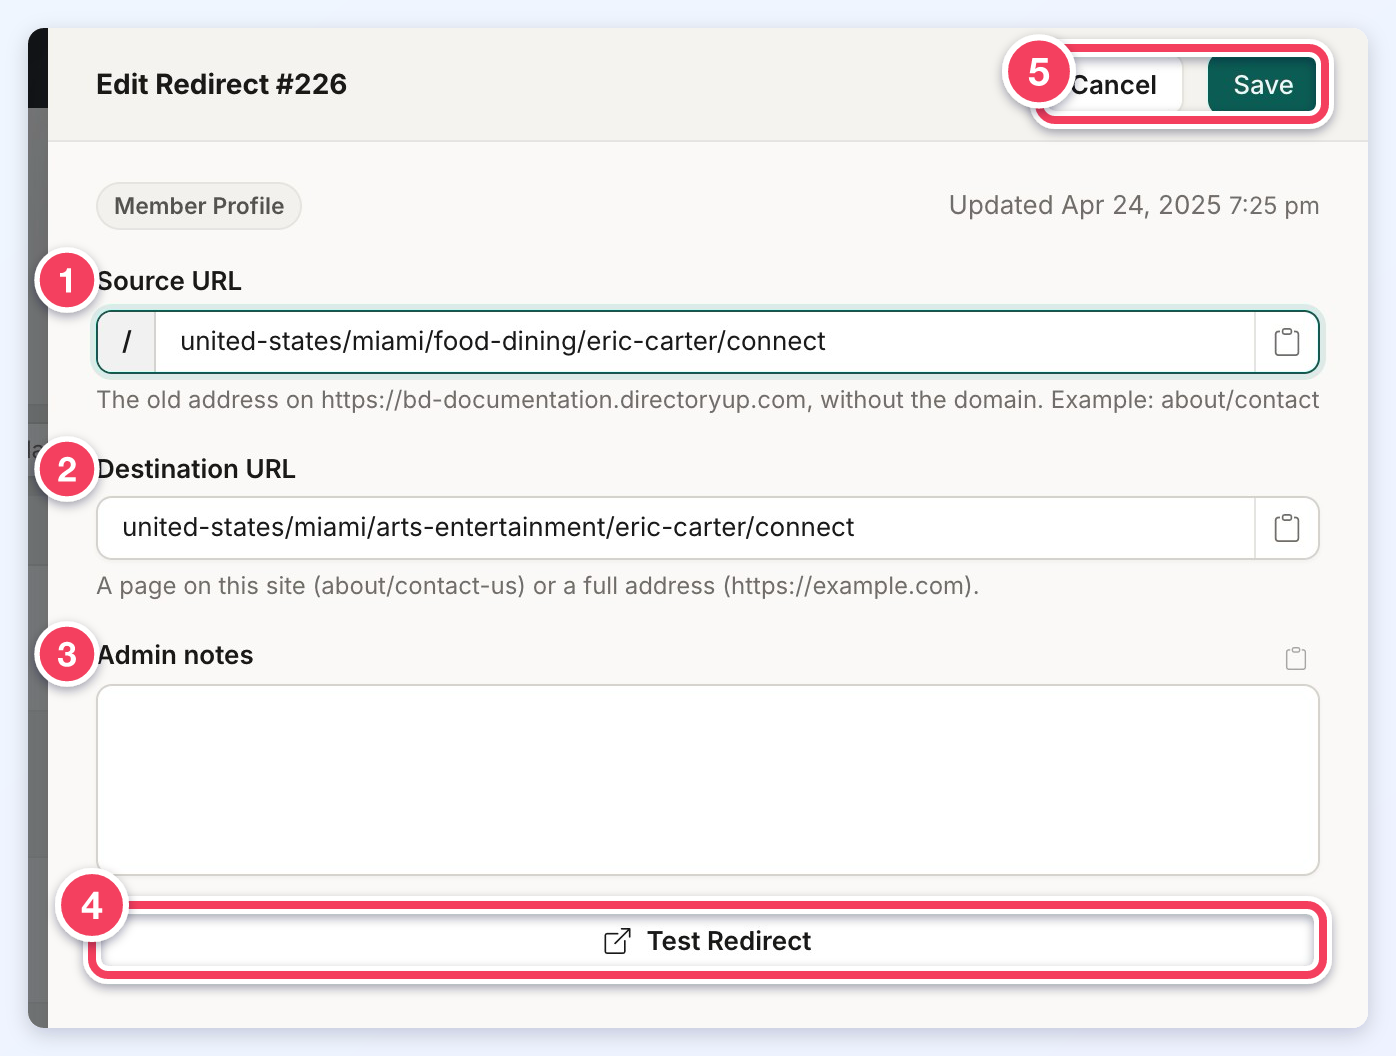
- Source URL: the old address, with a button to copy its full address.
- Destination URL: the new address, with a copy button. A single / redirects to the homepage.
- Admin notes: an internal note about the purpose of the redirect. Notes are searchable and appear under the rule in the list.
- Test Redirect: opens the Source URL in a new browser tab to confirm it lands on the Destination.
- Cancel and Save.
The drawer also shows the redirect's type and when it was last updated.
The Actions Menu
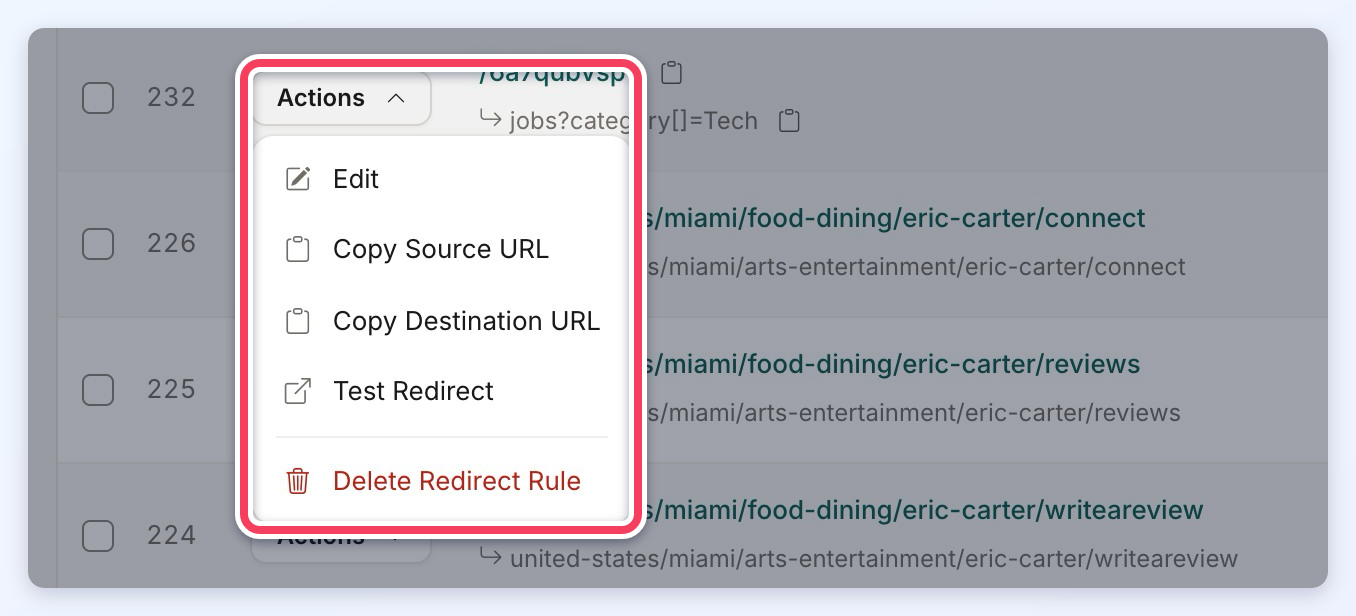
- Edit: opens the Edit Redirect drawer.
- Copy Source URL and Copy Destination URL: copy the full address.
- Test Redirect: opens the Source URL in a new browser tab.
- Delete Redirect Rule: asks for confirmation, then deletes the redirect. Its Source URL stops redirecting and the deletion cannot be undone.
Deleting Several Redirects
- Tick the checkbox beside each redirect to delete. The checkbox in the header selects every row on the page, and Select All in the bar that appears selects every matching redirect.
- In the bar above the table, choose Delete from Select Action and click Apply.
- When two or more redirects are selected, type the number of selected redirects to confirm, then click Delete Records.
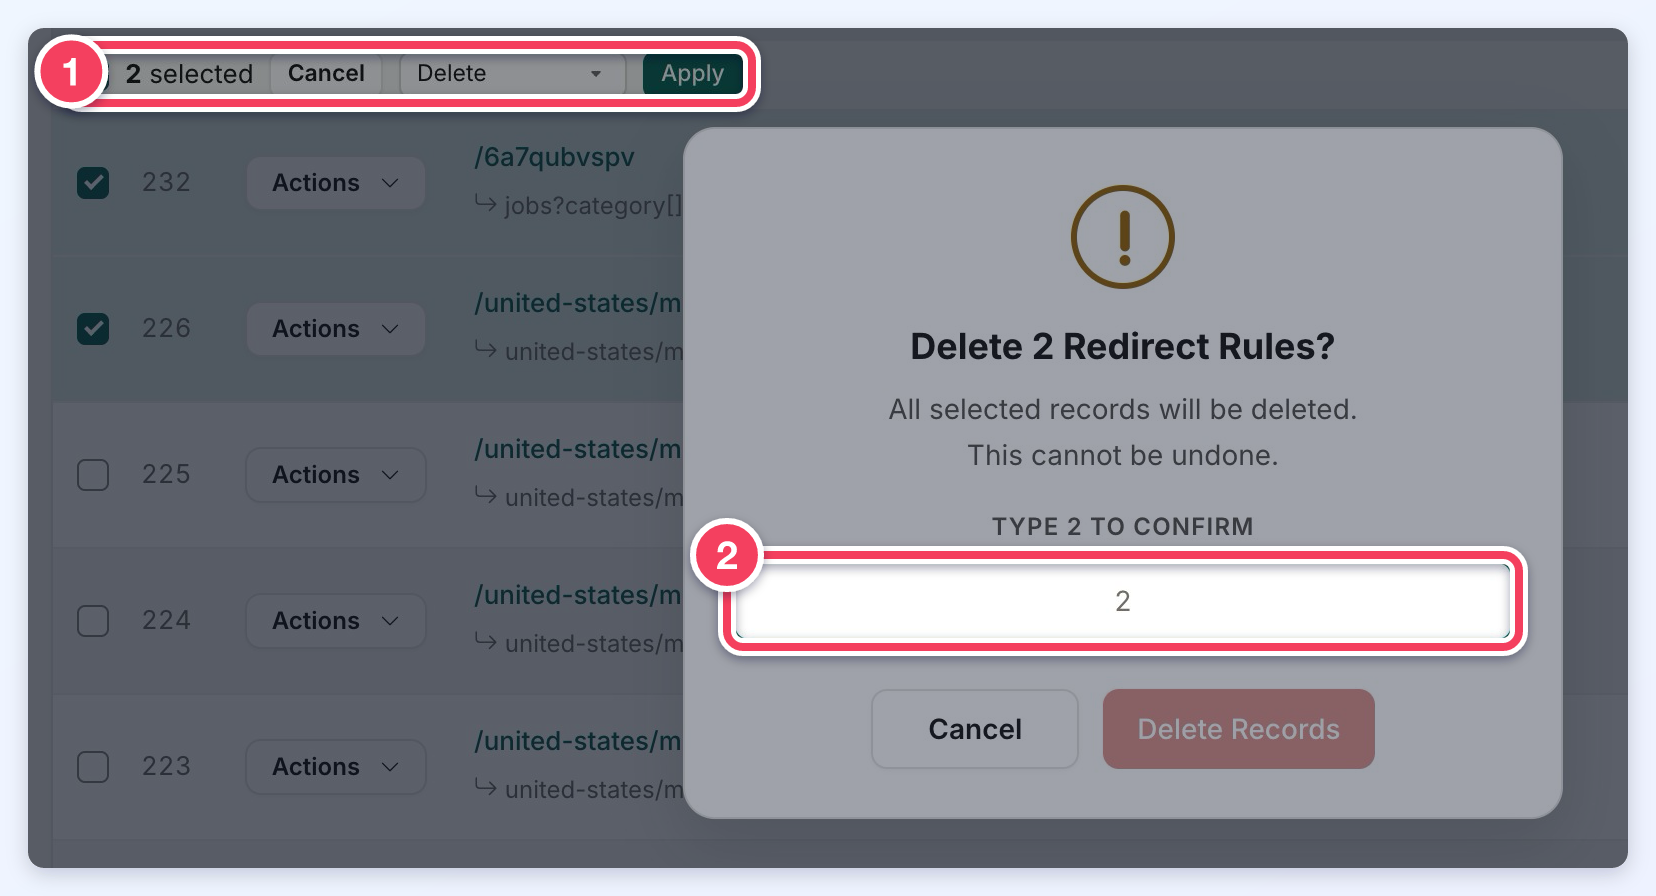
- The bulk action bar: the number selected, Cancel, Select Action and Apply.
- The confirmation field. Delete Records stays disabled until the number is typed.
Finding Broken Redirects
Choose Broken redirects in the filter menu to list only redirects whose destination is a page that does not exist on the website. Chains of redirects are followed to their last step, so a redirect that points at another redirect is broken when the end of the chain is missing. Destinations on other websites are not checked.
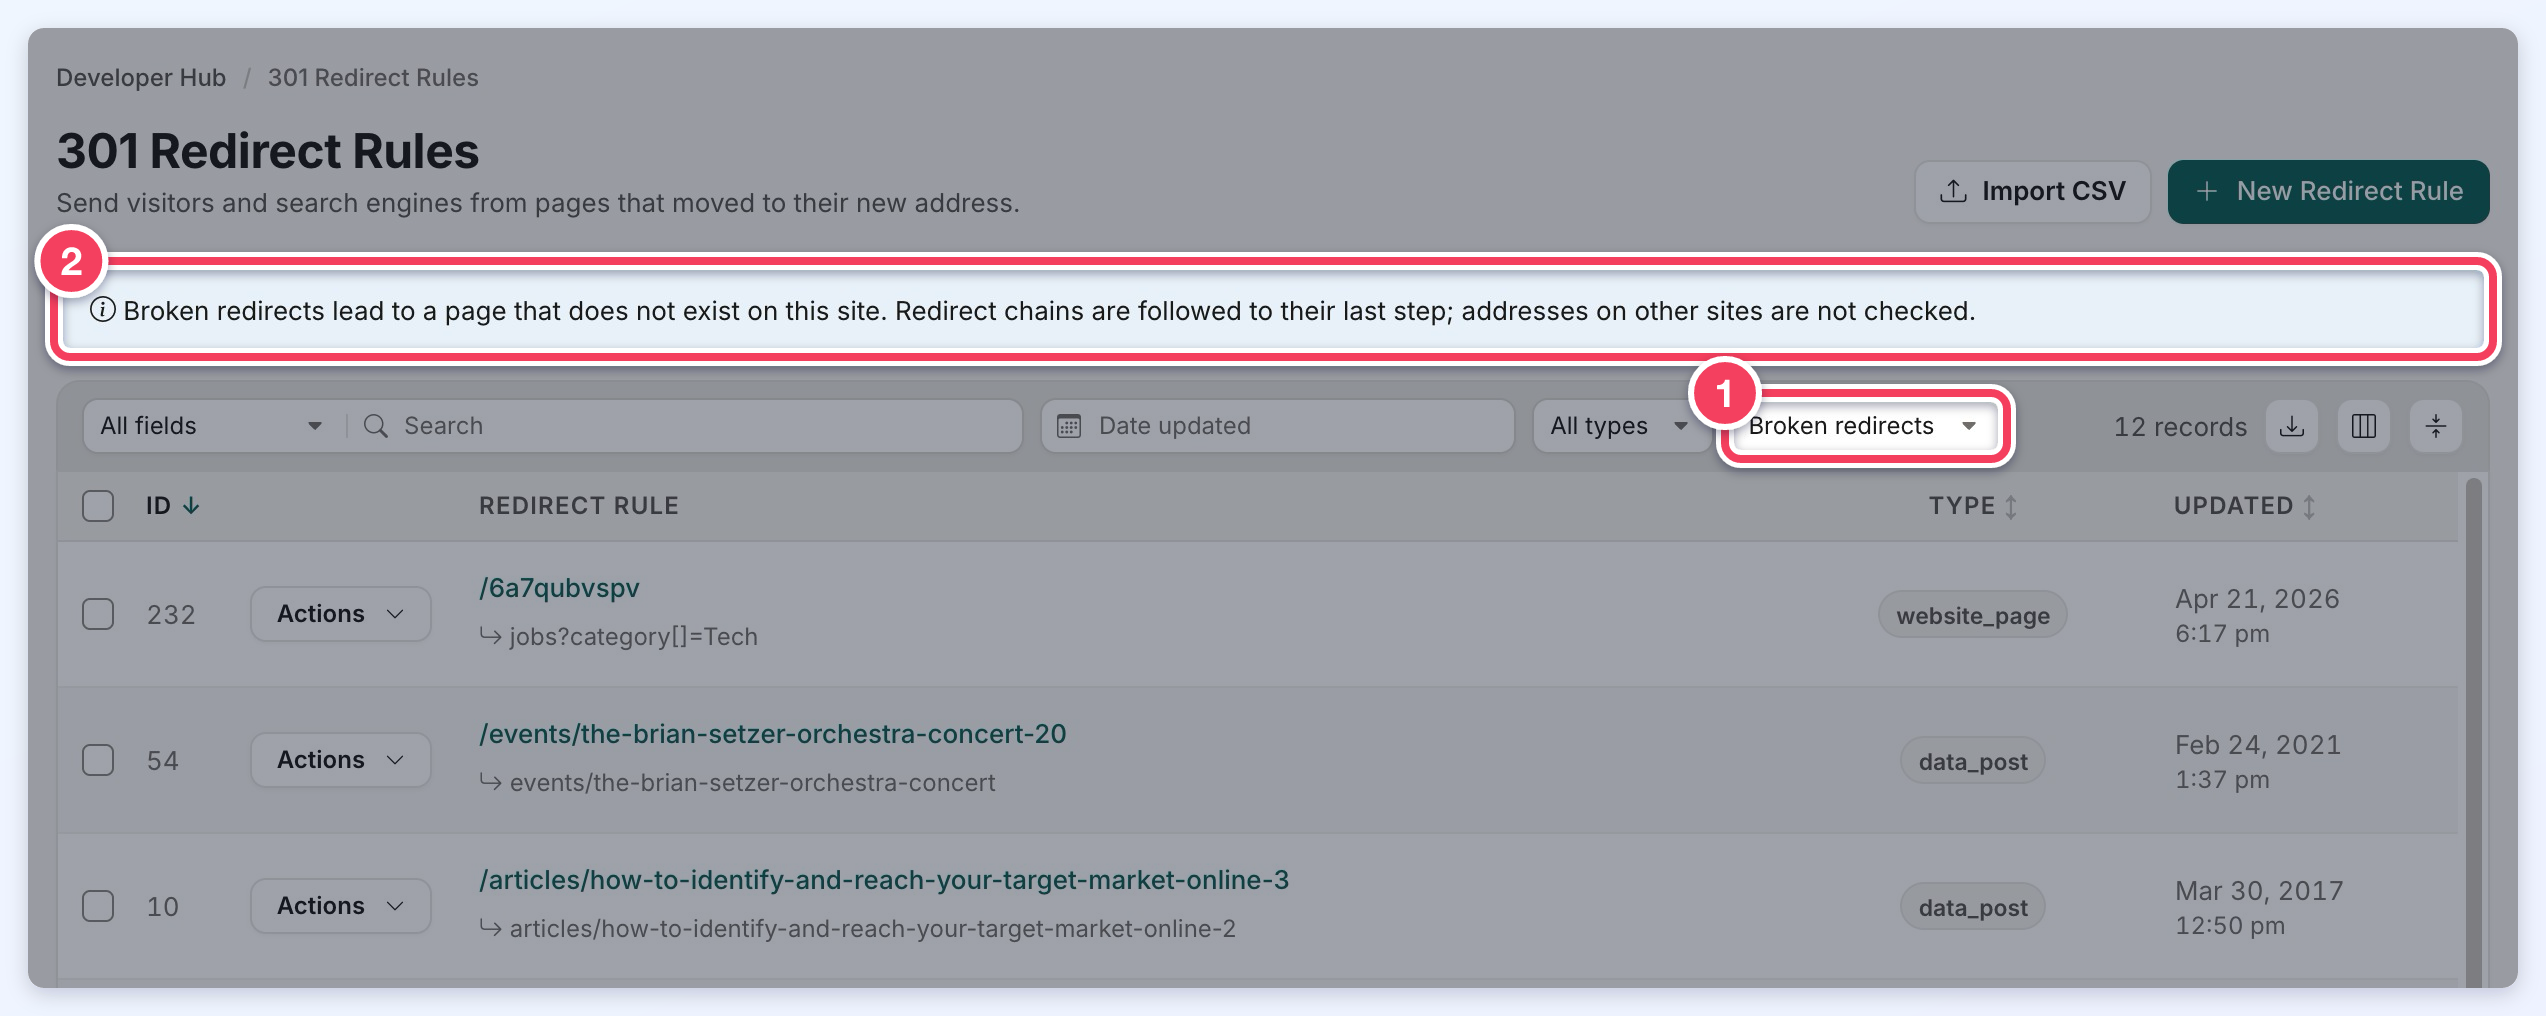
- The Broken redirects filter.
- The note explaining what counts as broken.
Review the list and either edit each broken redirect to point at a page that exists, or delete the redirects that are no longer needed. Typing in the search box switches the list back to All redirects.
Importing 301 Redirects
For bulk redirect creation, a CSV file listing Source URLs and their Destination URLs can be imported with Import CSV.
