
Account Dashboard » Update Profile
Link: https://support.brilliantdirectories.com/support/solutions/articles/12000109946
The Update Profile page in the Account Dashboard holds the contact details of the signed-in admin account: profile photo, name, job title, company, contact email and phone number, additional email addresses and phone numbers, email signature, and website and social profile links. The Brilliant Directories support and billing teams use these details to know who they are talking to and where to send replies.
The page edits only the account that is signed in. Other admins on a website update their own profiles from their own accounts.
Before Starting
- Sign in to the Account Dashboard.
- The Sign-in email cannot be changed from this page. Contact support to change it.
How to Open Update Profile
- In the Account Dashboard, click the admin name at the top right.
- Select Update Profile.
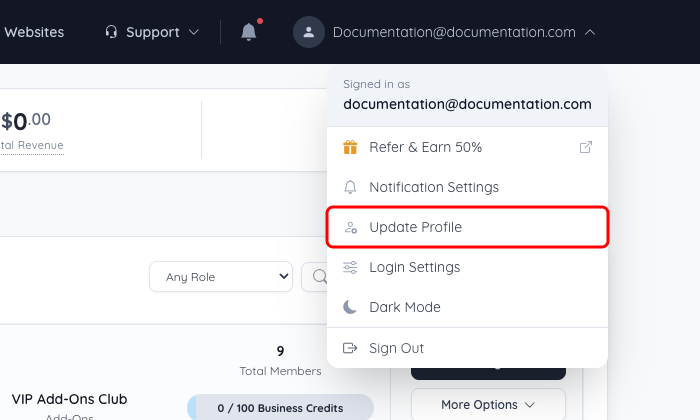
Update Profile is also listed in the Account menu on the left of every account page, together with Notification Settings, Login Settings, Verified Users and Change Password.
Profile Settings
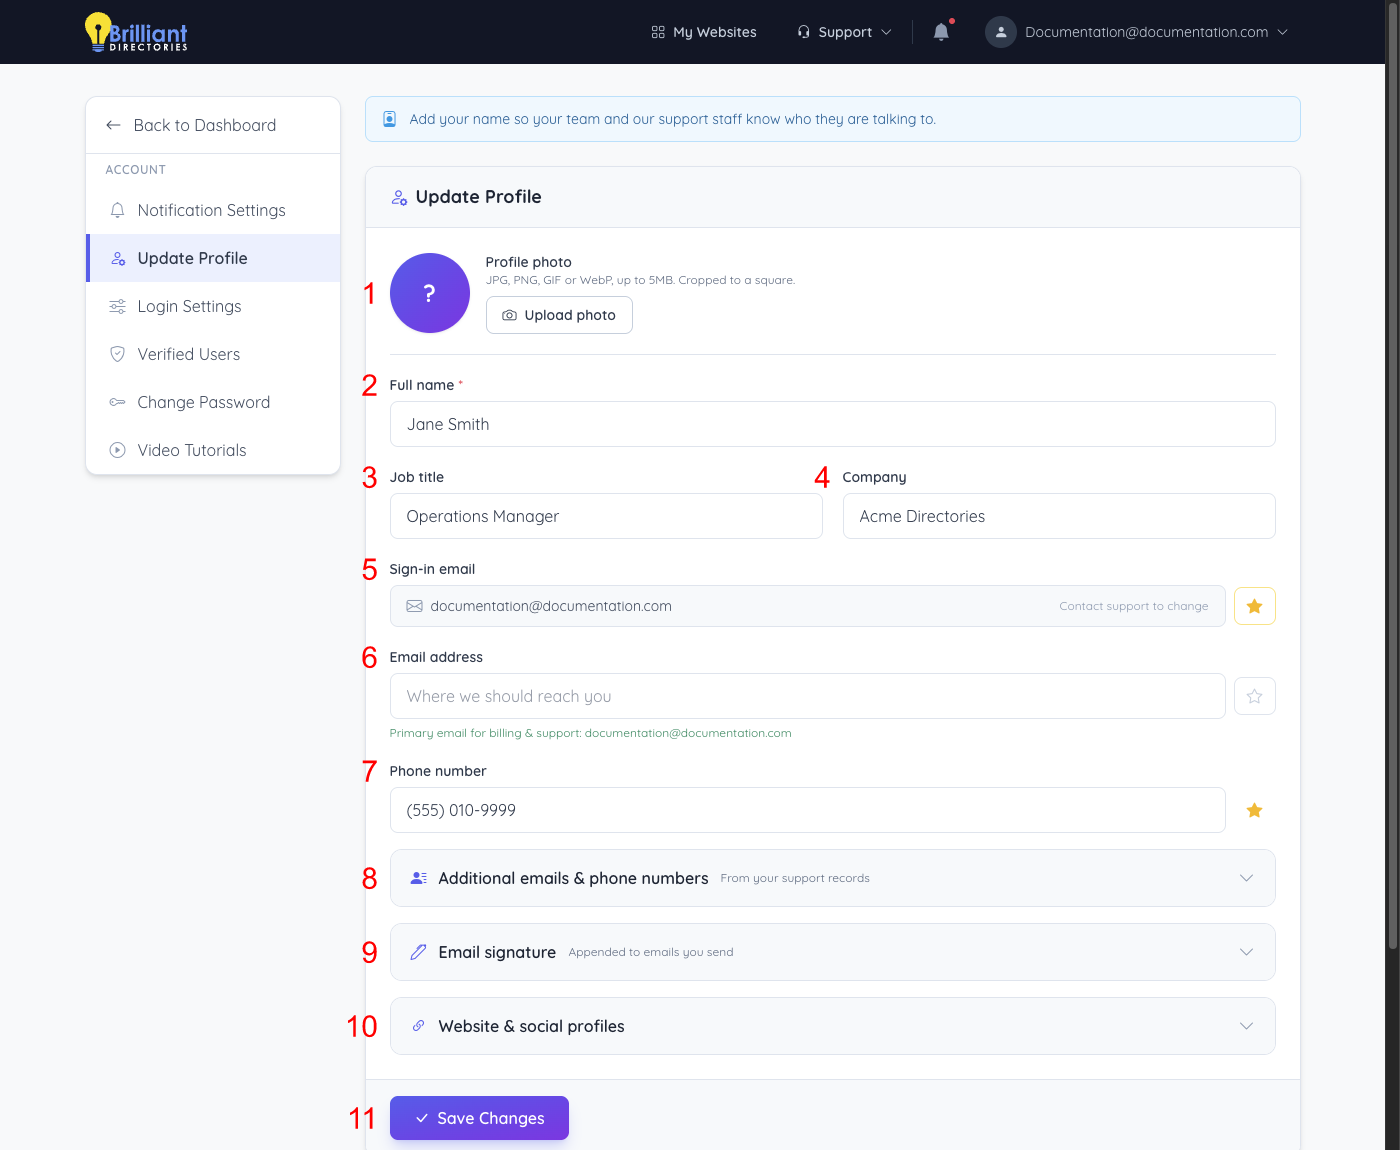
- Profile photo – Click Upload photo and choose a JPG, PNG, GIF or WebP image up to 5MB. The image is cropped to a square and saved as soon as it uploads. Once a photo is set, Change photo replaces it and Remove deletes it.
- Full name – Required. The name of the person who uses this admin account.
- Job title – Optional.
- Company – Optional.
- Sign-in email – The email address used to sign in. It is shown for reference only (Contact support to change).
- Email address – The address where Brilliant Directories should reach the admin. The star button next to an email address marks it as the primary email address for billing & support replies. The line under the field shows which address is currently the primary one.
- Phone number – The main contact phone number, marked with a star as the primary phone.
- Additional emails & phone numbers – Click to expand. The list loads from the account's support records. Click Add another address or Add another number to add one, click the star next to an entry to make it the primary one, or remove an entry with its remove button.
- Email signature – Click to expand. The signature is appended to emails sent from the account. Use the editor toolbar for formatting; text colour, size and alignment are not kept.
- Website & social profiles – Click to expand. Enter full addresses starting with http:// or https://.
- Save Changes – Saves every field except the photo, which saves on upload.
After Saving
The message Your profile has been saved. appears once the changes are stored.
When a different address is chosen as the primary email, the line under Email address adds pending review. The Brilliant Directories team reviews profile changes before applying them to the account's support records, so the new primary email, additional emails and photo reach support records after that review.
