
Settings » Domain Manager » Mailboxes and Email Routing
Link: https://support.brilliantdirectories.com/support/solutions/articles/12000109760
The Mailboxes tab in Settings > Domain Manager identifies where incoming email is delivered and provides the available mailbox controls. It is separate from the outgoing sender-authentication checks in Emails.
Before starting
Use a custom domain and confirm which provider should receive its email. The visible actions depend on the domain's DNS connection and whether local mailboxes are supported. Moving mail to another provider requires that provider's account, mailbox setup, and exact records. Back up messages before removing mailboxes or changing a mail-hosting arrangement.
Check the current mail provider
- Open Settings > Domain Manager > Mailboxes.
- Read Who handles your email.
- Review the provider and routing result before changing any mailbox.
MX records decide where new incoming mail goes. A locally listed mailbox does not prove that the domain currently delivers new mail to it. If the domain uses Google, Microsoft, Cloudflare Email Routing, or another provider, manage the active inboxes at that provider unless a deliberate migration is being performed.
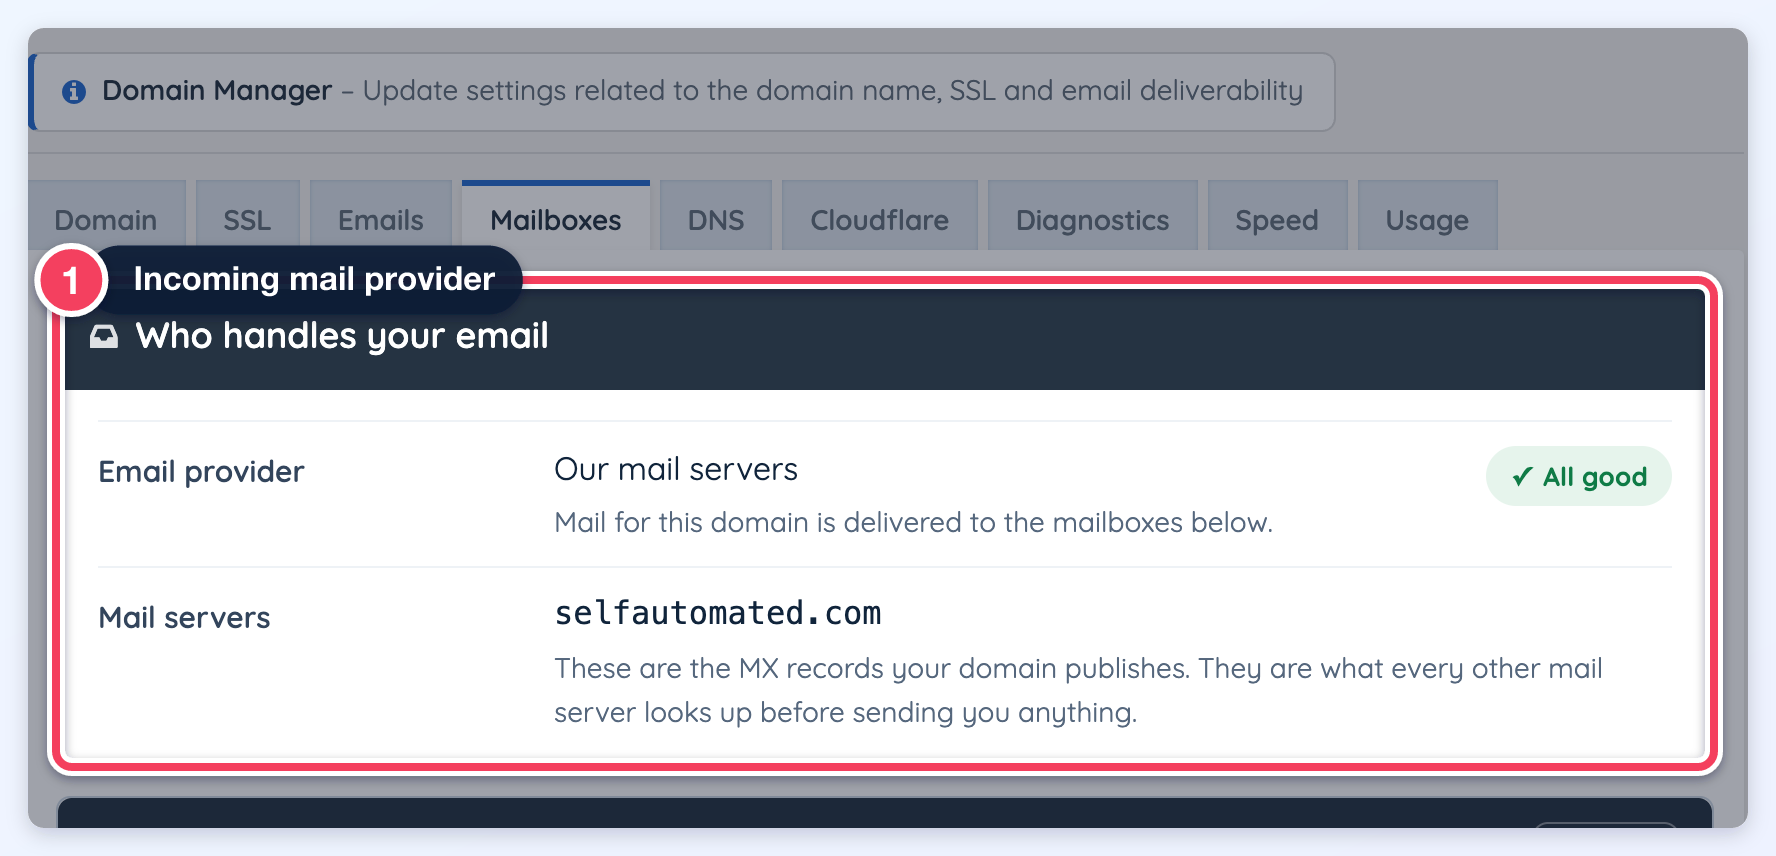
The example uses selfautomated.com with Brilliant Directories-hosted mail throughout. Who handles your email (1) reports where new mail for the domain is delivered.
Add and manage a local mailbox
- Find Mailboxes.
- Click Add a mailbox when offered.
- Enter the requested mailbox details and password.
- Set the storage limit.
- Save the mailbox.
- Click Refresh and confirm it appears.
Each mailbox displays space used and its limit, with Open webmail, Set up, and More buttons. Open webmail is described under Open a mailbox in webmail. Set up shows the connection settings and can email them with Email these instructions to. More holds Change the password, Change the storage limit, and Delete this mailbox. A limit of 0 means no individual mailbox limit; the website's hosting capacity still applies.
Use Set up for the exact connection settings for Outlook, Apple Mail, or a phone. Confirm the recipient before sending setup instructions.
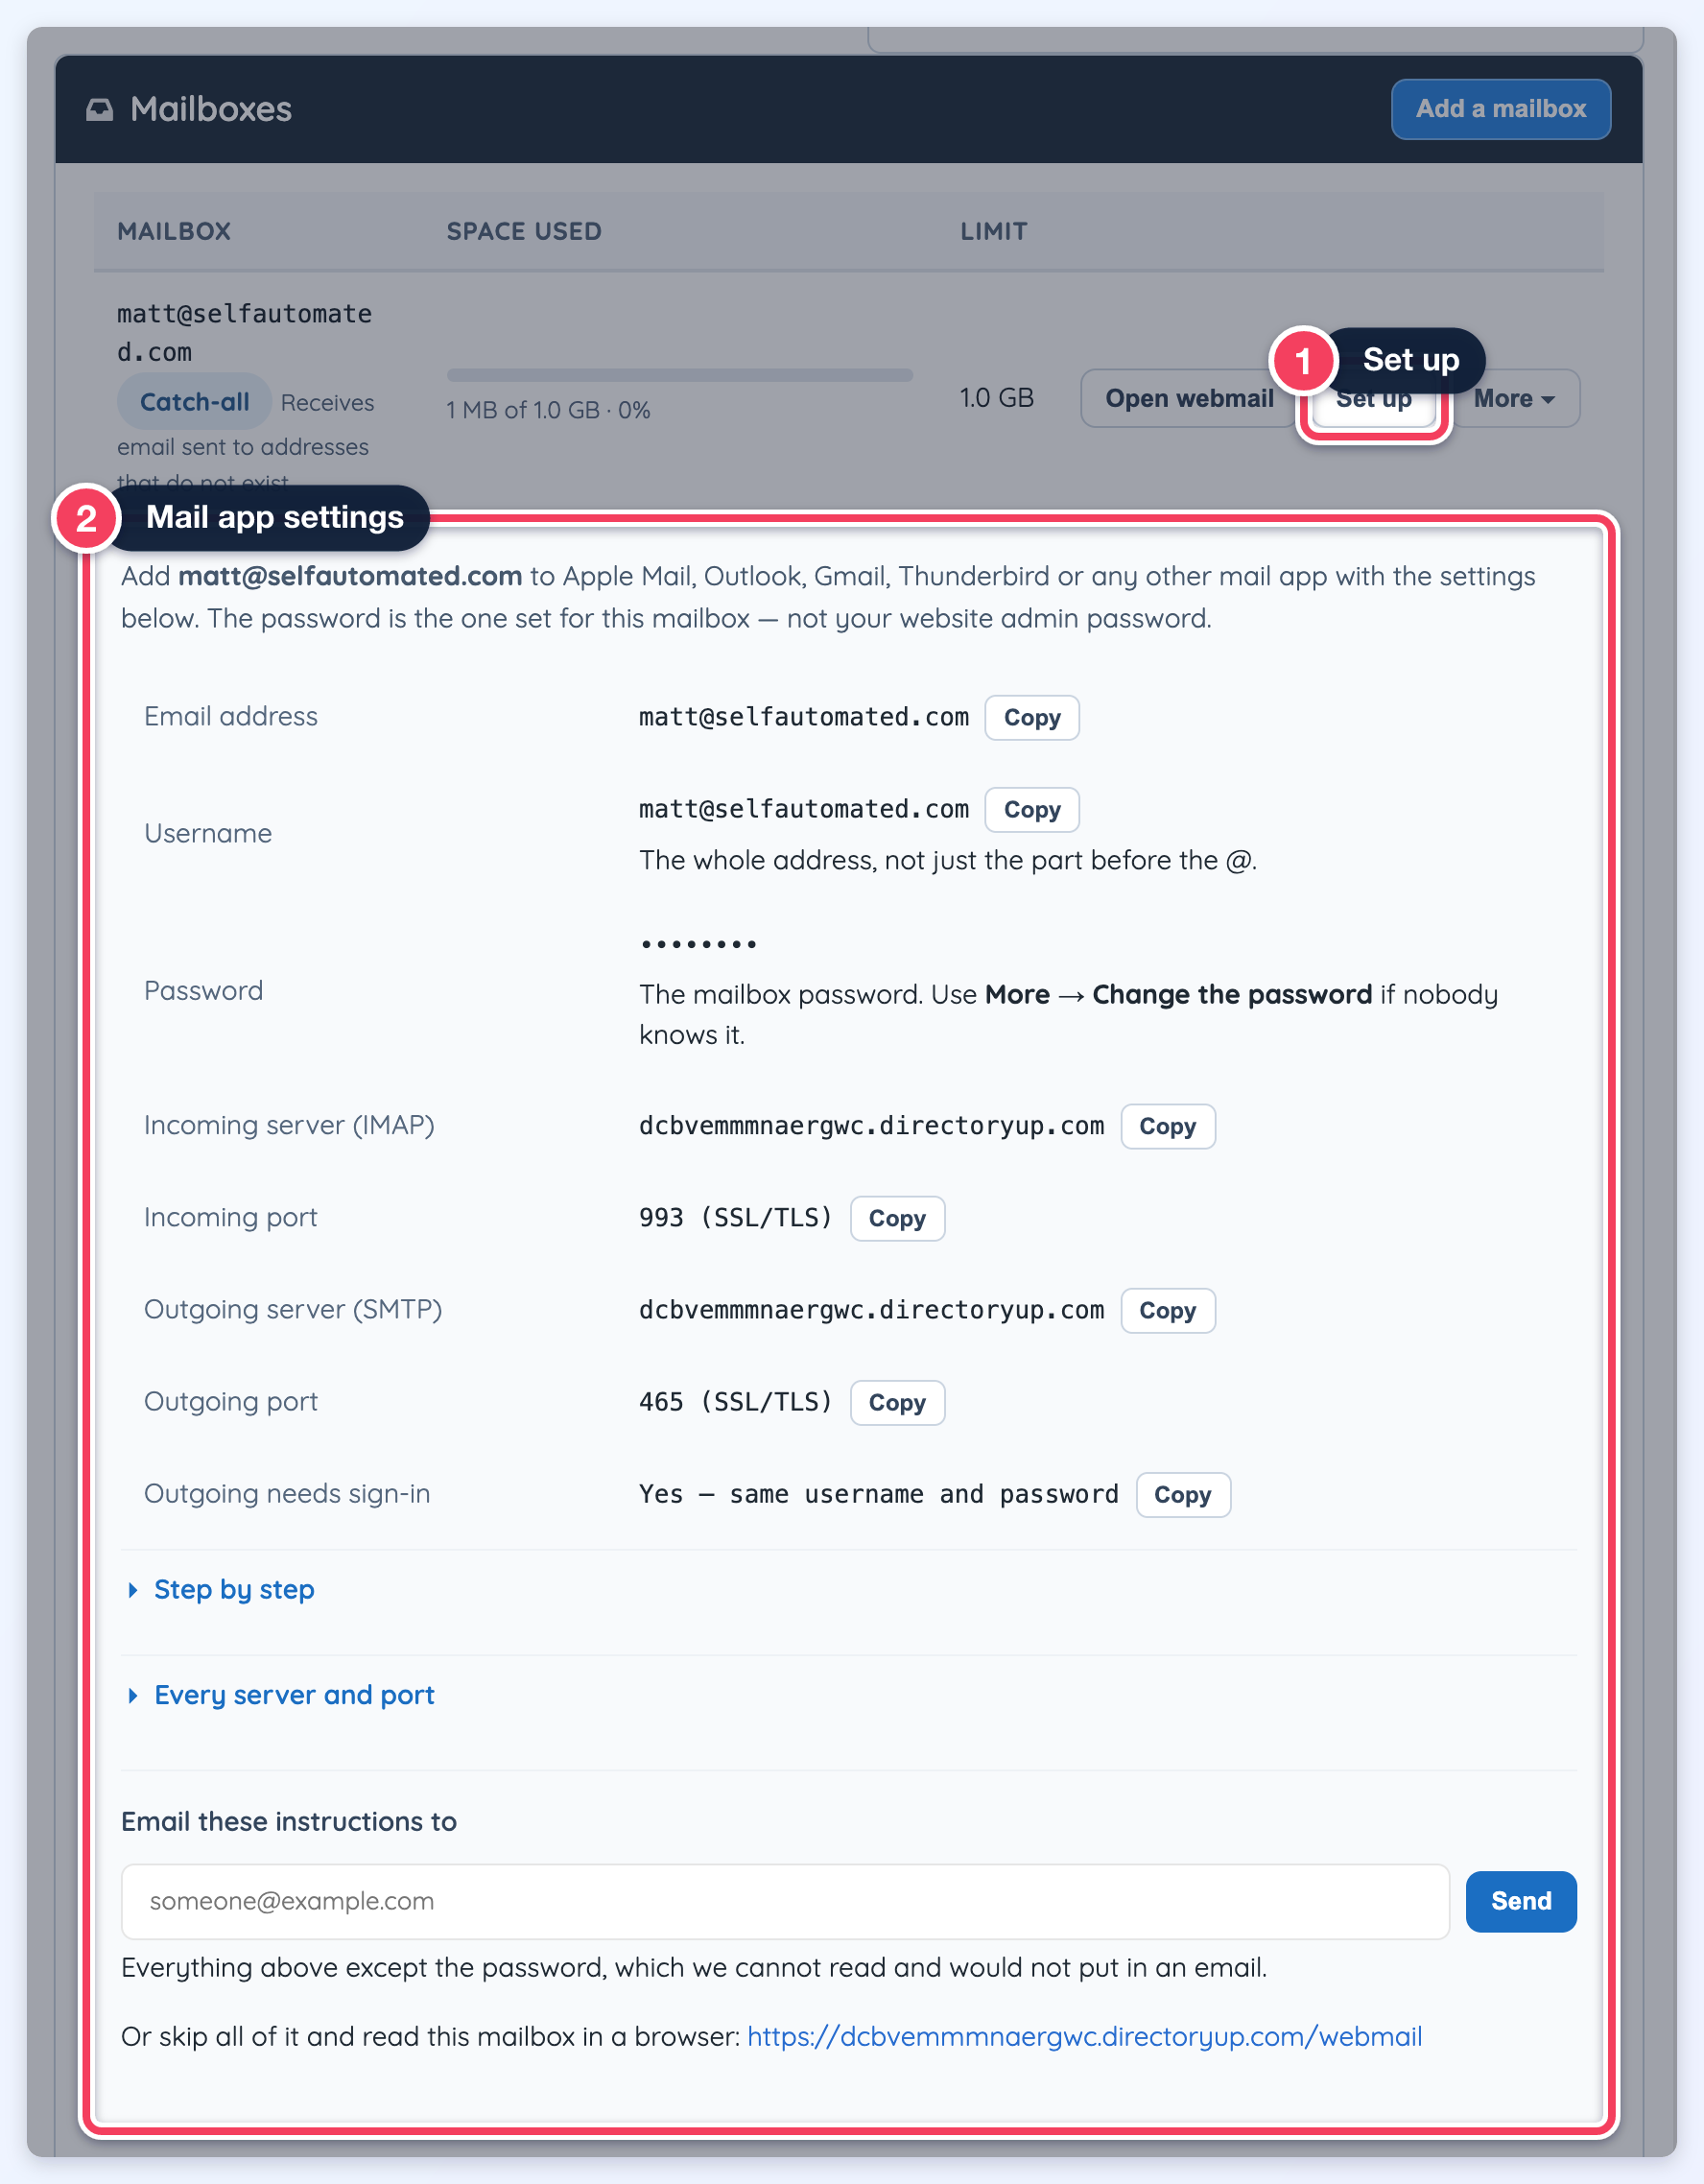
Set up (1) expands the connection settings (2) for the existing matt@selfautomated.com mailbox. It displays the exact connection settings without exposing the password.
Deletion requires confirmation of the full email address and cannot be undone from Domain Manager. Preserve any messages that must be kept first.
Open a mailbox in webmail
Open webmail opens the mailbox's inbox in a new browser window, already signed in, without the mailbox password. It works the same way as Check Email in cPanel.
- Find the mailbox under Mailboxes.
- Click Open webmail.
- Read and send mail in the new window.
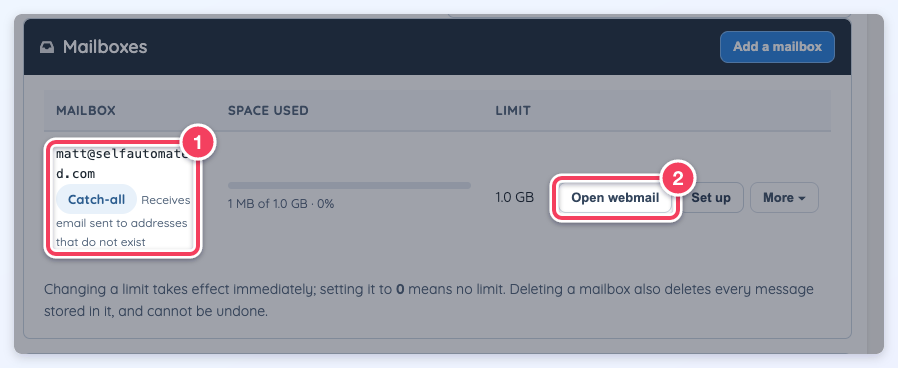
A mailbox row: the Catch-all label (1) marks the mailbox that receives mail sent to addresses that do not exist, and Open webmail (2) opens its inbox signed in.
- Signing in without the password is available to administrators whose role can open the website's cPanel. For other administrators, Open webmail opens the ordinary webmail sign-in page, which asks for the mailbox password.
- If the browser blocks the new window, a message asks to allow pop-ups for the page; allow them and click Open webmail again.
- If the mail server cannot sign in to the mailbox, the new window shows the webmail sign-in page instead, and a message explains that the mailbox password is needed there.
- Each signed-in opening is recorded in the website's notifications as Webmail opened for the mailbox. The sign-in itself is never placed in a link or the browser address.
A mailbox marked Catch-all receives email sent to addresses at the domain that do not exist; see Handle unrouted email. When that mail is kept in the account's own mailbox, that mailbox is listed too, as The account's own mailbox with the Catch-all label. It has no address at the domain and no usage figures (Not reported). For administrators whose role can open cPanel it offers only Open webmail, because webmail is the only way to read that mail; for other administrators it has no buttons.
Set the website's sending address
Email from your website controls the domain-based sending address offered by this panel. Use an address that is monitored and can receive replies, then recheck the outgoing authentication in Emails. This card appears when the domain has mailboxes on Brilliant Directories servers; otherwise, set the sending address under Emails with Your "from" address.
Also check Emails > Your mailboxes' signature (DKIM). Its Fix it action provides the signature record for mail sent from hosted mailboxes; this is separate from the website’s sender-authentication setup.
Handle unrouted email
Send all unrouted email for the following domain controls messages addressed to names without an existing mailbox. Choose one of three options, then click Save:
- Bounce it back rejects these messages. This is the safer choice, because a sender who mistypes an address finds out.
- Keep in the catch-all mailbox holds them in the account's own mailbox, which is then listed under Mailboxes with Open webmail.
- Send it to delivers them to the address entered below it. When that address is one of the domain's own mailboxes, it is marked Catch-all in the mailbox list.
When mail is currently kept in the account's own mailbox, the card says so (Right now it is kept in the catch-all mailbox, followed by its name). If no option is selected, Save asks for a choice instead of saving. Confirm the destination before saving so mail is not collected in an unintended inbox.
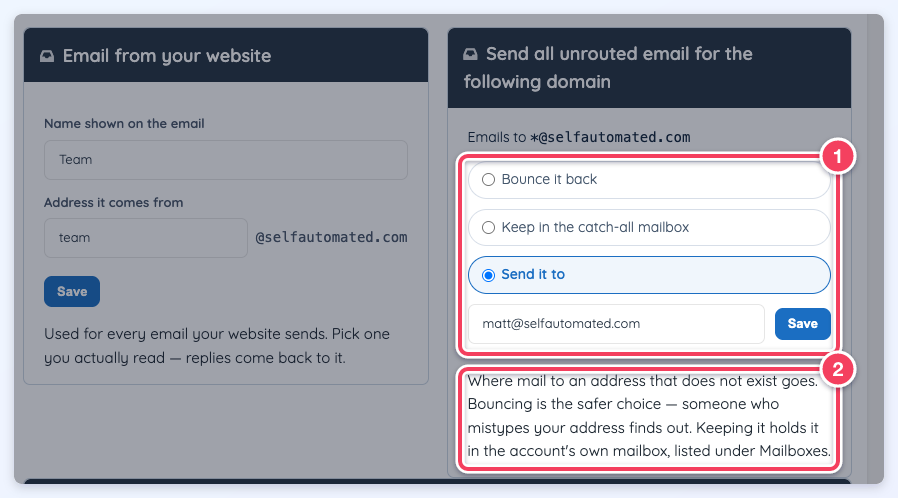
Send all unrouted email offers Bounce it back, Keep in the catch-all mailbox, and Send it to (1); the note below explains each choice (2). Here, mail to addresses that do not exist goes to matt@selfautomated.com.
Change the incoming email provider
- Prepare the destination provider's account and mailboxes.
- Open the DNS tab and keep a copy of the domain's current MX, SPF (TXT), and autodiscover records.
- Open Change your email provider.
- Click Change.
- Select Our mail servers, Google Workspace, Microsoft 365, or Somewhere else.
- Enter or review the required provider values.
- Click Point my email here.
- Read the confirmation before approving the MX change.
- Refresh the provider result.
- Open the DNS tab and confirm the result: only the new provider's MX records remain, and the SPF and autodiscover records are still present. Remove any MX record left from the previous provider, and restore any missing record from the copy.
- Test incoming email at the destination.
The automated change can leave an MX record from the previous provider in place or remove the domain's SPF or autodiscover record. A leftover MX record can keep sending some incoming mail to the old provider, and a missing SPF record can send the website's email to spam. Compare the records with the copy taken before the change.
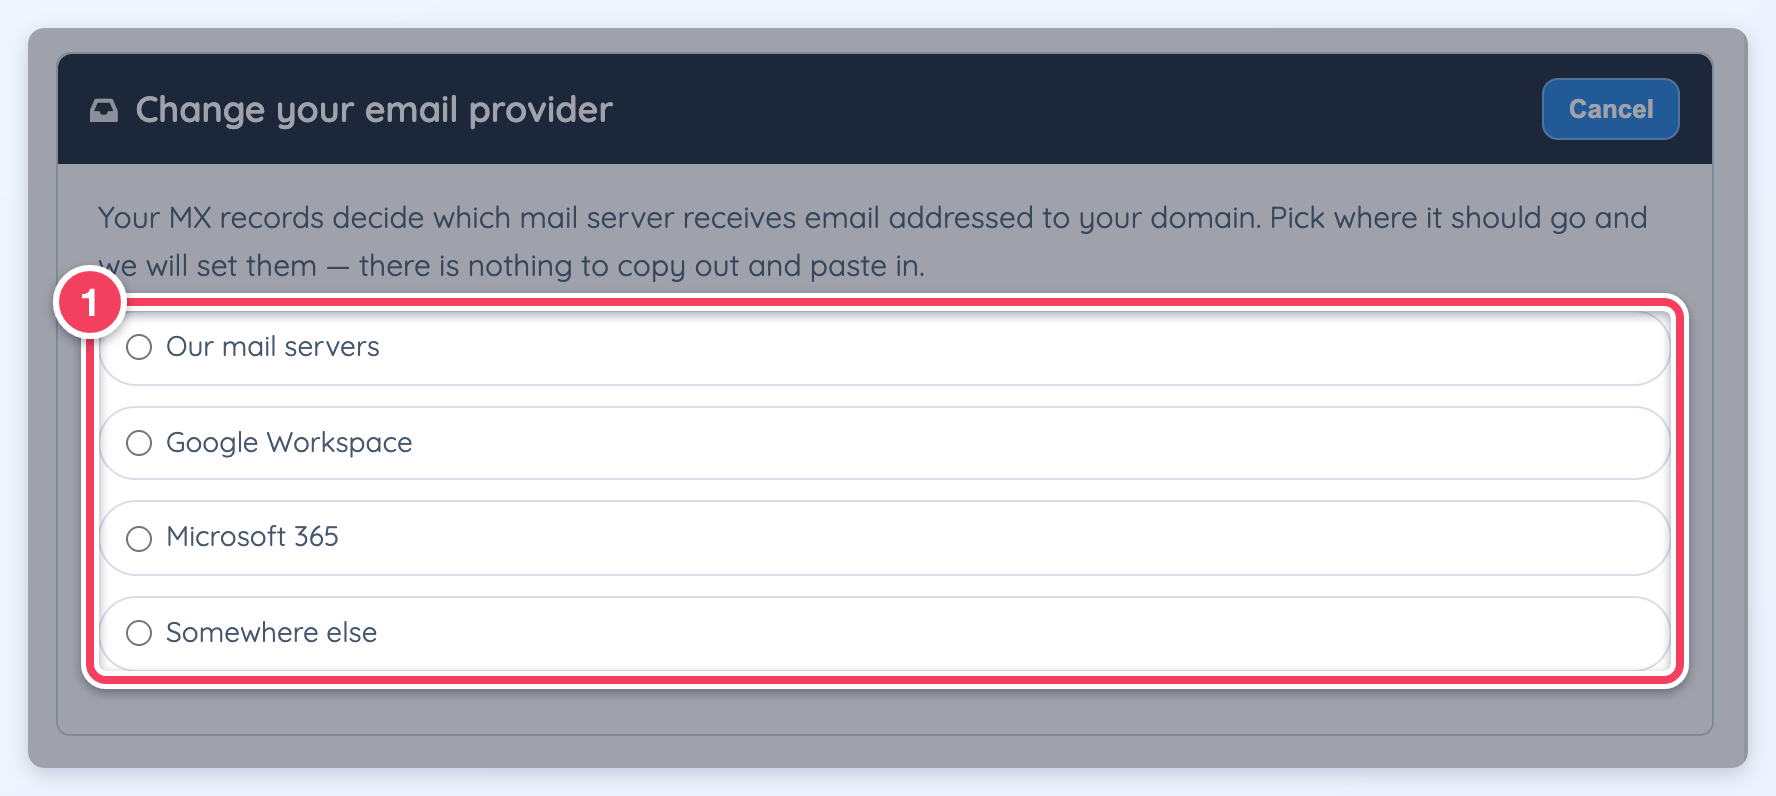
After Change is clicked, Change your email provider offers four choices (1): Our mail servers, Google Workspace, Microsoft 365, and Somewhere else. Cancel closes it without changes.
The automated action replaces the existing MX records where the panel has the required DNS access. For externally hosted DNS without that access, update the records at the DNS provider. Use the destination provider's exact hostname rather than a generic example. This changes delivery routing; it does not migrate stored messages or create a paid account at the destination provider.
If the panel identifies a mismatch between local mail delivery and server routing, it may offer Deliver my mail here. Use that only when the local server is the intended mail destination.
The reverse case, where the domain's mail goes to another provider but this server still keeps mail for the domain, shows This server still delivers your mail to itself with a Send my mail to button for that provider. If an old Brilliant Directories MX record outranks the provider's records, the panel removes it where it manages the DNS, or explains how to remove it at the DNS provider.
Completion means new mail reaches the intended provider, outgoing website mail passes authentication, and mailbox applications can connect with the displayed settings.
