
Post Images: Importing Posts With Photos
Link: https://support.brilliantdirectories.com/support/solutions/articles/12000093407
Importing posts can be a bit of a tricky process due to the fact that all of the data entered must be simple, clean text (no formatting, line breaks, or other things that can break a CSV file), and the data must all be in the proper columns in order to import properly. This includes the links for the images that will be uploaded with the file, in the post_image column (1).
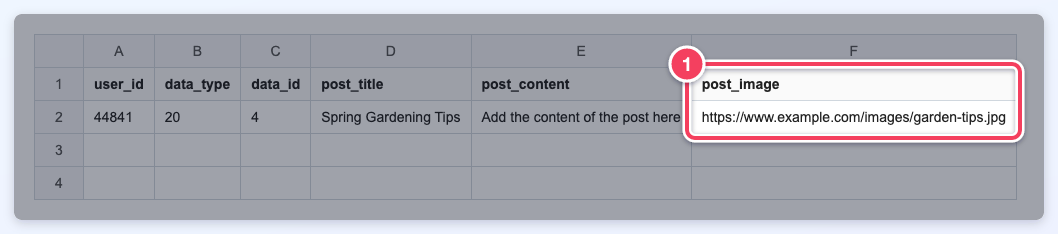
More information on how to import posts and example import files can be found in the article below:
>> How To Import Posts Via CSV File
These post images can be uploaded to the Media Manager in order to guarantee a successful upload. For in-depth information about the Media Manager check out this link: >> Media Manager Folder <<
Once the images are uploaded to My Content » Media Manager, right-click an image (2) to copy its URL, as the PRO TIP (1) explains:
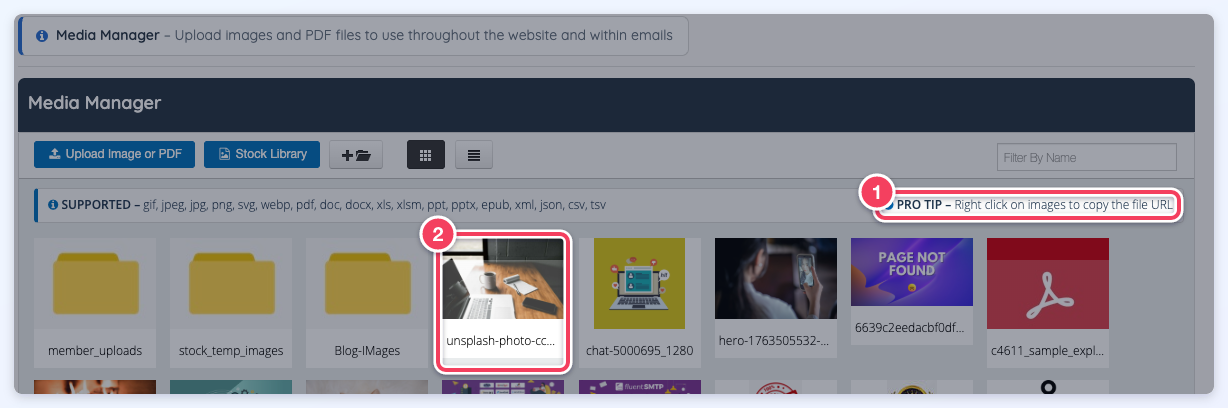
NOTE: The images can also be hosted on external platforms, however, this tool is meant to help in migrating a site from one platform to another, not to copy images from a 3rd party source without their consent. It is possible to import images that are hosted elsewhere, but they must comply with the following:
- The image URL must also have a compatible extension: jpg, jpeg, png, gif, webp.
- The image must be publicly accessible (the host cannot block the image importer).
The Import Posts via CSV File Upload page has an Advanced Option, Auto Import the posts image base on "Post Image" during import (1), that automatically downloads and imports the images when it is selected:
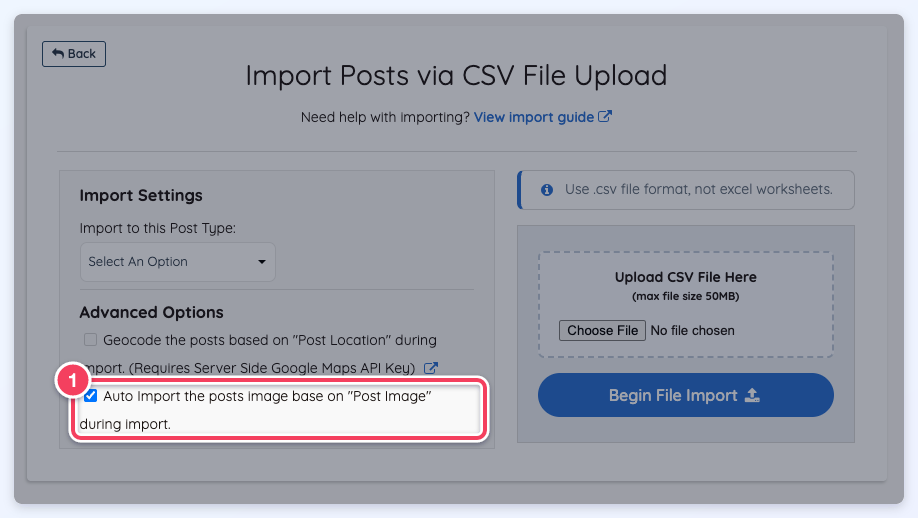
However, if this option was not selected, or if any images are left unimported, follow these steps to import the images of the posts that were just imported:
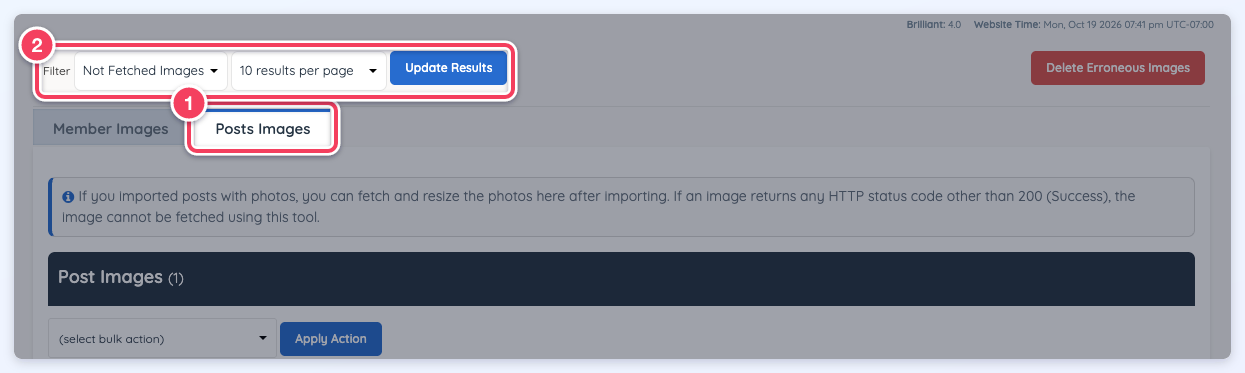
- Navigate to My Members » Member Images and open the Posts Images tab (1).
Important Note: This tab will only display if the system identifies recently imported images through the member or post-import template. - Choose how many posts to show per page in the dropdown next to the Filter, then click Update Results (2). Importing and resizing photos is an extremely resource-intensive activity for a server, so 500 images is the maximum that can be imported or resized at a time.
- Select the posts (or use Check All), choose Fetch from Source and Resize Photos in the bulk action dropdown, and click Apply Action. A single photo can also be fetched with its own Fetch and Resize button.
- Do not close the window or navigate away from the page while the images are processed.
- Repeat the steps above for each page until all images have been fetched and resized.
If an Image Fails to Import
An image can only be fetched when its URL answers with HTTP status 200 (Success). When the picture cannot be downloaded (EG the URL returns a 404 error or the host blocks the importer), the photo stays on the post as an empty photo. On the Posts Images tab it shows a red error icon (2) in place of the source image, with its Fetch and Resize and Delete buttons (1):
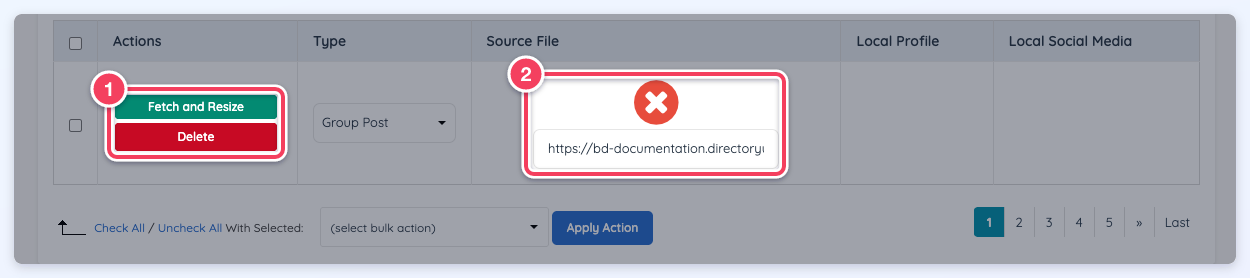
Once the image URL is publicly accessible, click Fetch and Resize to try the download again, or remove the empty photo in one of two ways:
- Click Delete on that row of the Posts Images tab.
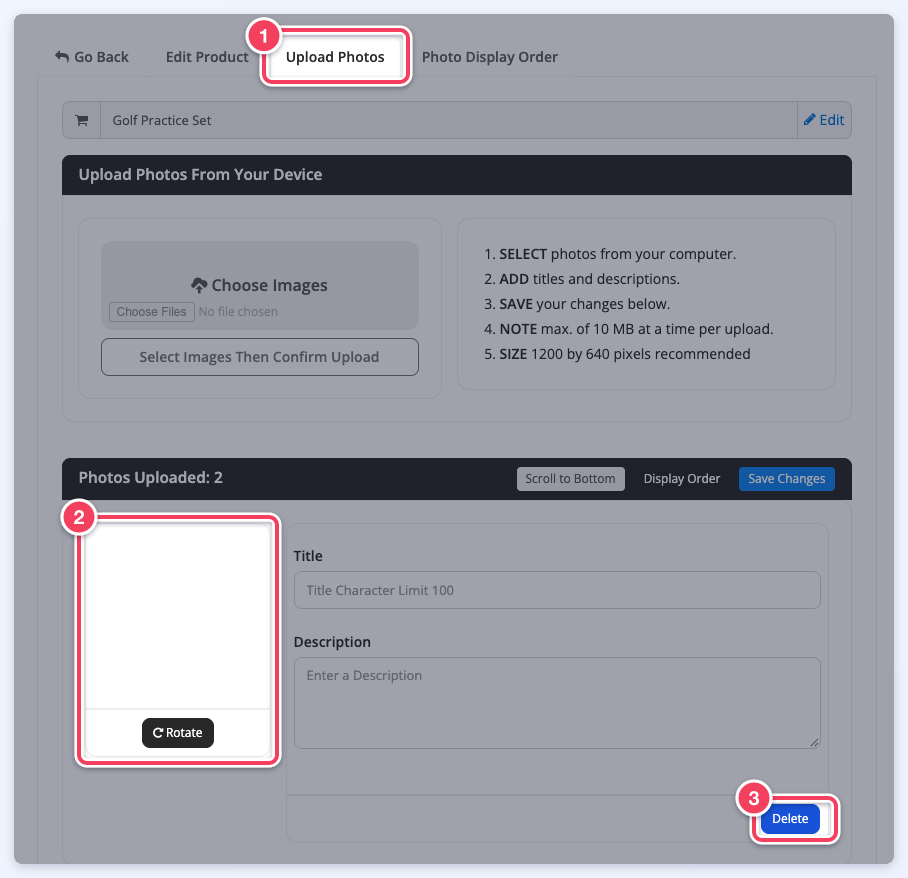
- Or go to My Content » Manage Posts, click Edit Post on the post, and open its Upload Photos tab (1). The empty photo shows as a blank tile (2). Click its Delete button (3), then Yes, delete it! to confirm.
Difference for Importing Images for Single Image and Multi-Image Posts
In the platform, there are two general types of post formats:
- Single Image Posts — EG Articles, Blogs, Job Listings
- Multi-Image Posts — EG Classifieds, Properties, Products
When importing either type, use the same CSV variable: post_image.
For Single Image Posts
Simply include one image URL per post (one per row).
For Multi-Image Posts
Include multiple image URLs, separated by commas, within the same post_image field (1).
Example: https://brilliantdirectories.com/img1.jpg,https://brilliantdirectories.com/img2.jpg,https://brilliantdirectories.com/img3.jpg
Optional: Image Title & Description
These are optional and can be added to enrich the post content. Provide a title and description for the image(s) using the following CSV variables (2):
- post_image_title
- post_image_description
Include multiple titles and descriptions, separated by commas, in the same order as the image URLs:

On the post's page, each photo then shows its title and description (1):
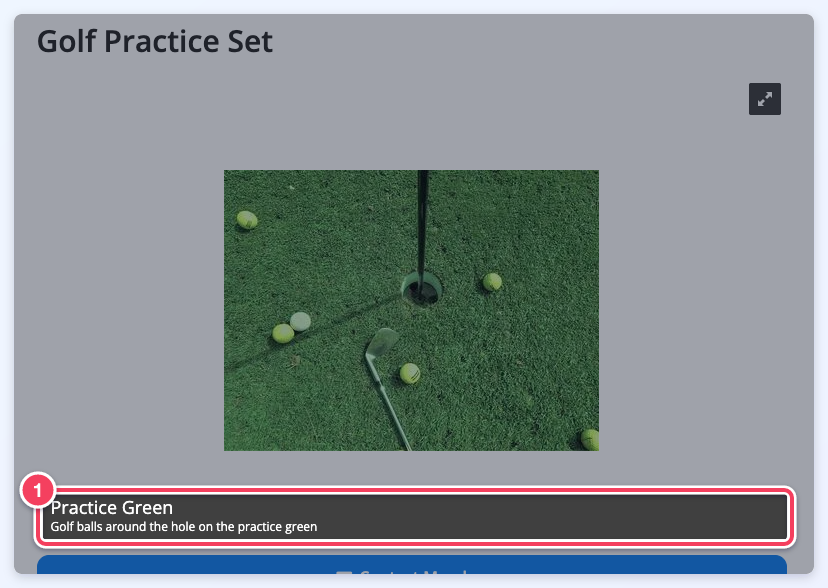
Photo Album Import Example CSV
Download: Example CSV file for a photo album import
To use this file, ensure that the user_id value is updated to match the member associated with the import.
