Developer Hub » Generate and Manage API Keys
Link: https://support.brilliantdirectories.com/support/solutions/articles/12000088768
This article explains how to generate and manage API keys for authenticating requests to the Brilliant Directories API.
The API allows external applications to communicate securely with a Brilliant Directories website by sending requests to supported API endpoints. Each request must include a valid API key to authenticate the connection.
Important Notes
- The API currently supports creating, retrieving, updating, and deleting member records.
- Creating a member requires, at a minimum, an email address, a password (minimum of six characters), and a valid
subscription_id(Membership Plan ID). - When a member is created through the API, the assigned Membership Plan settings are applied automatically, including any pre-selected top-level category and listing type, unless those values are overridden in the request.
- The website's member limit is enforced for API requests, including sites using the 100,000 Member Boost.
- If the
allow_duplicate_member_emailsAdvanced Setting is disabled, duplicate member email addresses cannot be created through the API. - API requests are limited to 100 requests per minute.
How to Access the Tool
- Go to Developer Hub.
- On the Manage API Keys card, click Manage API Keys.
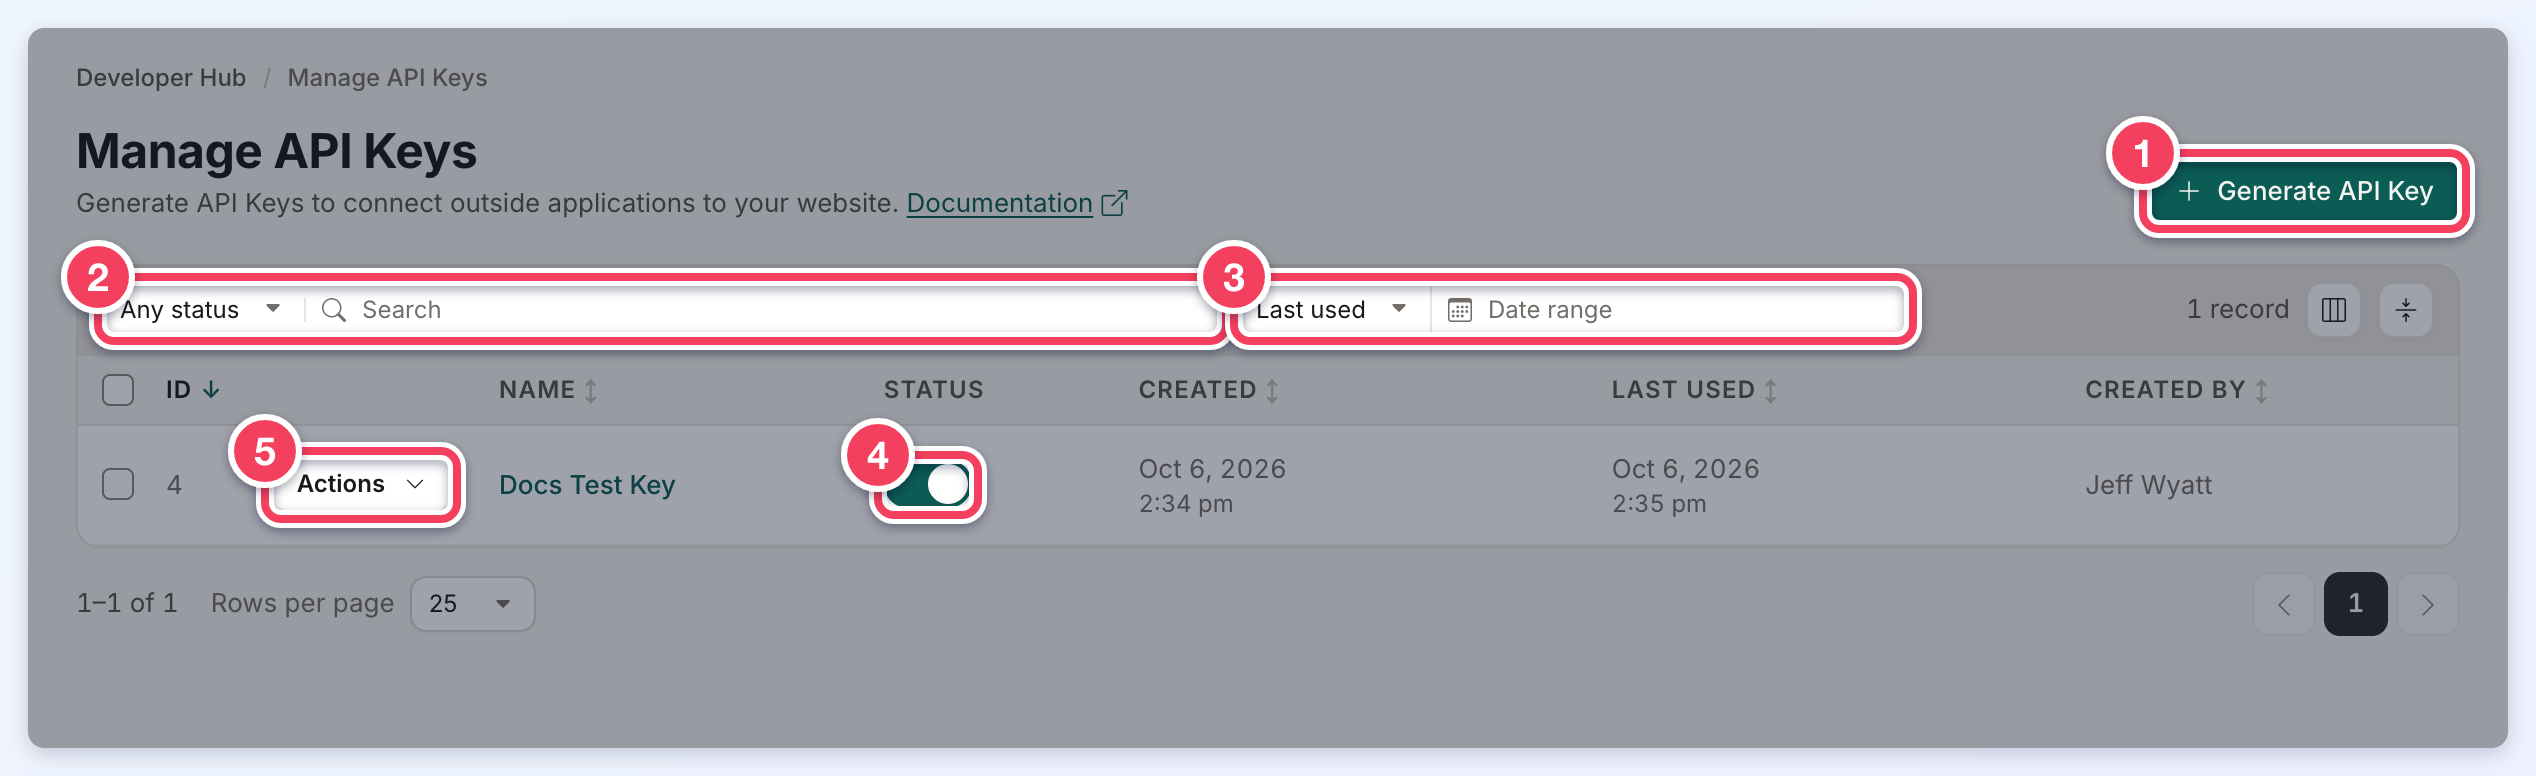
- Generate API Key: creates a new key.
- Any status and Search: show only enabled or disabled keys, and find keys by name or ID.
- Last used / Created and Date range: show only keys last used, or created, within a date range.
- The Status switch enables or disables the key (see below).
- Actions: Permissions, View Logs and Delete API Key.
The table also shows when each key was created, when it was last used, and which admin created it. Clicking a row opens that key's Permissions.
Generate an API Key
- Click Generate API Key.
- Enter an API Key nickname that describes what the key is for.
- Click Generate API Key. The Save Your API Key window shows the new key.
- Copy the key with the copy button and store it in a secure location. It cannot be viewed again after the window is closed.
- Click Configure Permissions to choose what the key can access straight away, or Done to close the window.
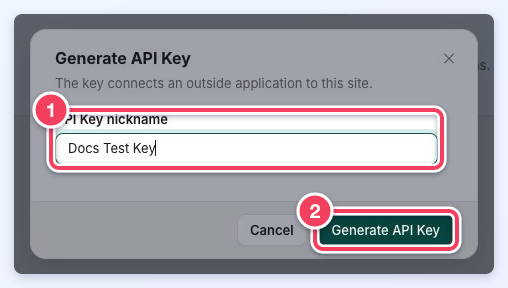
- API Key nickname: required.
- Generate API Key creates the key.
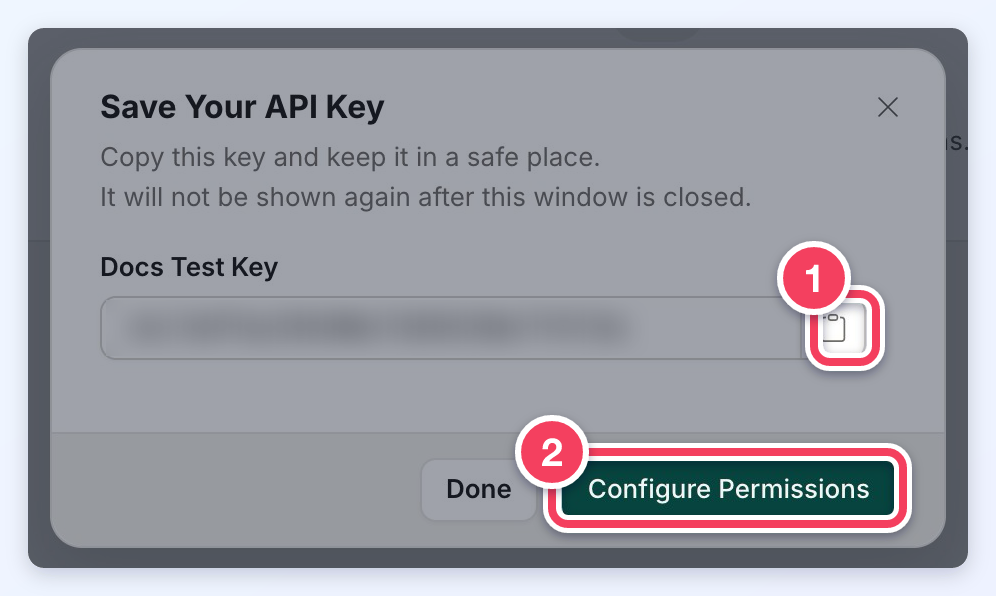
- The copy button copies the whole key. The key is blurred in this example.
- Configure Permissions opens the new key's permissions.
After generating the API key, refer to Zapier API Actions: Create New User (Google Sheets Example) or API Reference - Getting Started for examples of connecting an external application.
Configure API Key Permissions
Each API key can be configured with specific permissions to control which endpoints it can access. Open them from the key's Actions menu with Permissions, or by clicking the key's row.
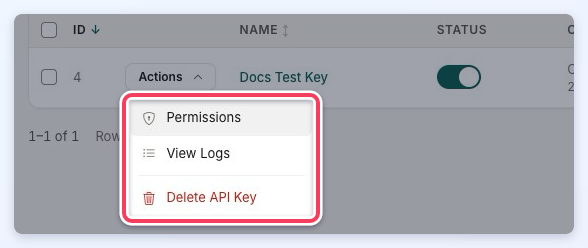
The Permissions window groups the endpoints into three tabs:
- Standard Endpoints
- Advanced Endpoints
- Sensitive Data
Default permissions follow least privilege. A newly created API key starts with all Standard Endpoints enabled and all Advanced Endpoints disabled. A key that has never had permissions explicitly saved (including keys created before the permissions system existed) is treated the same way: Standard Endpoints are allowed and Advanced Endpoints are denied until an admin explicitly enables them. Keys with explicitly saved permissions are unaffected by these defaults.
The Standard Endpoints tab covers the core resources: Album Photos, Authentication, Leads, Multi Image Posts, Post Types, Single Image Posts, Unsubscribed, Users, Users Clicked Link, Users Reviews and Widgets. Everything else (EG Admin Roles, API Keys, Email Templates, Forms, Webhooks and other administrative resources) is on the Advanced Endpoints tab and requires explicit opt-in per key.
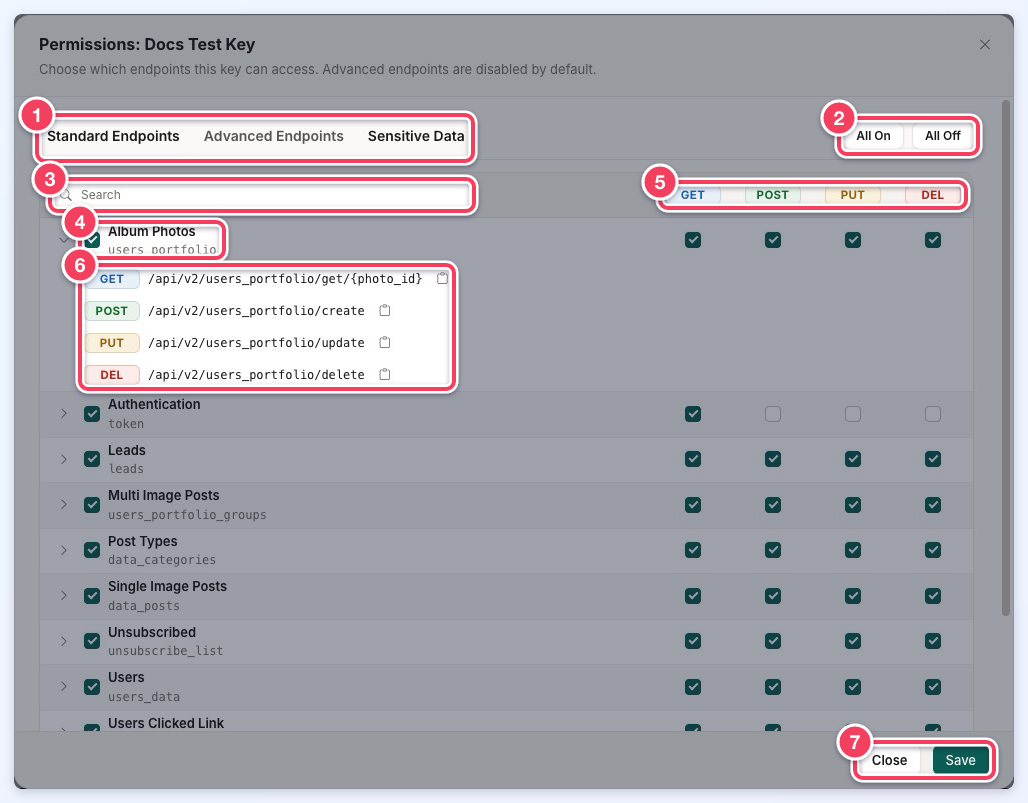
- The three tabs.
- All On and All Off: switch every endpoint on the open tab on or off.
- Search: finds a resource by its name or endpoint.
- One checkbox per resource (with its database table beneath the name) turns all of that resource's endpoints on or off. A partly filled checkbox means only some are on.
- The GET, POST, PUT and DEL columns turn one kind of request on or off for a resource. Clicking a column heading toggles that column for every resource on the tab.
- The arrow beside a resource expands it to show each endpoint address, with a button to copy its full URL.
- Close and Save.
Sensitive Data permissions (EG returning a member's login token) are always off by default. The Sensitive Data tab carries a warning that these features expose credentials and security secrets; turn one on only when the integration needs it.
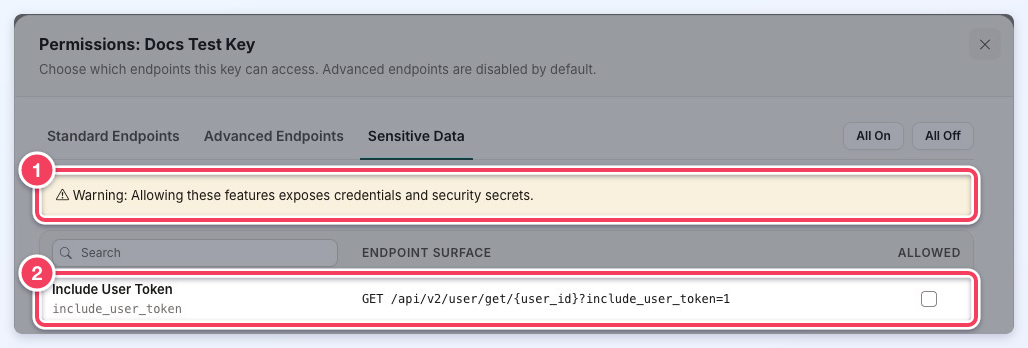
- The warning shown on the Sensitive Data tab.
- Include User Token: allows GET /api/v2/user/get/{user_id}?include_user_token=1 to return the member's login token.
Enable only the permissions required for the intended integration, then click Save. Closing the window with unsaved changes asks before discarding them.
Disable or Delete an API Key
API keys are enabled when created. To temporarily stop an API key from working, turn off its Status switch; the change takes effect at once. To disable or enable several keys together, tick their checkboxes and choose Enable or Disable from Select Action in the bar above the table, then click Apply.
If an API key is no longer needed, choose Delete API Key from its Actions menu and confirm. The key and its permissions are deleted, and this cannot be undone. Several keys can be deleted together with Delete in the same bulk action bar.
Viewing the API Key Log
The API Key Log records every request made using an API key, making it easier to review activity and troubleshoot API requests. To open it, choose View Logs from the key's Actions menu.
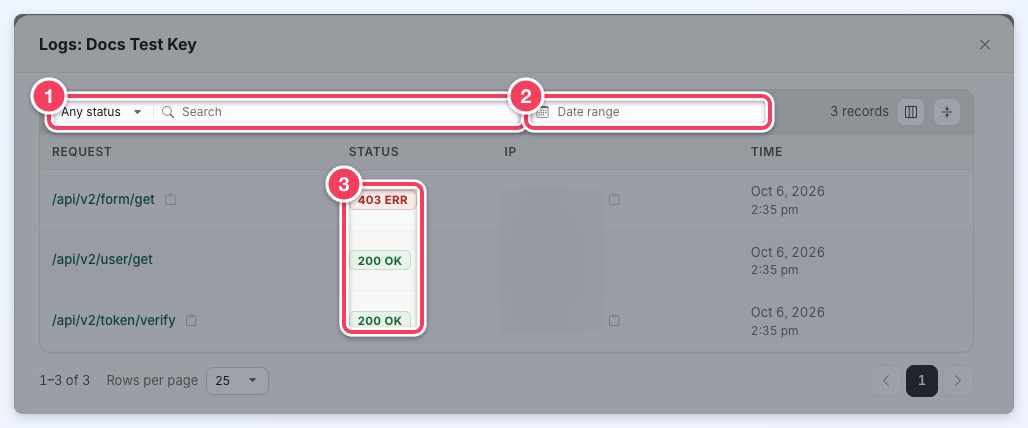
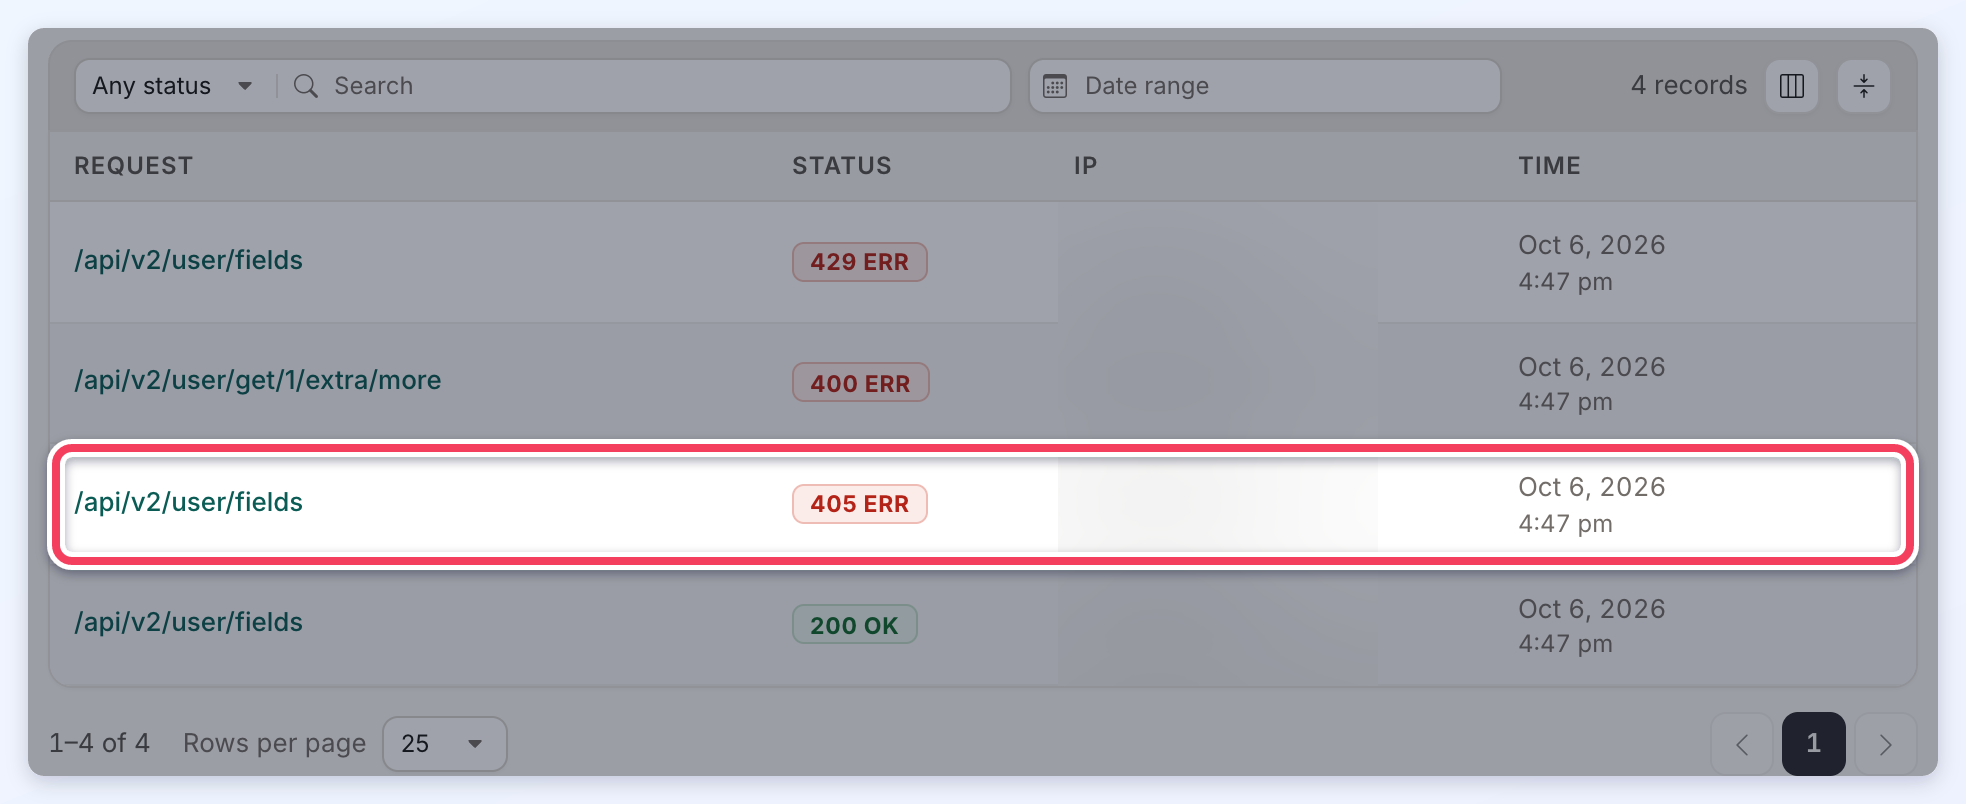
- Any status (or OK / Error) and Search: show only successful or failed requests, and find requests by text.
- Date range: show only requests made on one day or within a range of days.
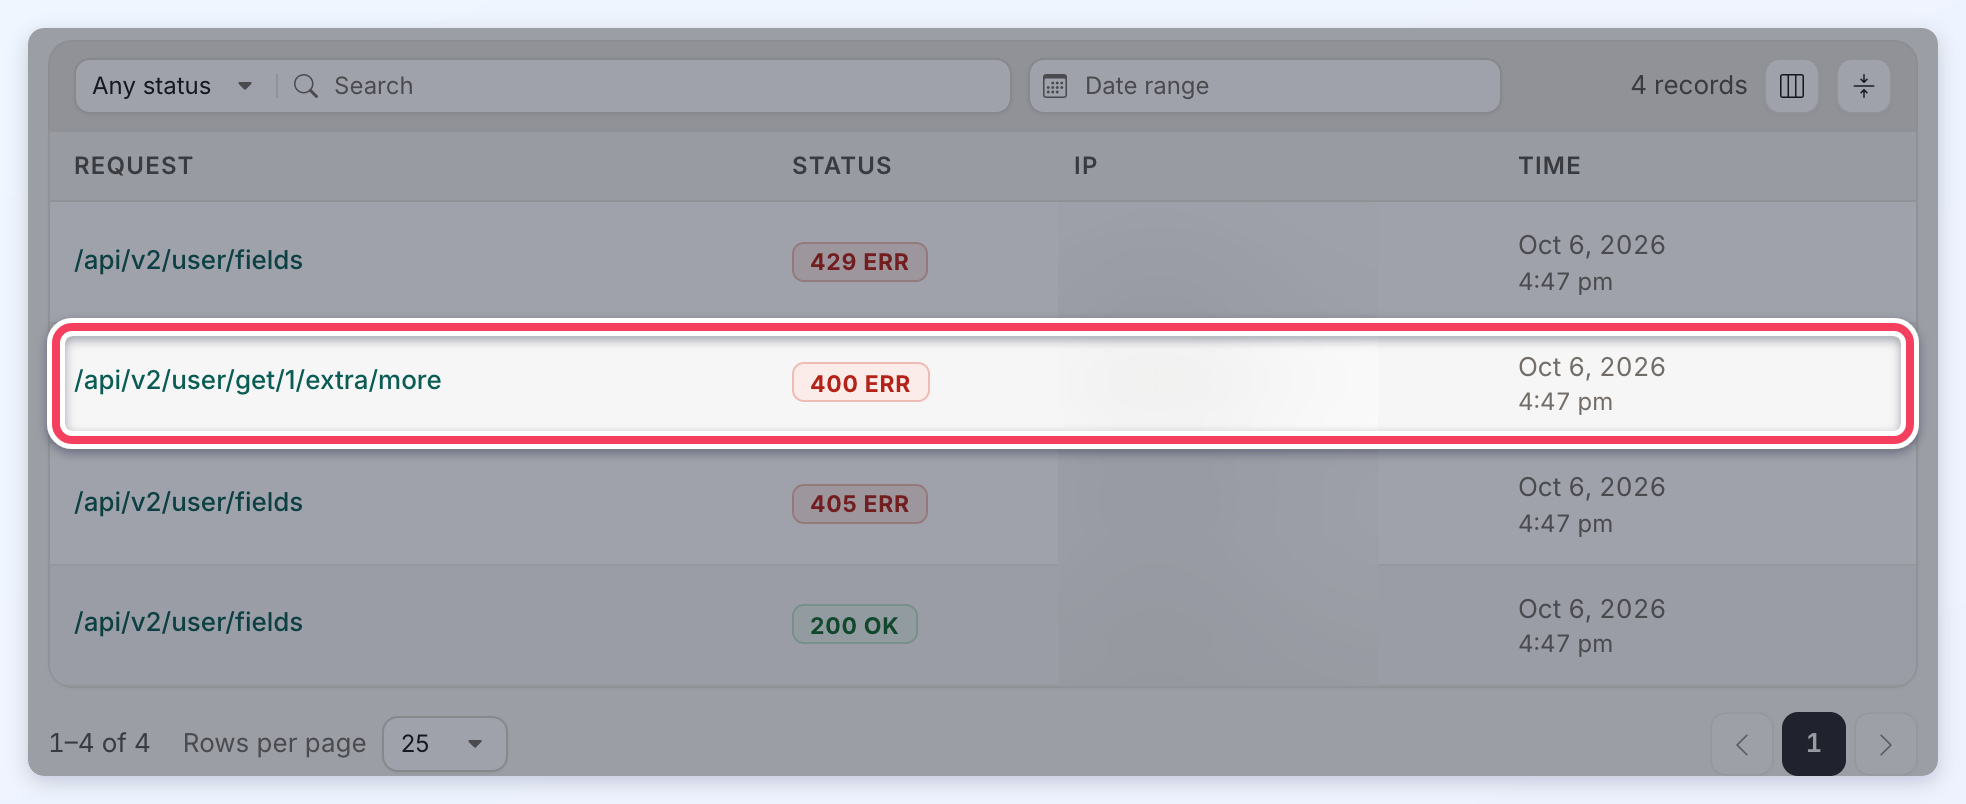
- The Status of each request: 200 OK, or the error code followed by ERR (EG 403 ERR when the key does not have permission for that endpoint).
Each request also shows the IP address it came from (blurred in these examples) and the time it was made, with copy buttons for the request URL and the IP address.
Picking a Date Range
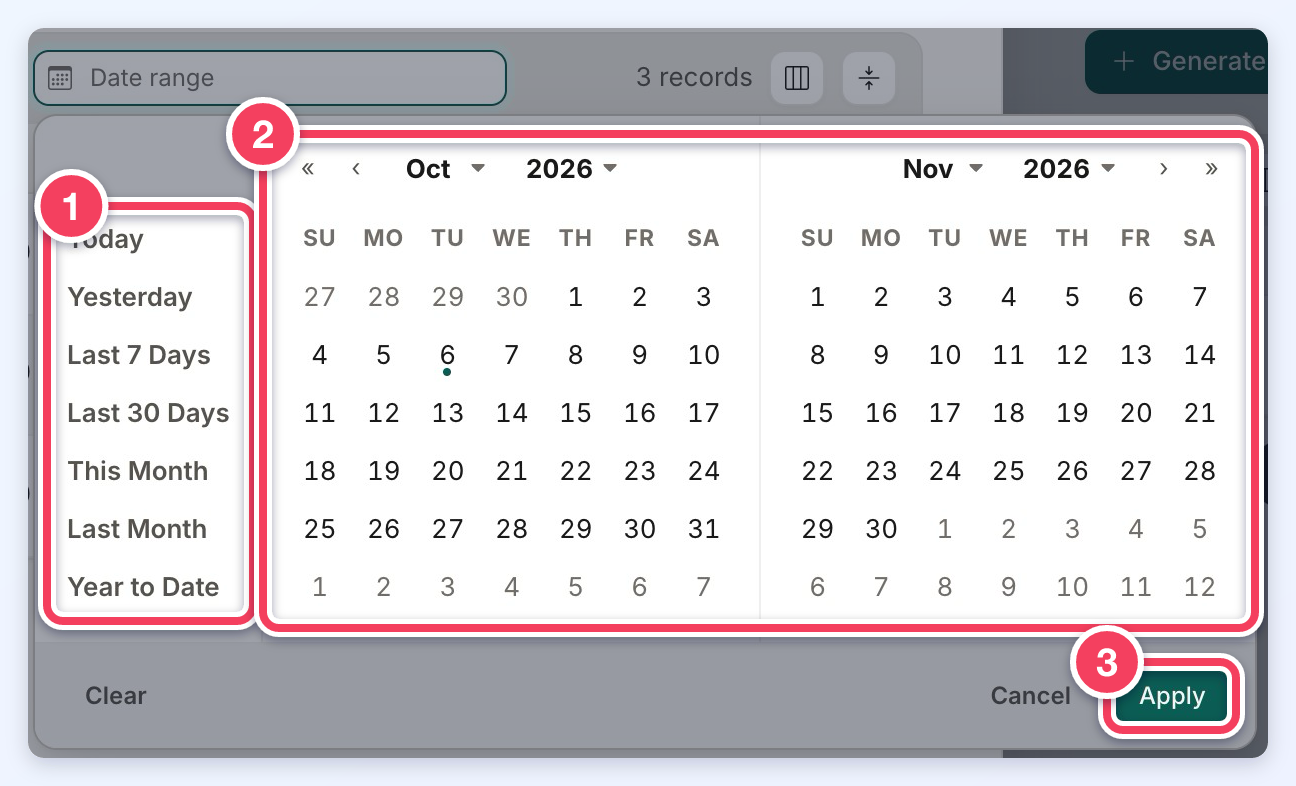
- Presets: Today, Yesterday, Last 7 Days, Last 30 Days, This Month, Last Month and Year to Date.
- Two months side by side. Double-click a day to pick just that day, or click a start day and an end day (in either order, and across months) to pick a range. The month and year menus jump to another month.
- Apply filters the log. Clear removes the date range and Cancel closes the calendar.
The same date range picker is used on the other pages built in the new admin design, such as the Date range filter on the API keys list.
Request Details
Click a request to see its details.
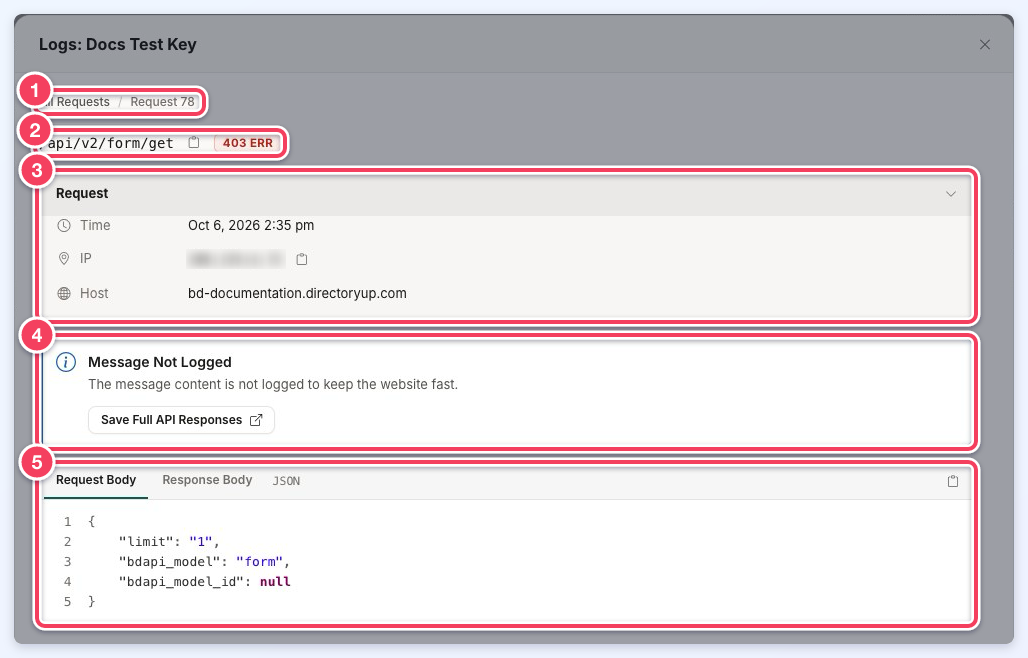
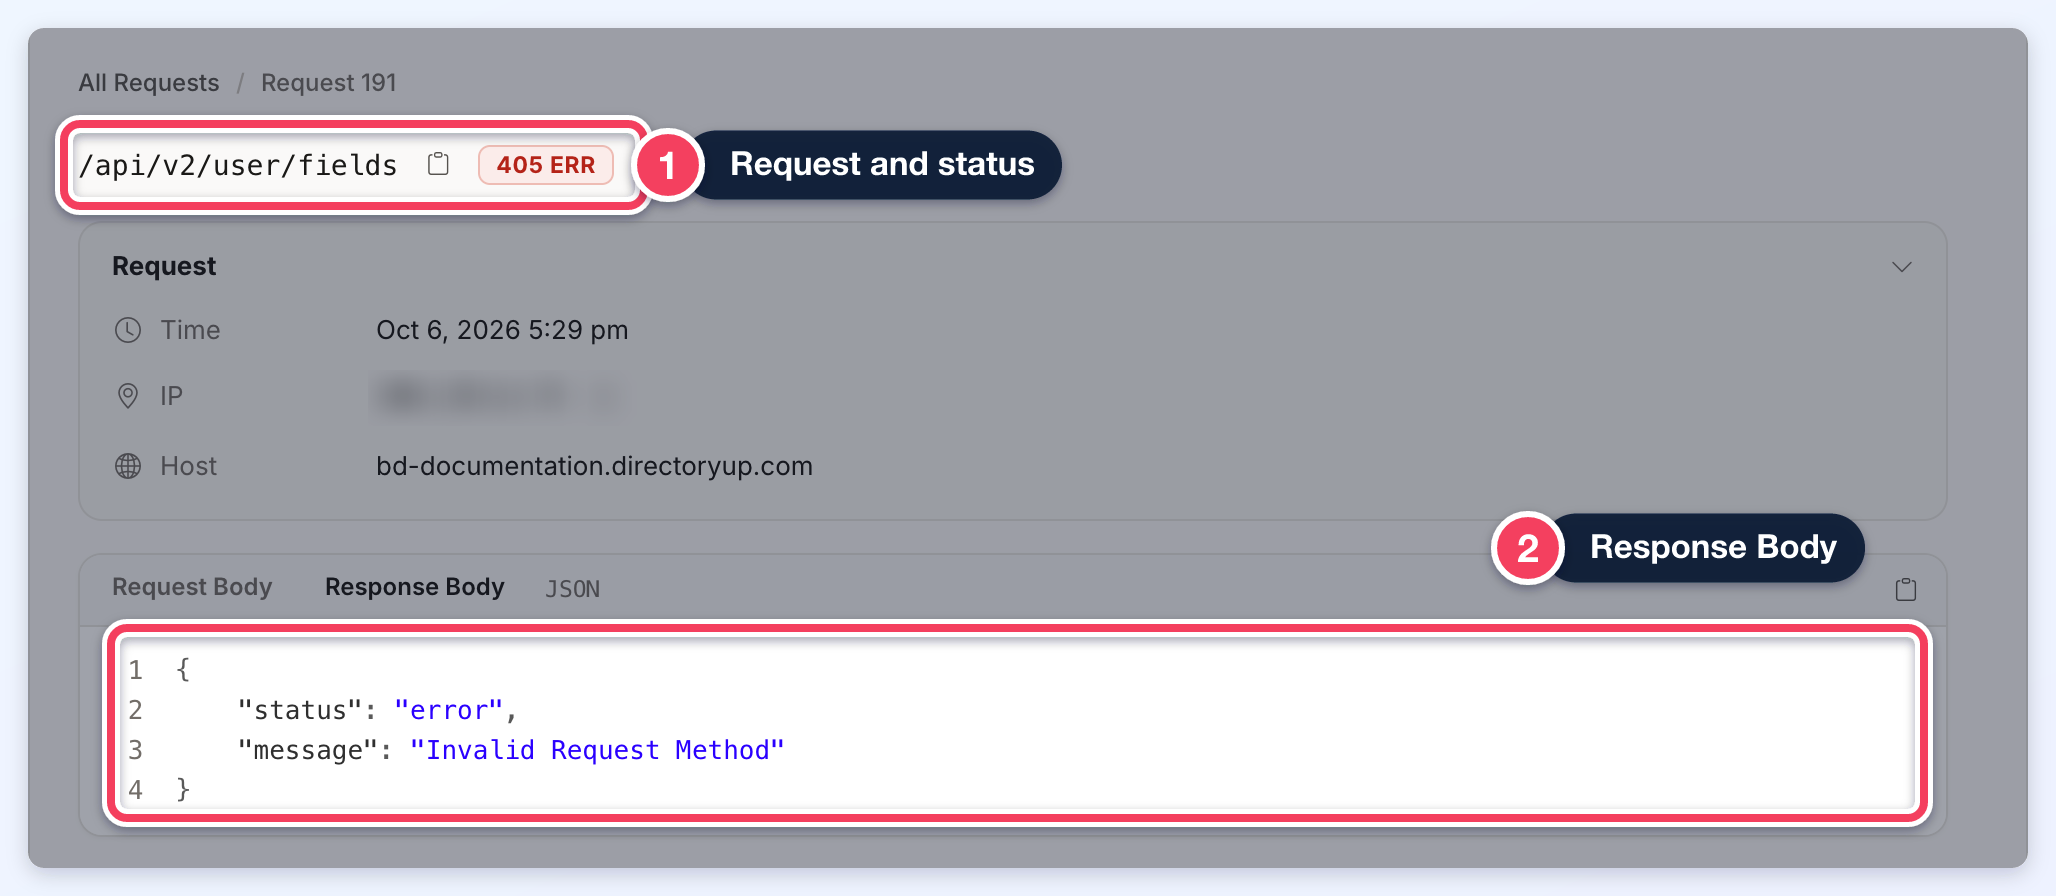
- All Requests returns to the list.
- The request URL, with a copy button, and its status.
- Request: the time, IP address, host and, when sent, the user agent.
- Message Not Logged: by default the full content of each message is not stored, to keep the website fast. Save Full API Responses opens the setting that stores it.
- Request Body and Response Body: what was sent, and what came back when it was stored, with a copy button.
Common Error Responses
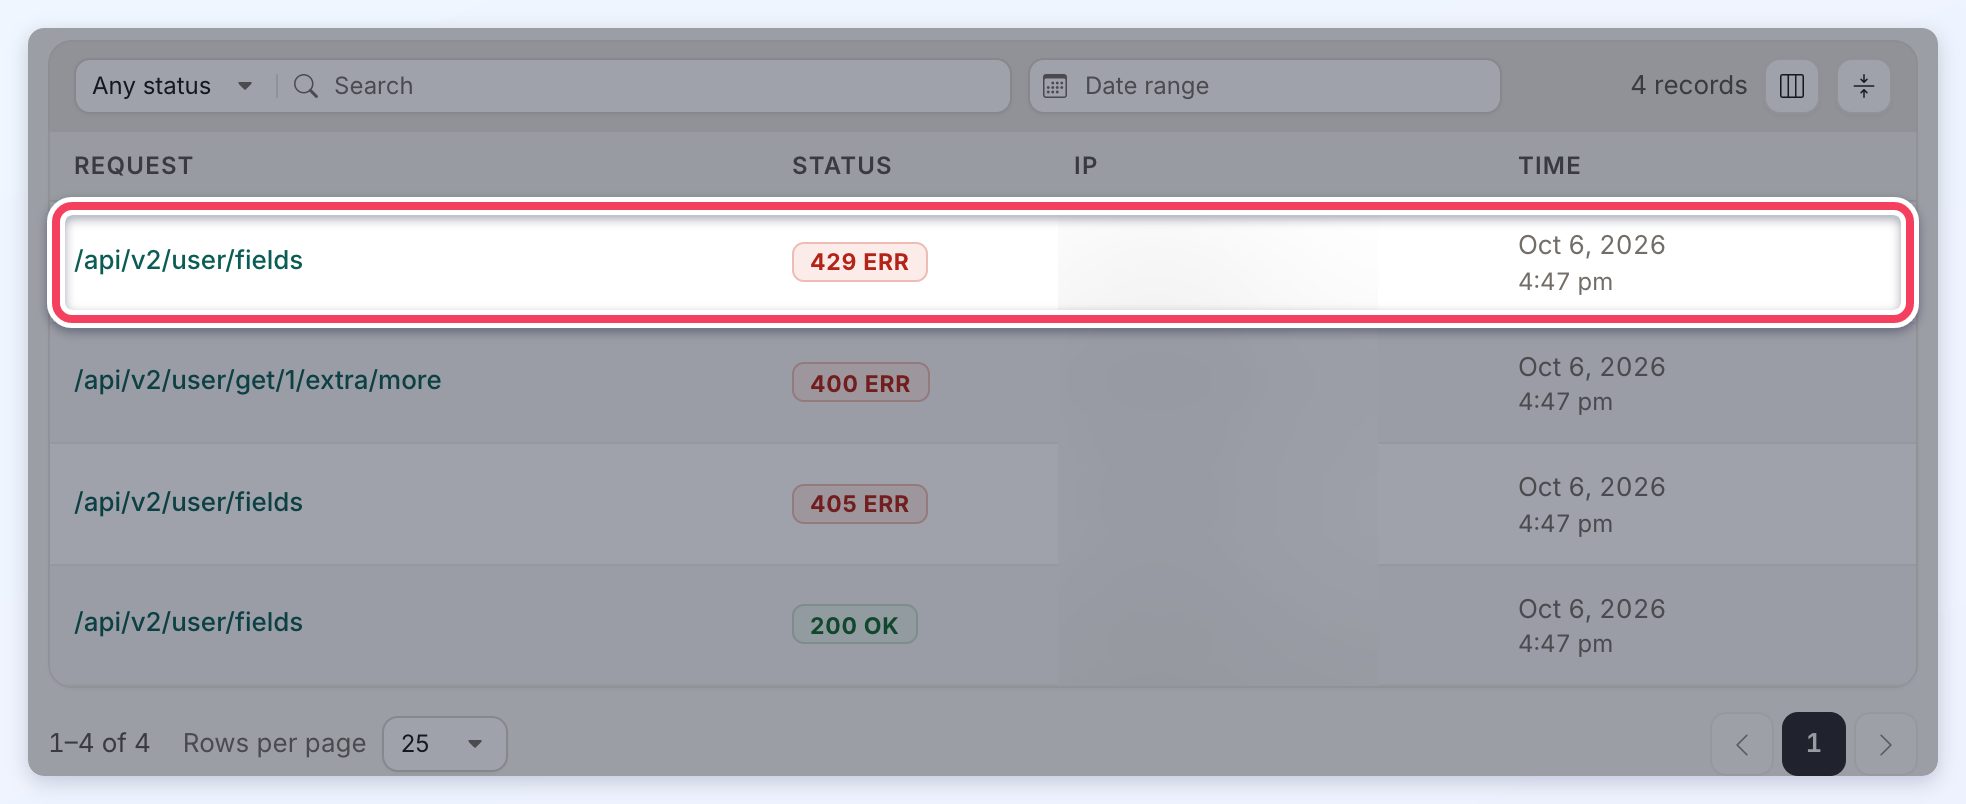
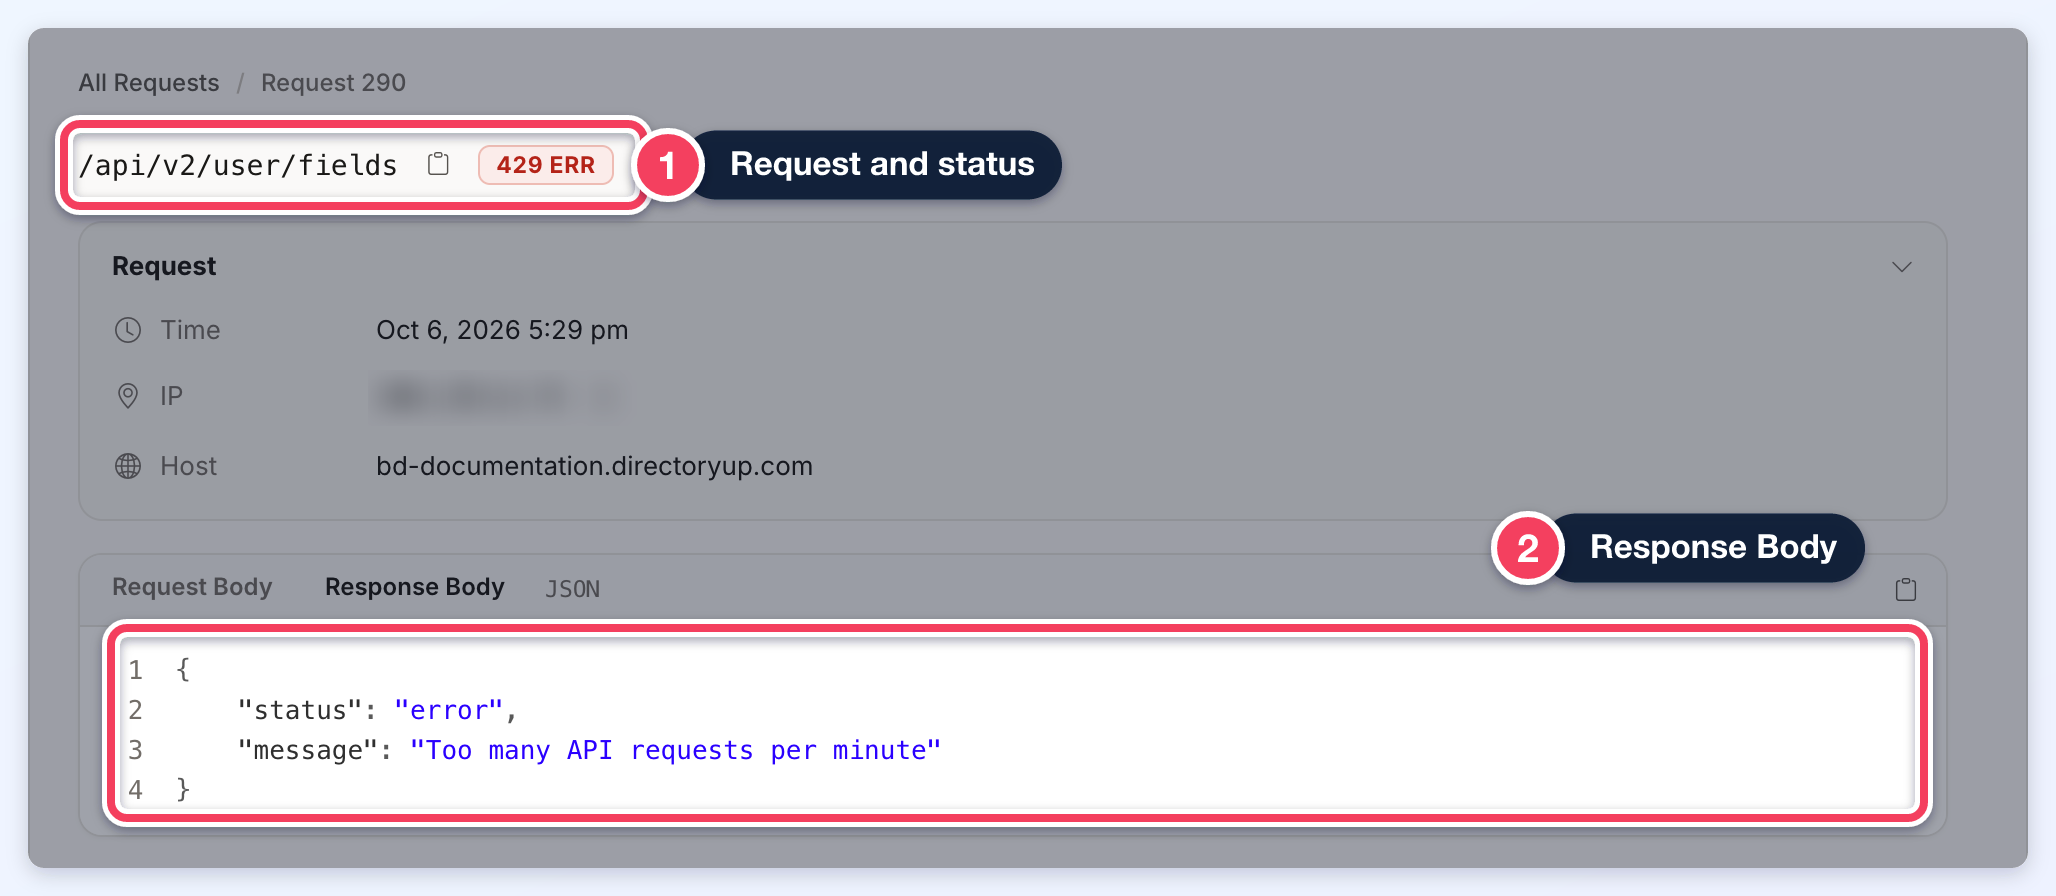
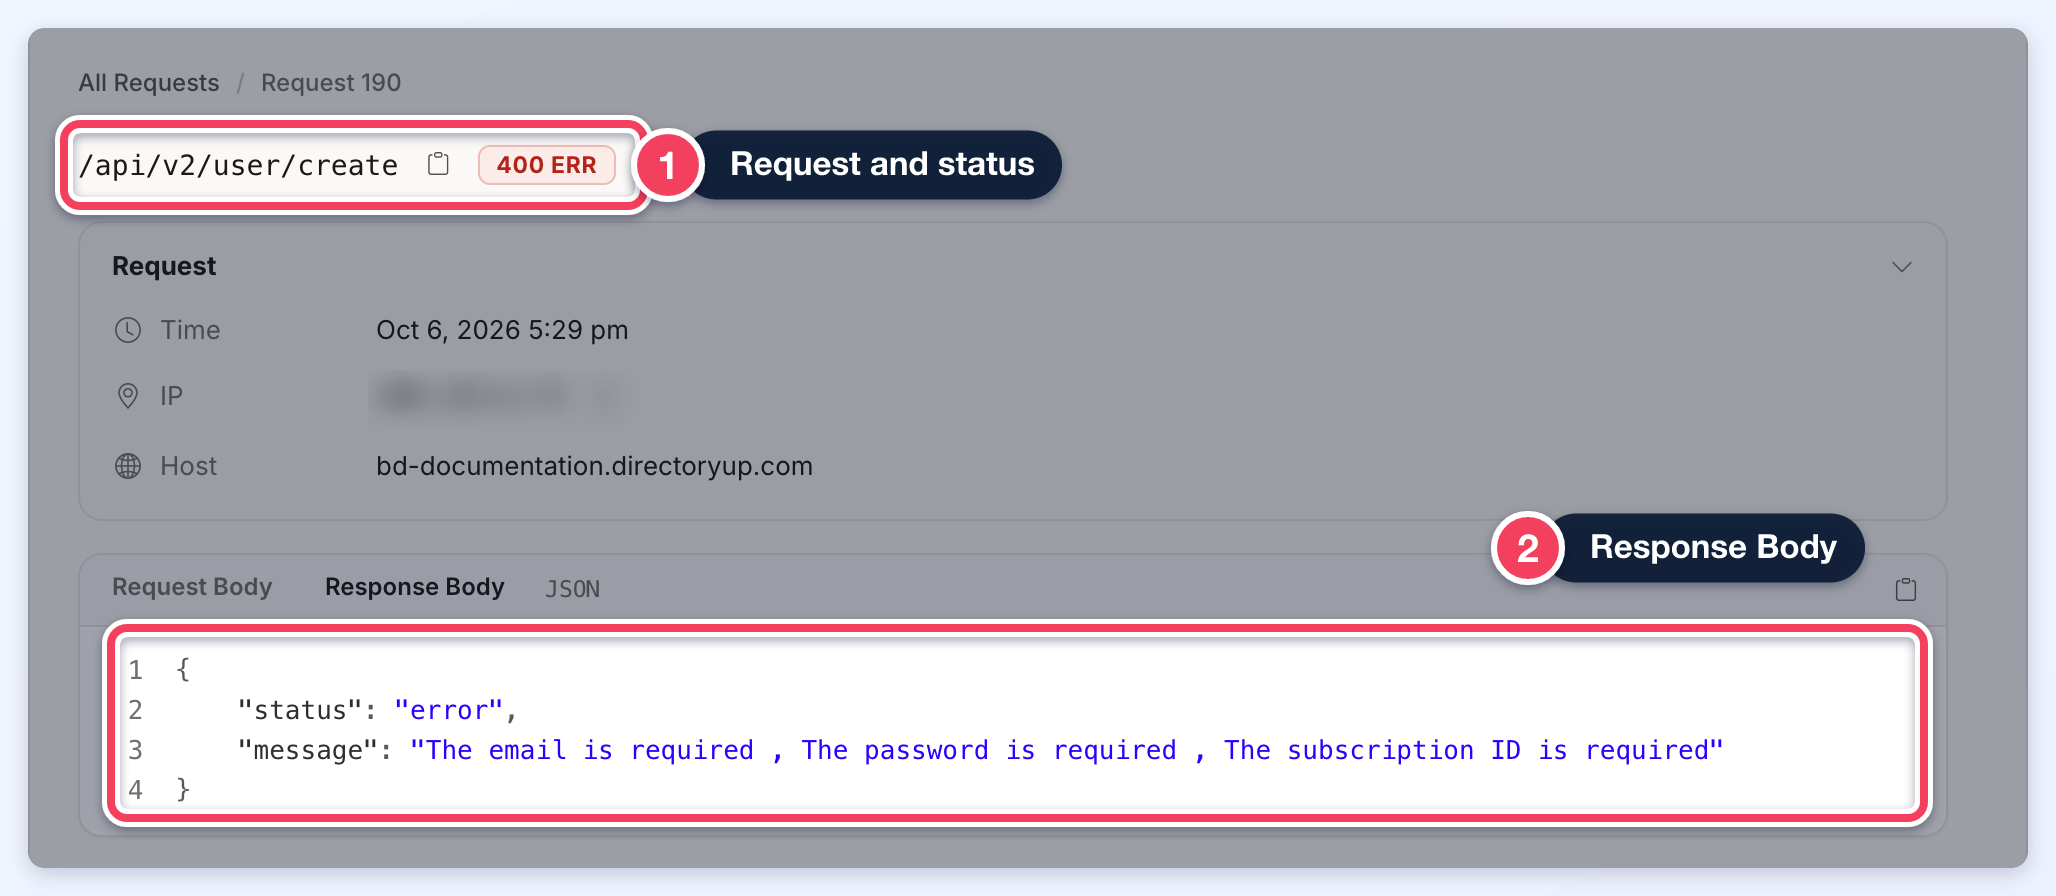
The API may return different HTTP status codes when a request cannot be completed. In the request details below, the Response Body shows the full error message because Save Full API Responses was turned on; by default it reads Not Logged.
429 – Too Many Requests
Returned when the API request limit of 100 requests per minute has been exceeded.
400 – Bad Request
Returned when the request contains invalid or incomplete data, such as a create request missing a required field, or an attempt to create a member after the website's maximum member limit has been reached.
405 – Method Not Allowed
Returned when an unsupported HTTP request method is used for the selected endpoint.