
Admin Accounts » Invite Admin +
Link: https://support.brilliantdirectories.com/support/solutions/articles/12000073190
This article explains how to invite new admins or team members to access the website admin area.
Admin invitations allow the website owner or authorized admin to send an email invite to a new admin user. The invited admin can then accept the invitation, create their login details, and access the admin area based on the role assigned to them.
Overview
The Invite Admin tool is used to add new admin users without manually creating their login credentials.
When an invite is sent, the new admin receives an email with an invitation link. After clicking the link, they can enter their full name, create a password, and complete the admin account setup.
Admin roles can be assigned during the invite process to control which areas of the admin the new user can access.
How to Invite a New Admin
- Go to Settings >> Admin Accounts.
- Click Invite Admin via Email.
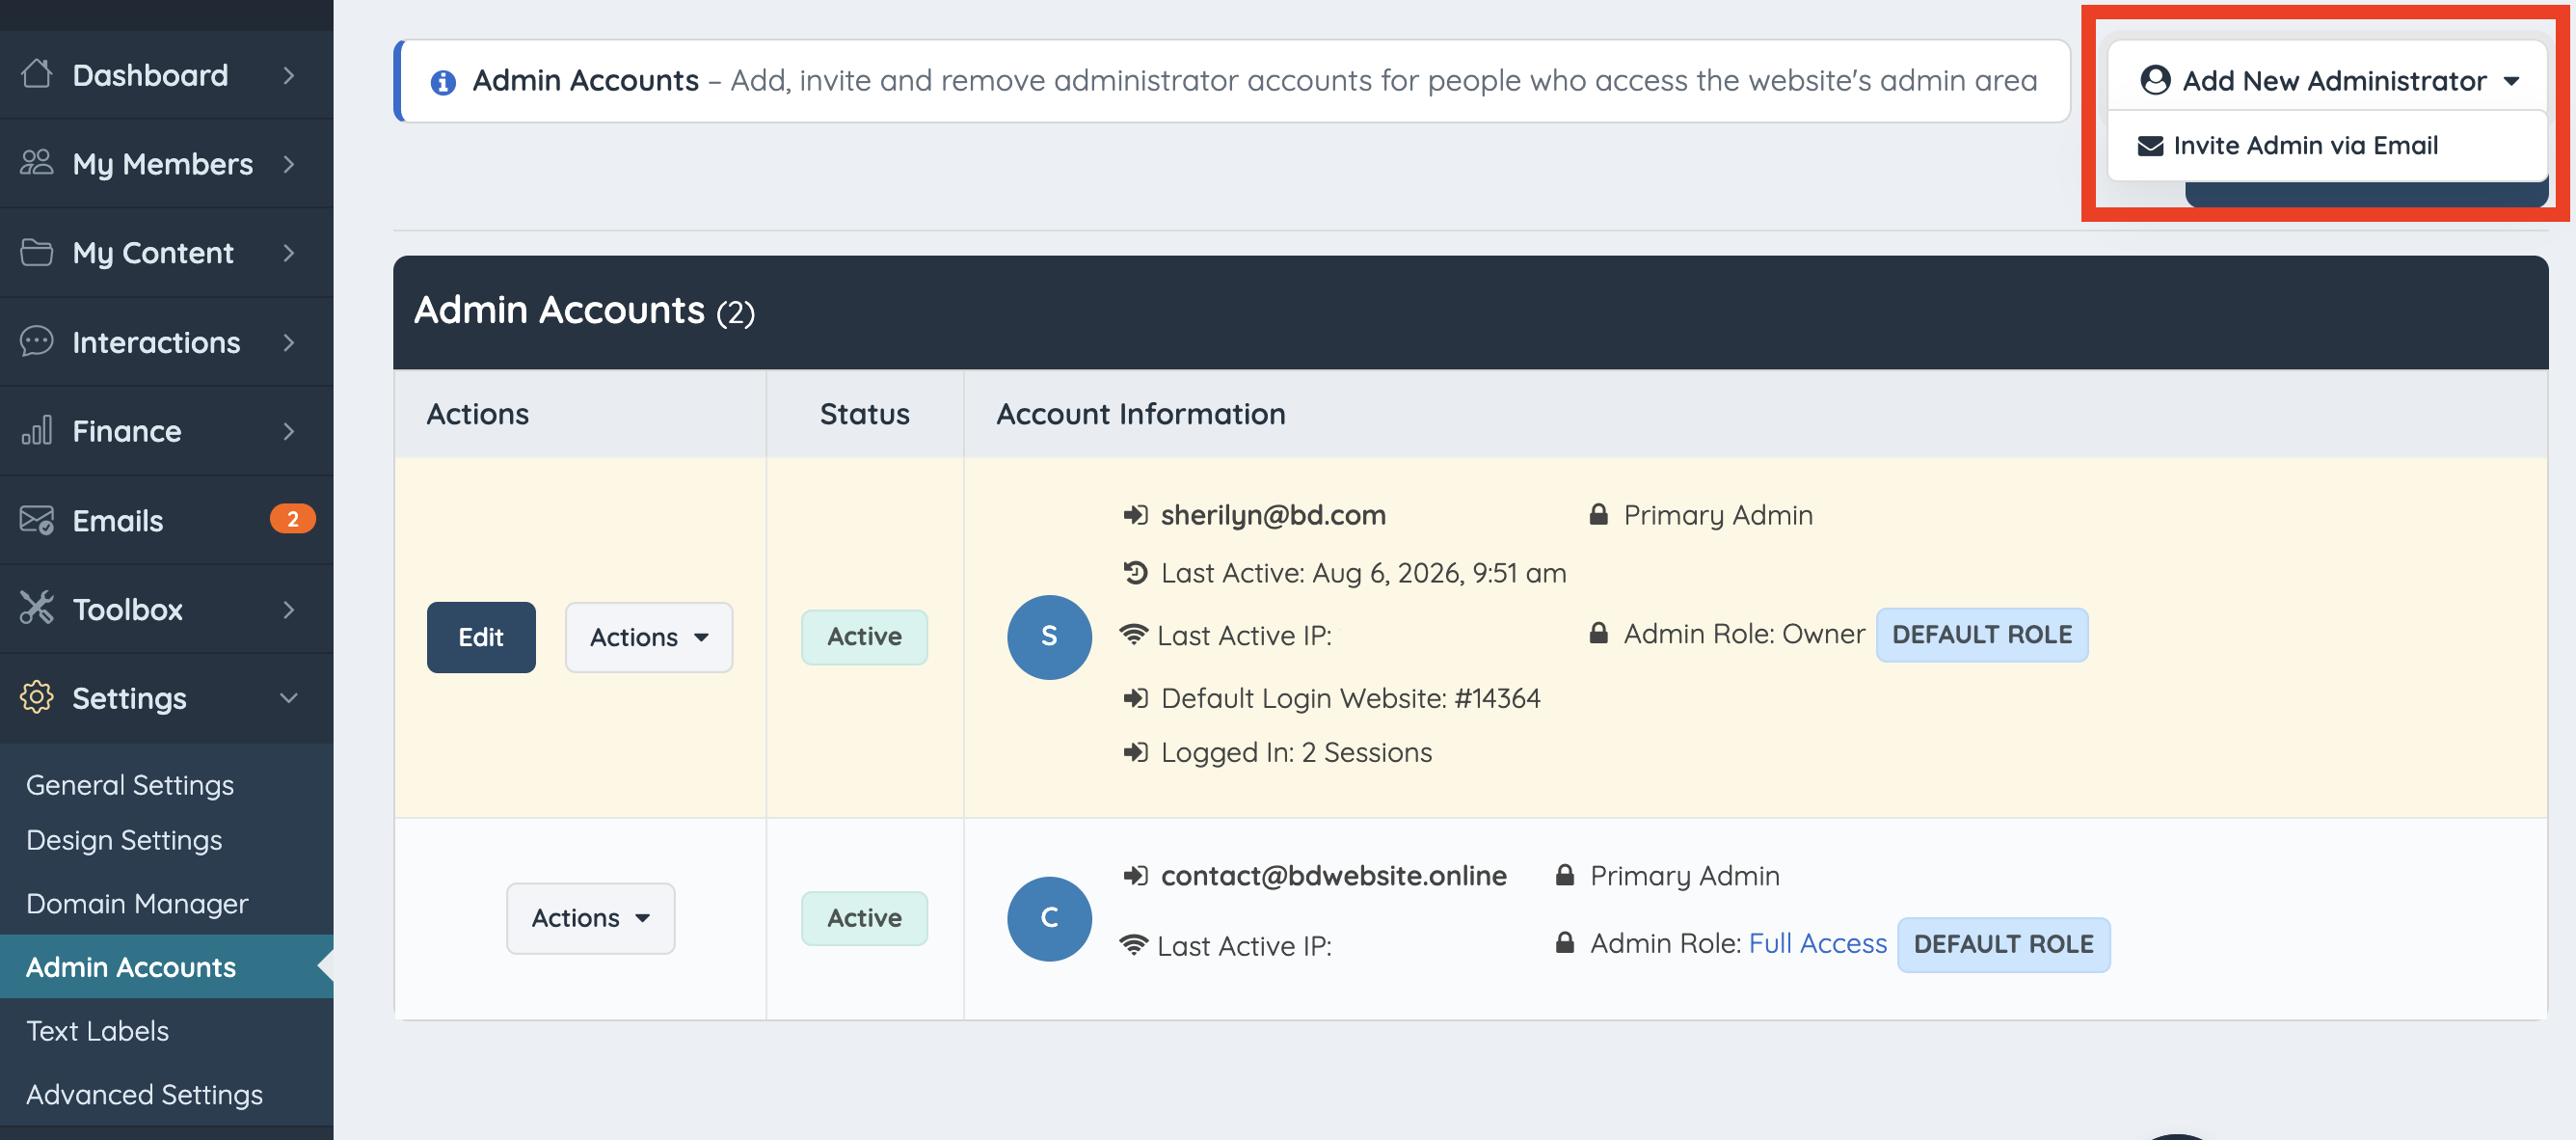
A popup will open where the admin email address and role can be selected.
Enter the Admin Email Address
In the invite popup, enter the email address of the person who should receive admin access.
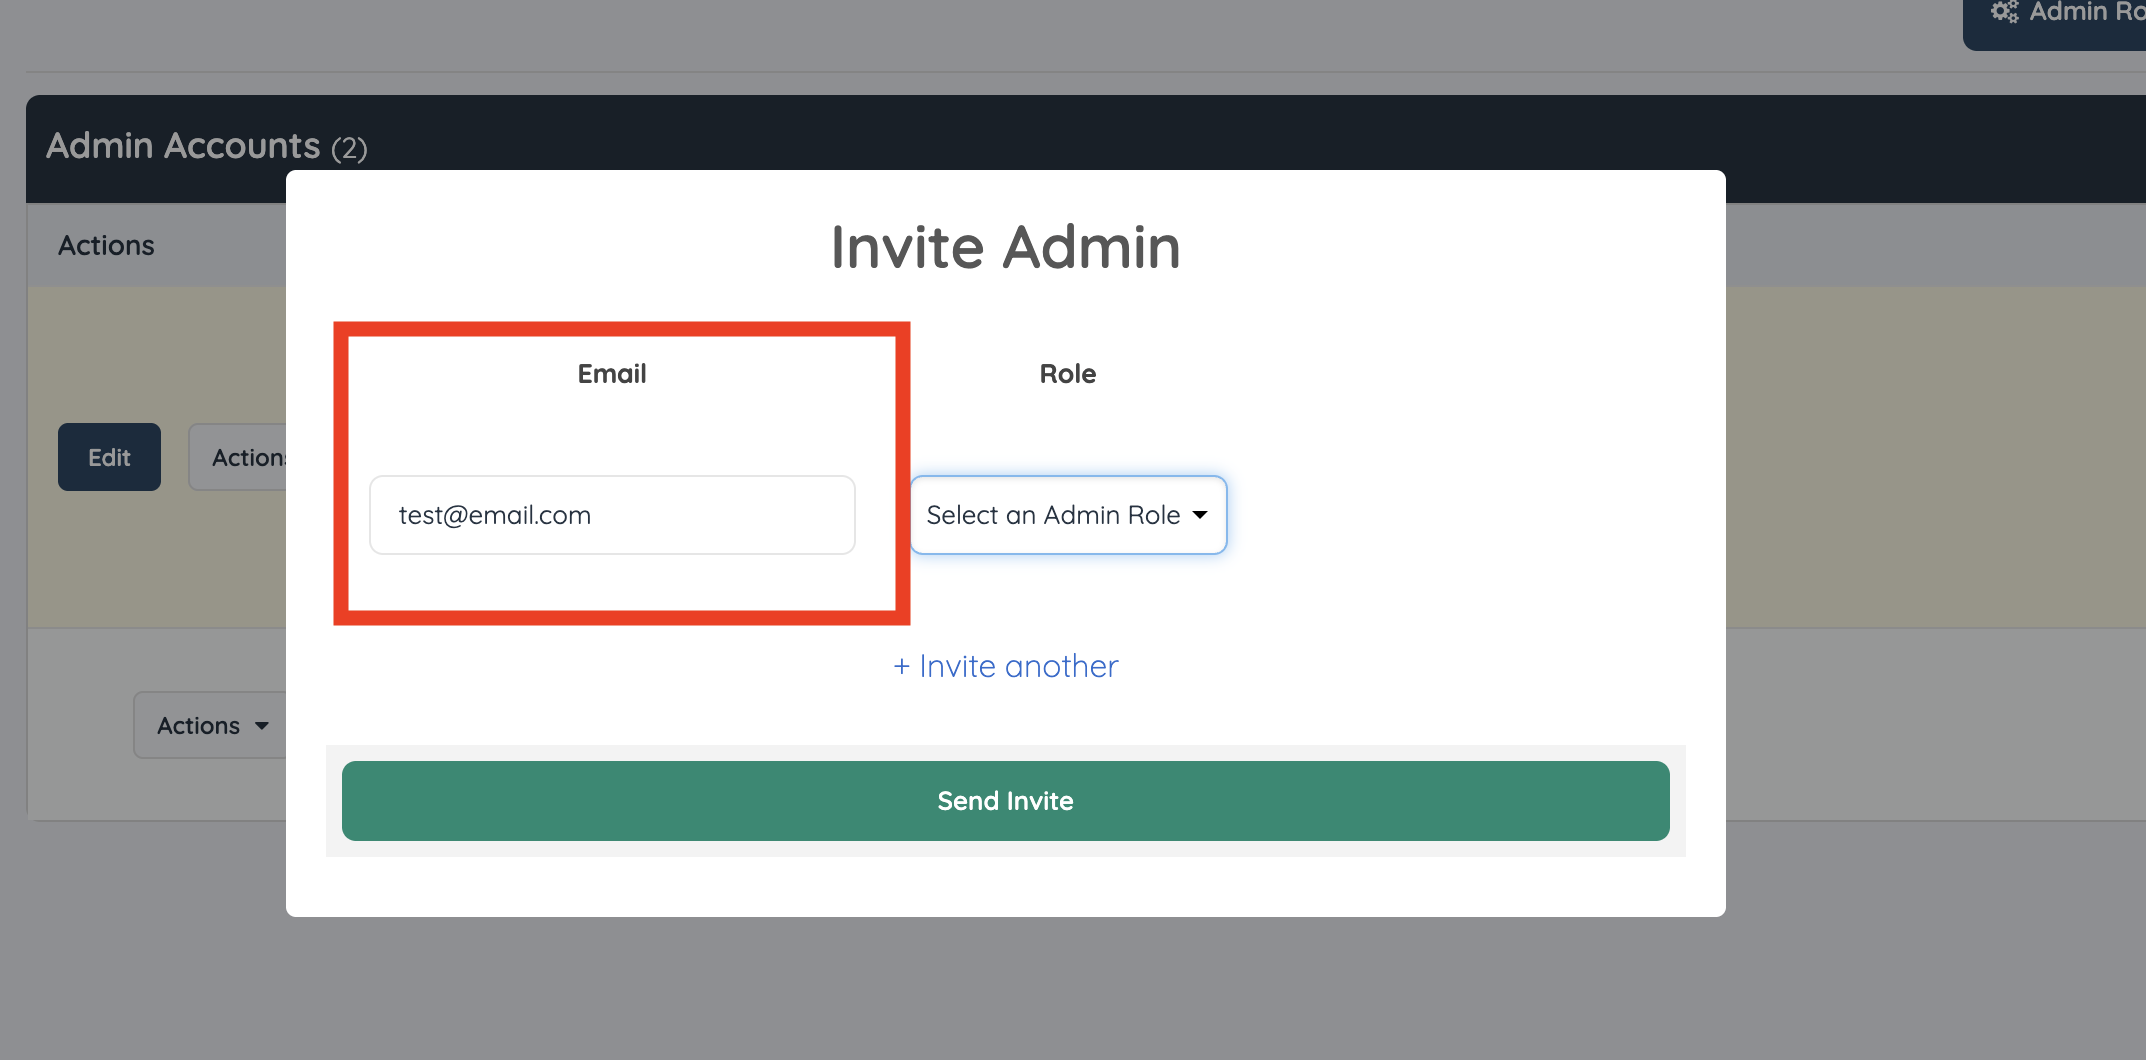
This is the email address where the admin invitation will be sent.
Select an Admin Role
Use the Role dropdown to select the admin role for the invited user. The assigned role controls which admin areas and tools the invited user can access after accepting the invitation.
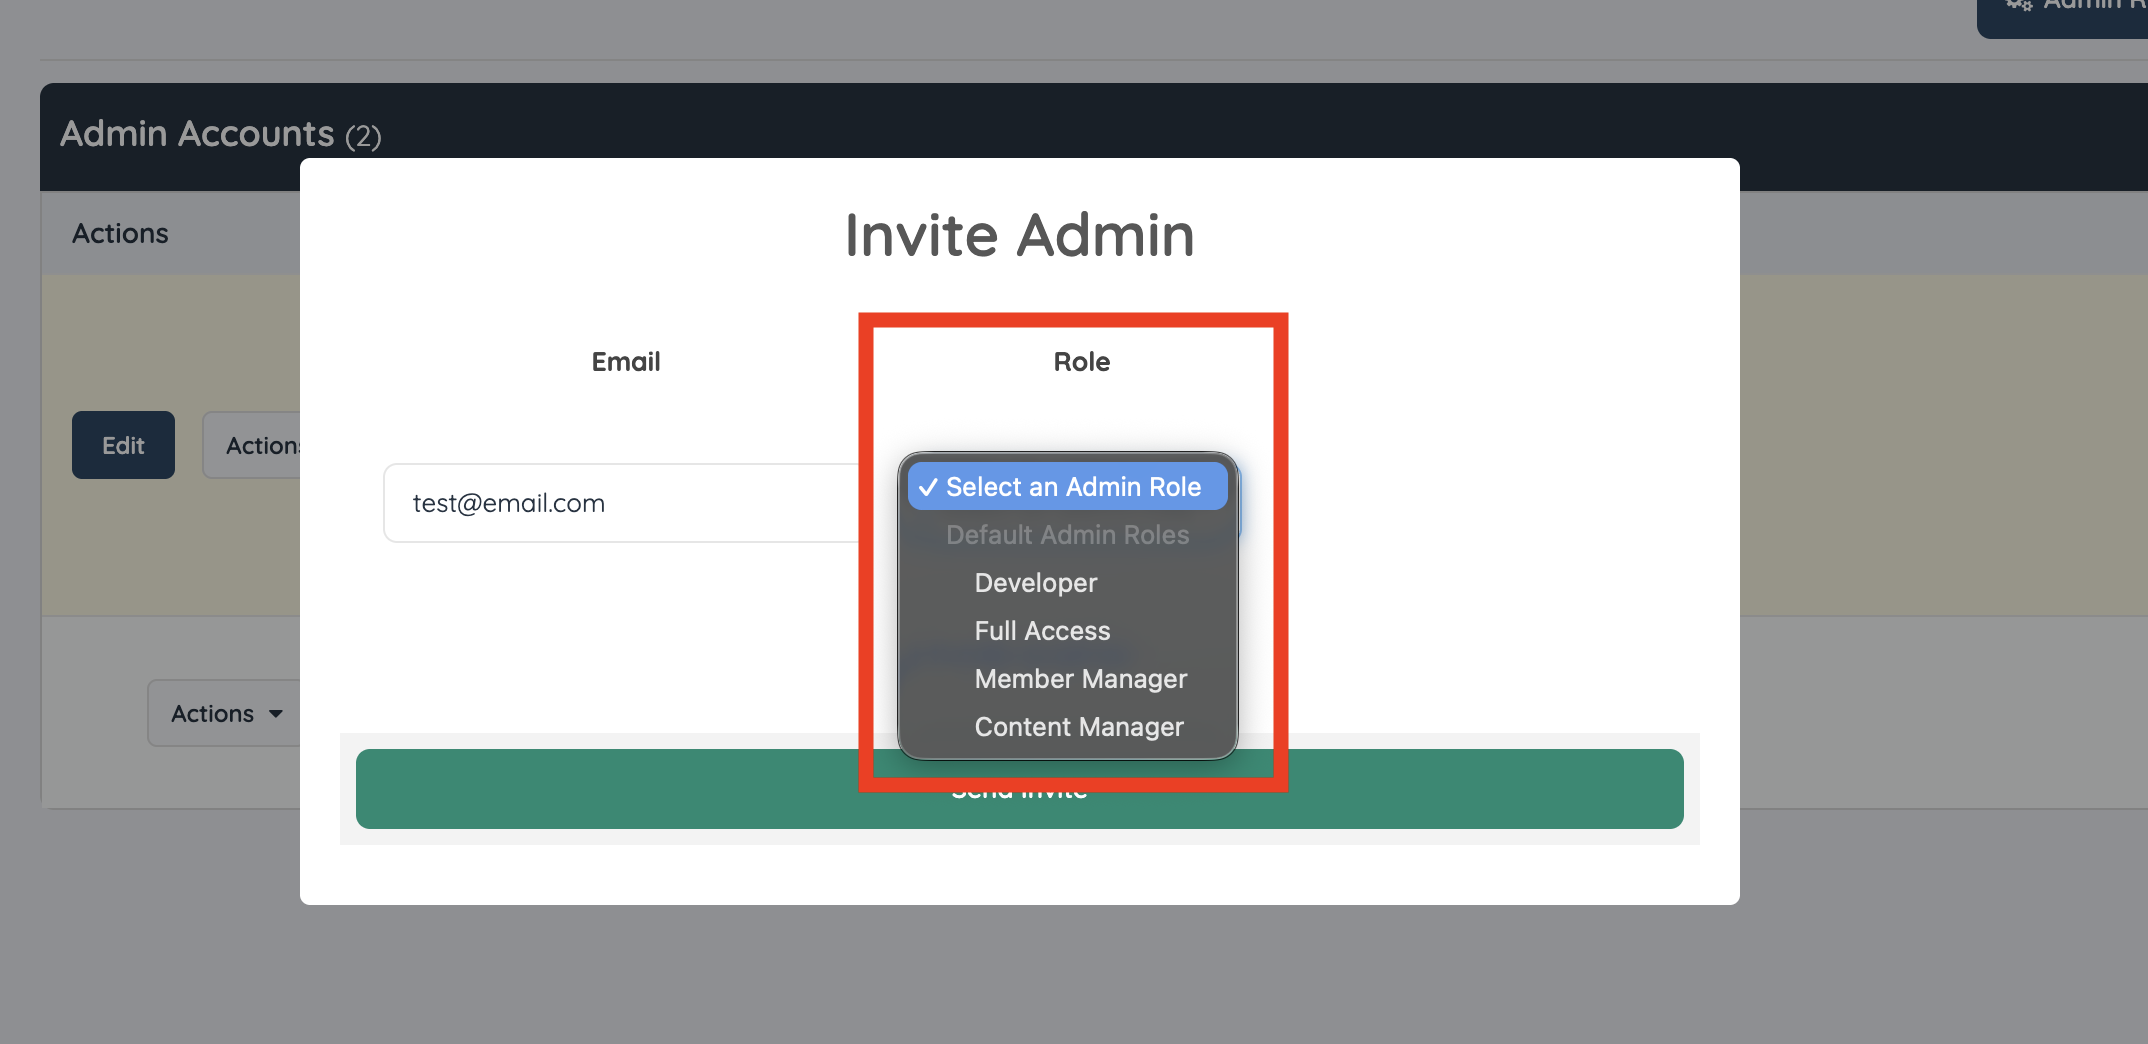
Available roles may include default admin roles and any custom admin roles created for the website.
For more information about admin roles and permissions, see the following article:
Invite Multiple Admins
To invite more than one admin at the same time, click Invite Another. This adds additional invitation fields to the popup.
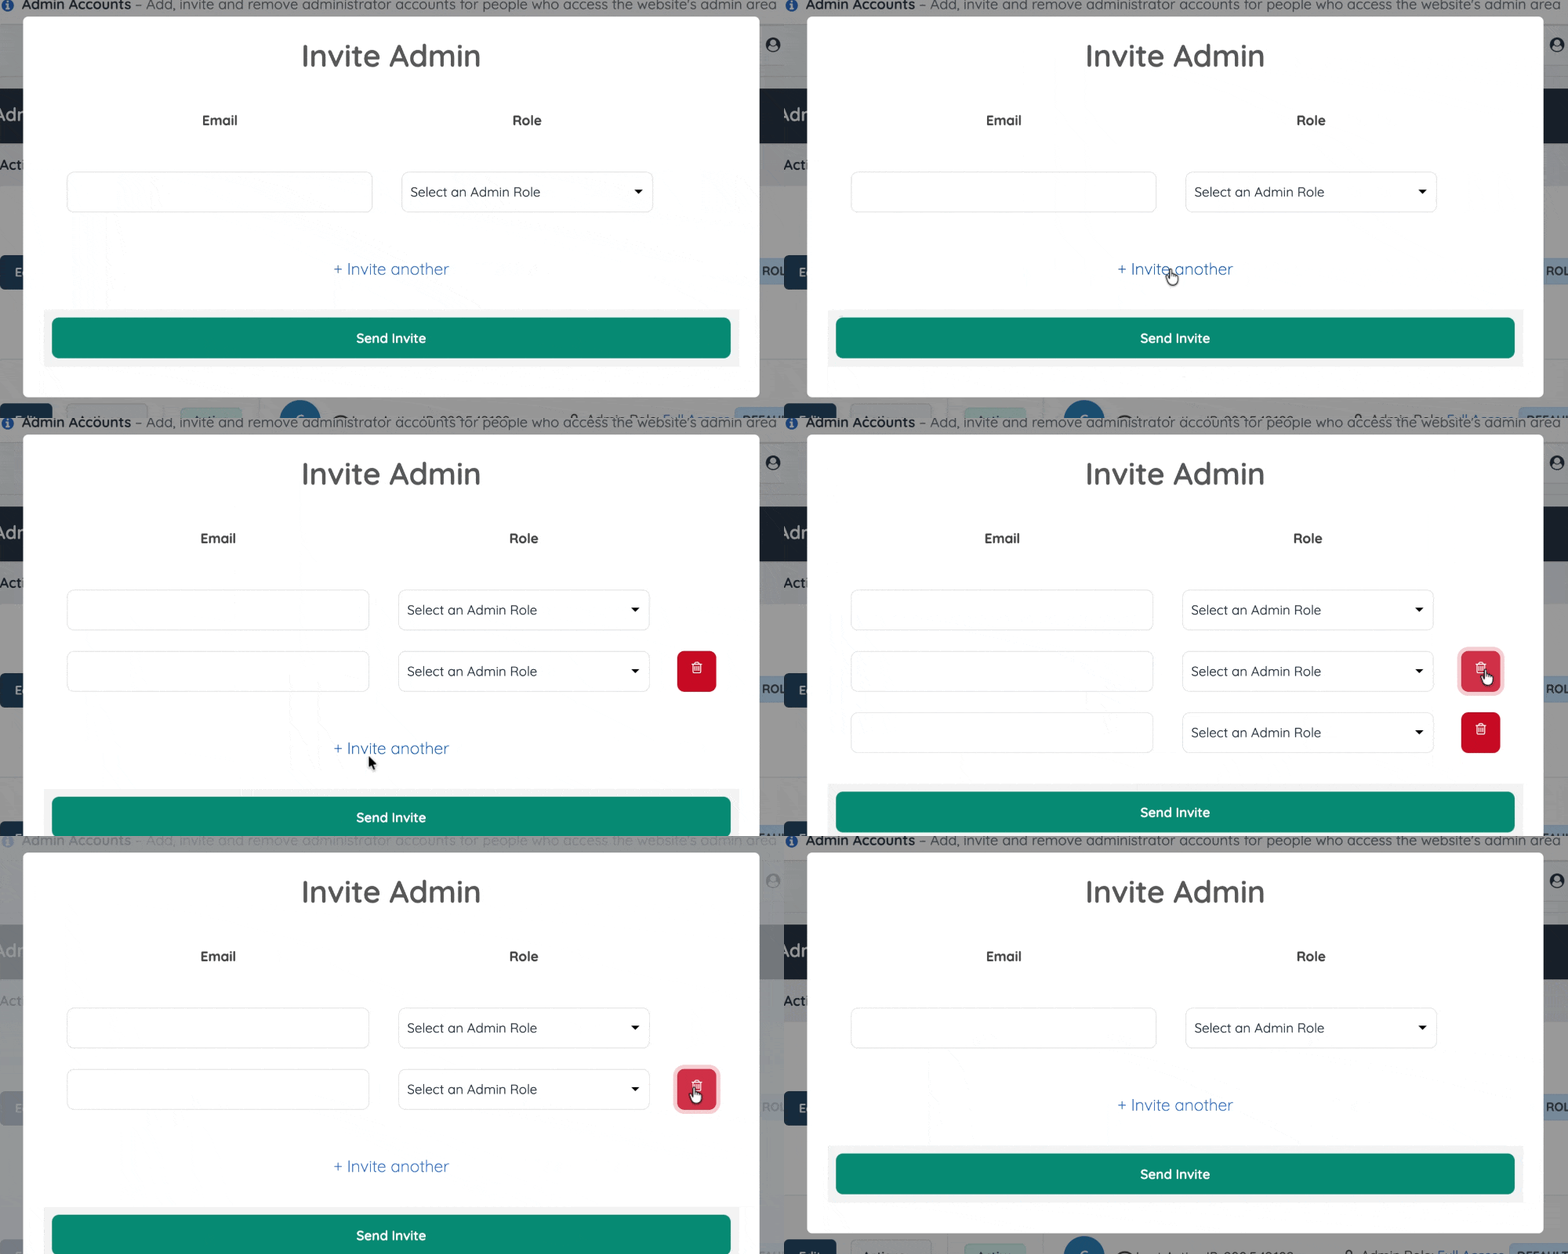
Each invitation row should include:
- The admin email address
- The admin role
Important: If additional invitation rows are added, they must either be completed or removed before the invites can be sent. If an added row is left blank, it will display in red and must be removed using the TRASH icon.
Send the Admin Invitation
After adding the email address and selecting the role:
- Review the admin email address.
- Confirm the correct role is selected.
- Click Send Invite.
After the invitation is sent, a success message will display.
Pending Admin Invites
After an admin invitation is sent, a Pending Admin Invites section will display in the Admin Accounts area. This section shows active admin invitations that have not yet been accepted.
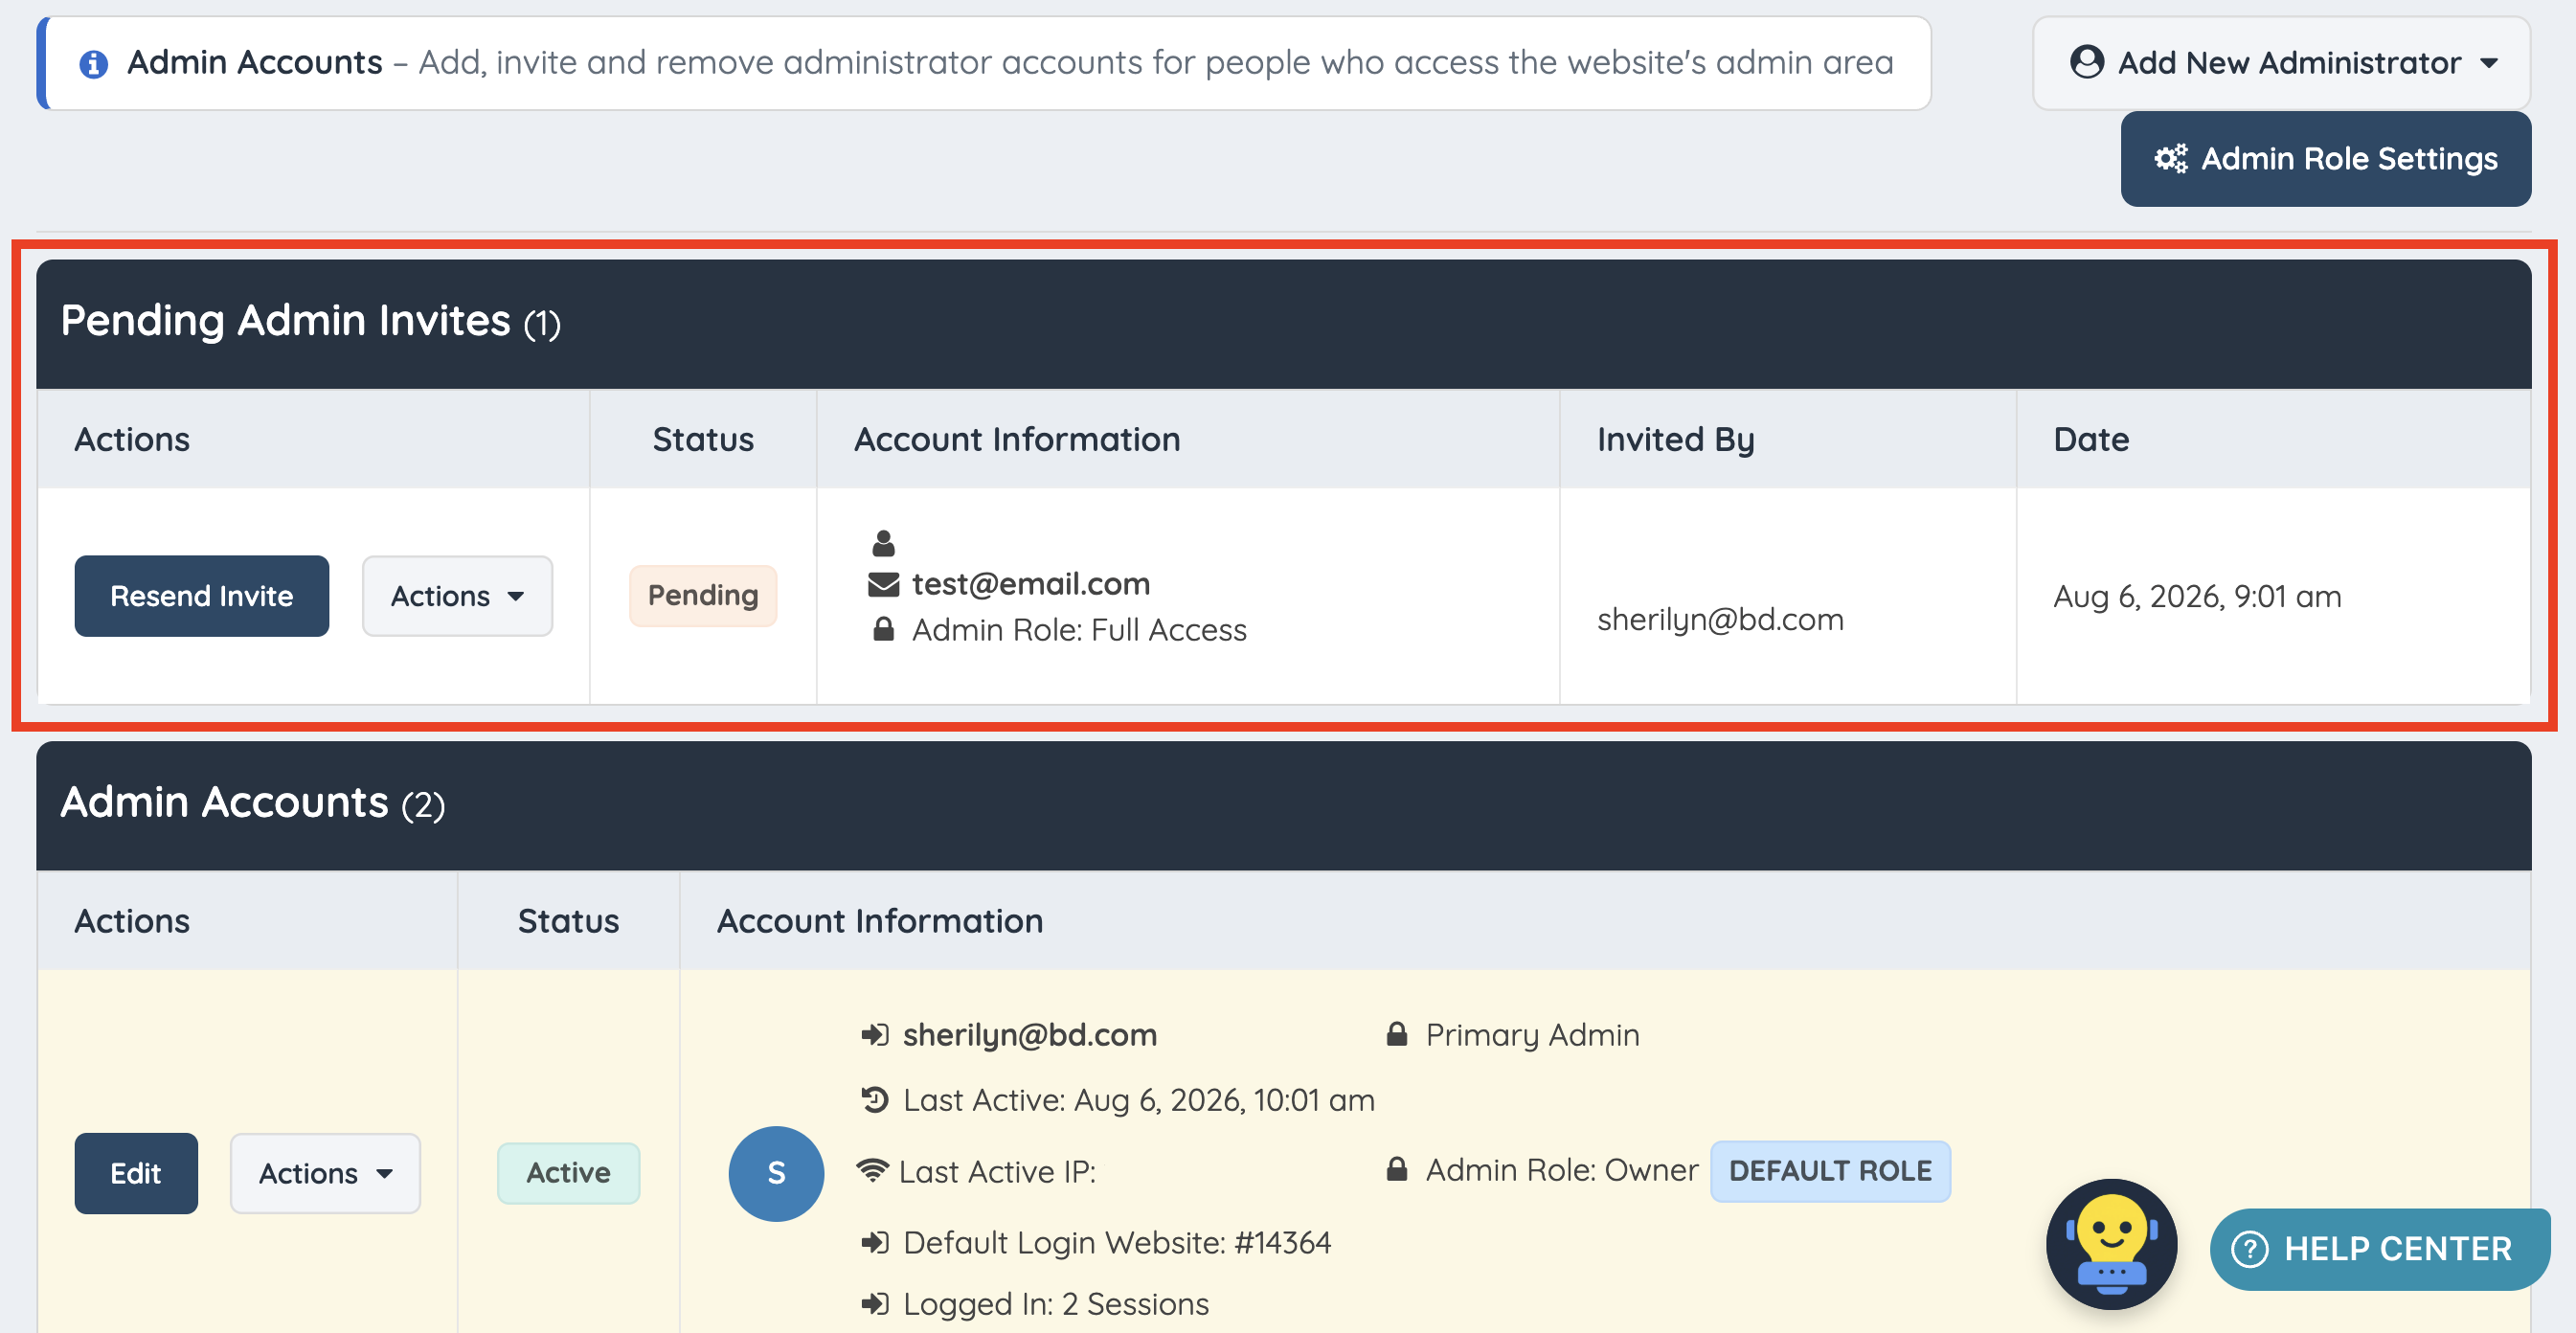
The pending invite details may include:
- Invite status
- Invited email address
- Assigned admin role
- Name of the admin who sent the invite
- Invite date or related invite details
This section helps admins track which invitations are still waiting for the invited user to accept.
Expired Admin Invites
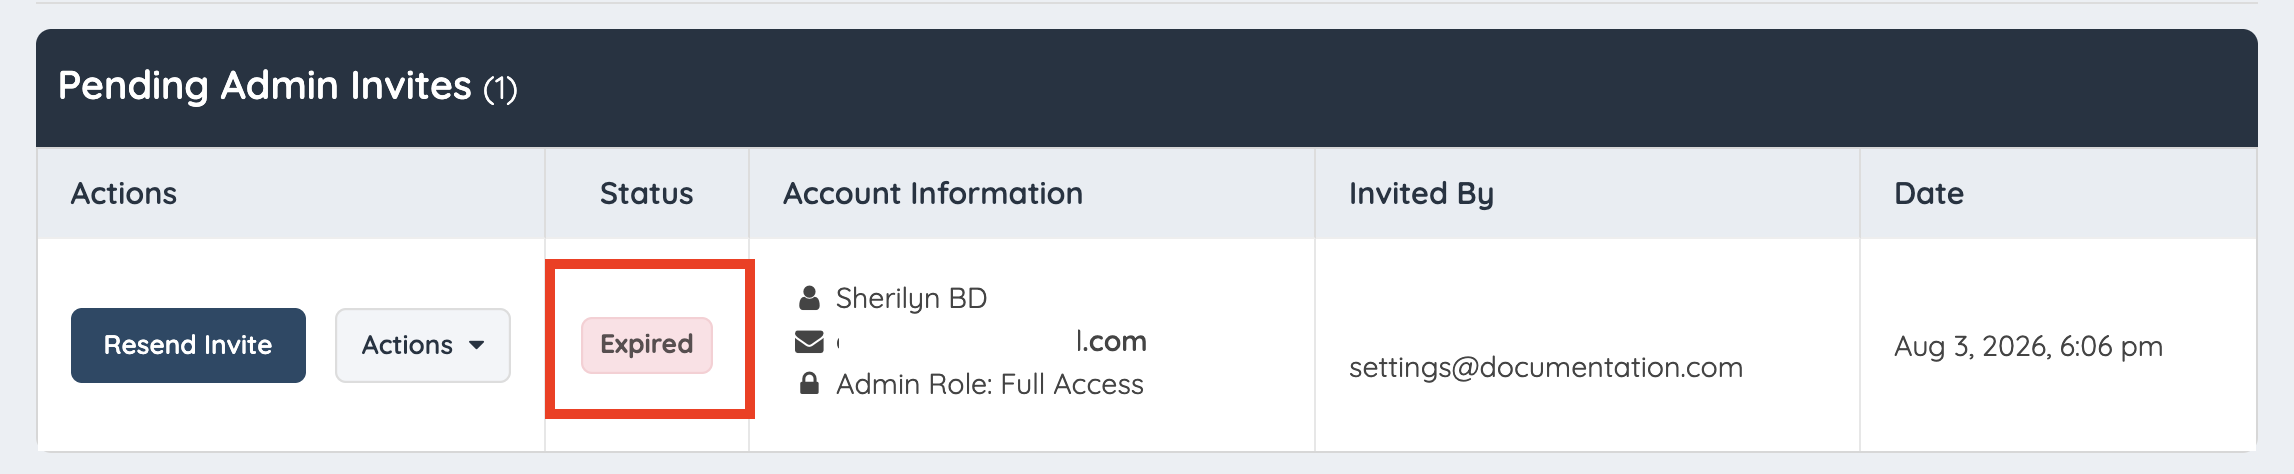
Admin invitations expire if they are not accepted within 24 hours. After an invite expires, it will be marked as Expired. Expired invitations can be managed from the admin invite section.
Resend or Revoke an Admin Invite
Pending or expired invitations can be managed directly from the invitation list.
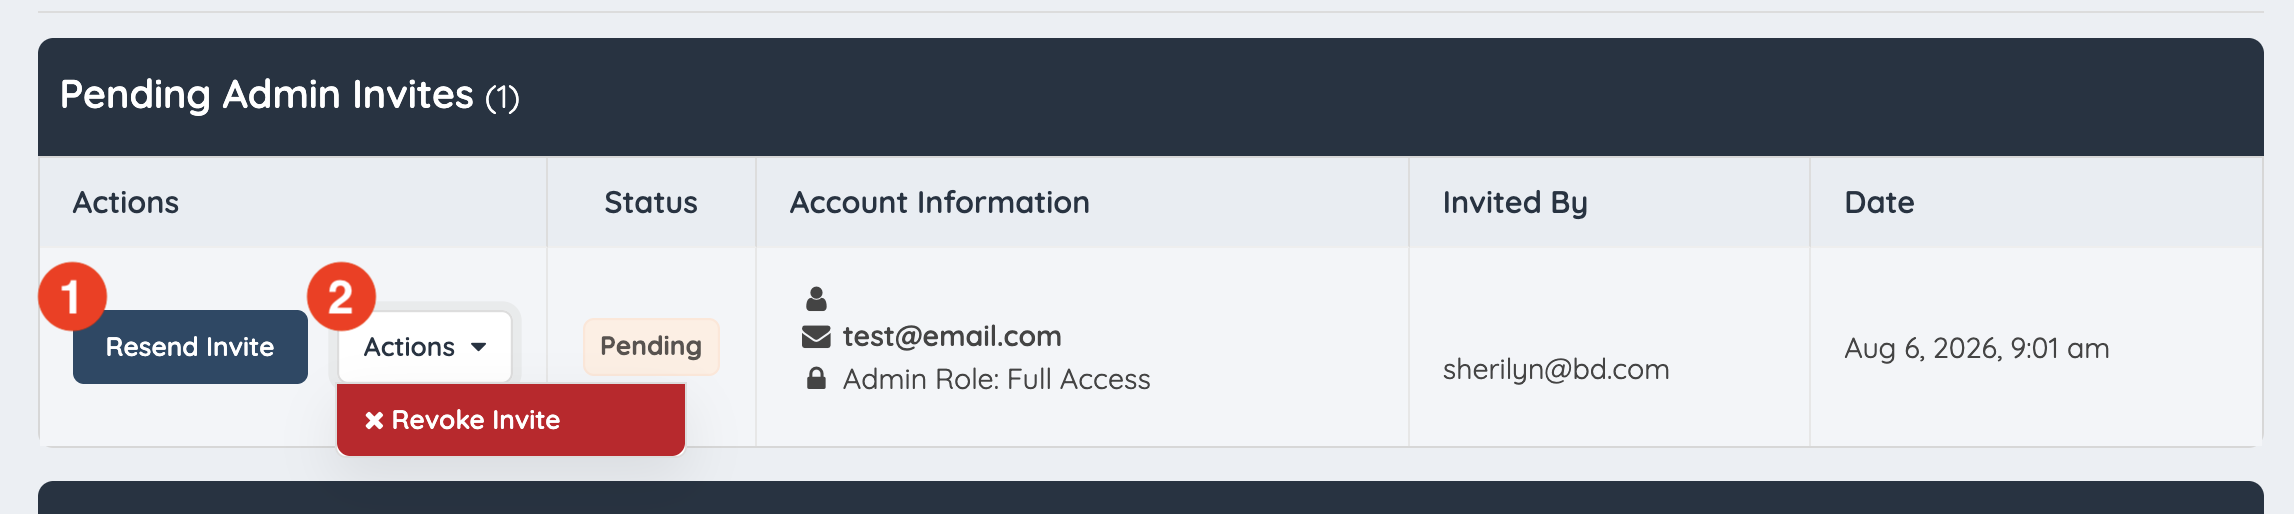
Available actions include:
- Resend Invite: Sends the admin invitation email again.
- Revoke Invite: Cancels the invitation so the invite link can no longer be used.
Remove an Admin
Admins can be removed from the website from the Admin Accounts section. This removes the selected admin’s access to the website admin area.
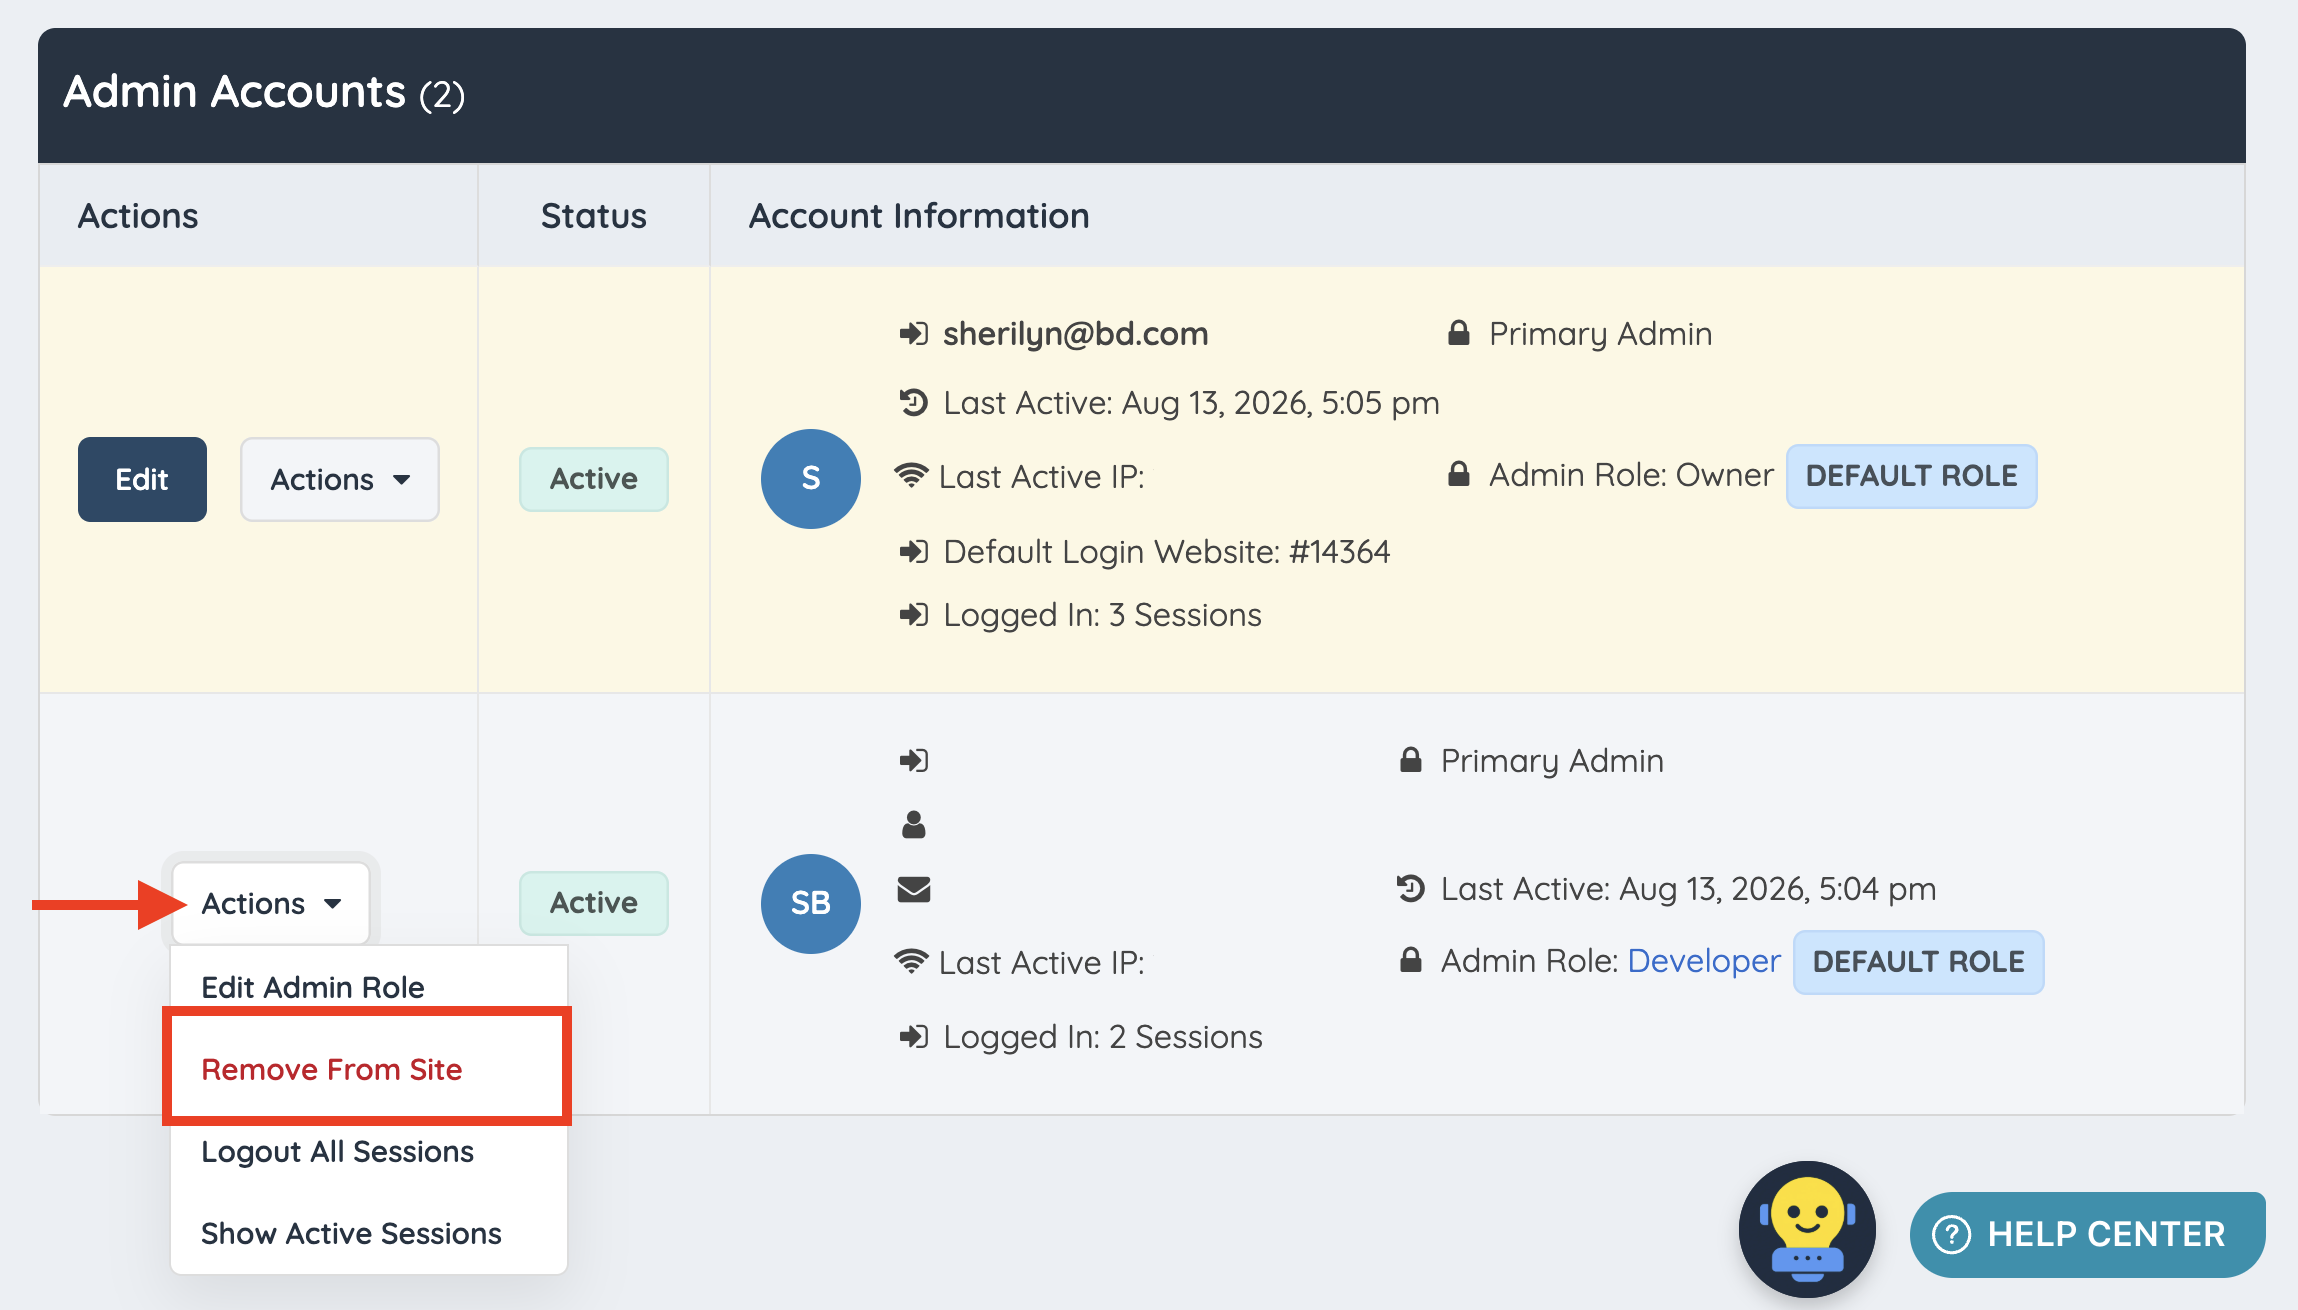
- Go to Settings >> Admin Accounts.
- Find the admin account that should be removed.
- Click the Actions dropdown for that admin.
- Select Remove From Site.
- Confirm the action when prompted.
After the admin is removed, they will no longer have access to the website admin area.
Important: Only remove admins who should no longer have permission to manage the website. If the admin should keep access but needs different permissions, use Edit Admin Role instead.
Automatic Email Address Unblocking
If the invited admin’s email address was previously blocked or had bounced, the system will automatically attempt to unblock the email address during the invitation process. This helps the invited admin receive the invitation email and future website emails.
Accepting an Admin Invitation
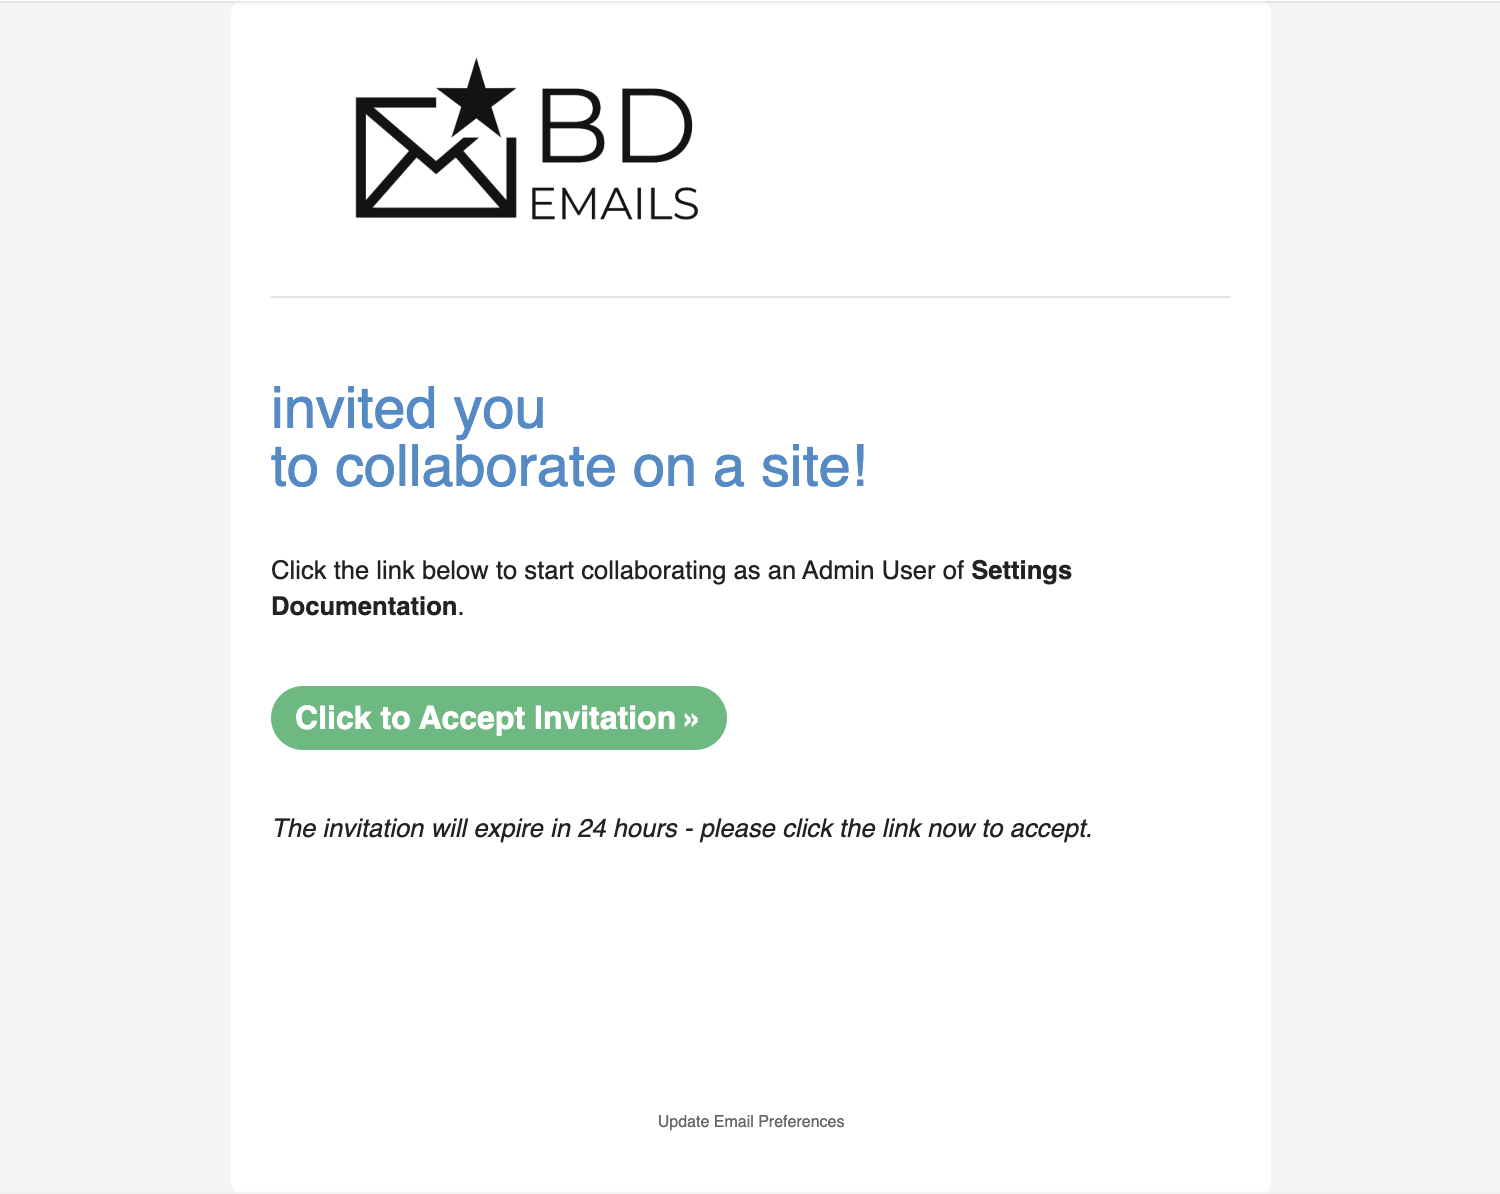
The invited admin will receive an email invitation.
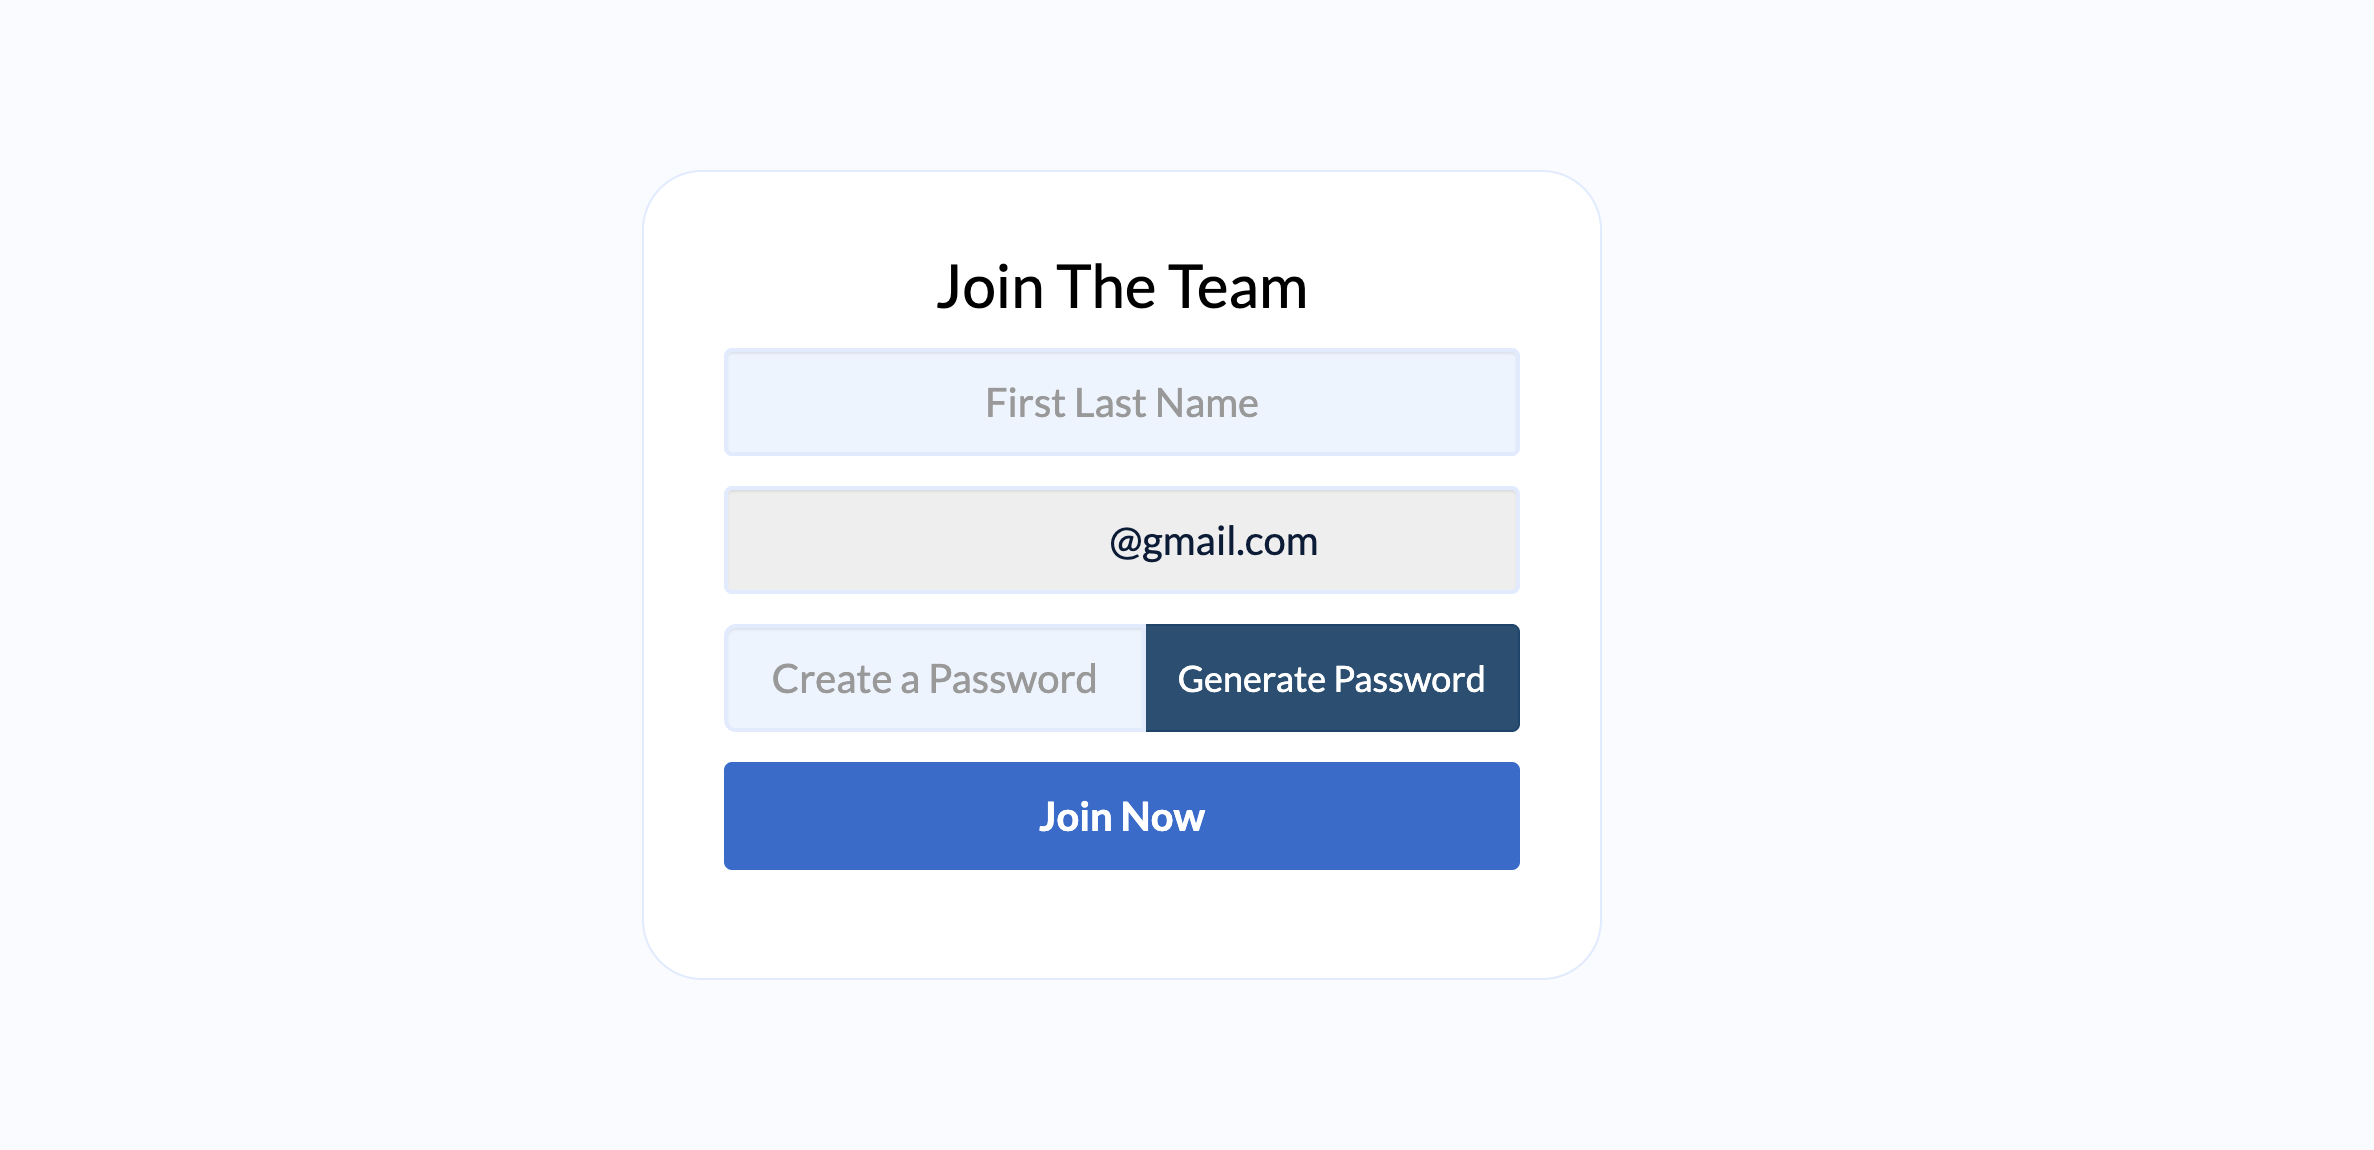
| Invitation Email | Create Admin Account (Invitee) |
|---|---|
 |  |
To accept the invitation, the invited admin should:
- Open the invitation email.
- Click Click to Accept Invitation.
- Enter their full name.
- Create a password.
- Submit the form to complete the admin account setup.
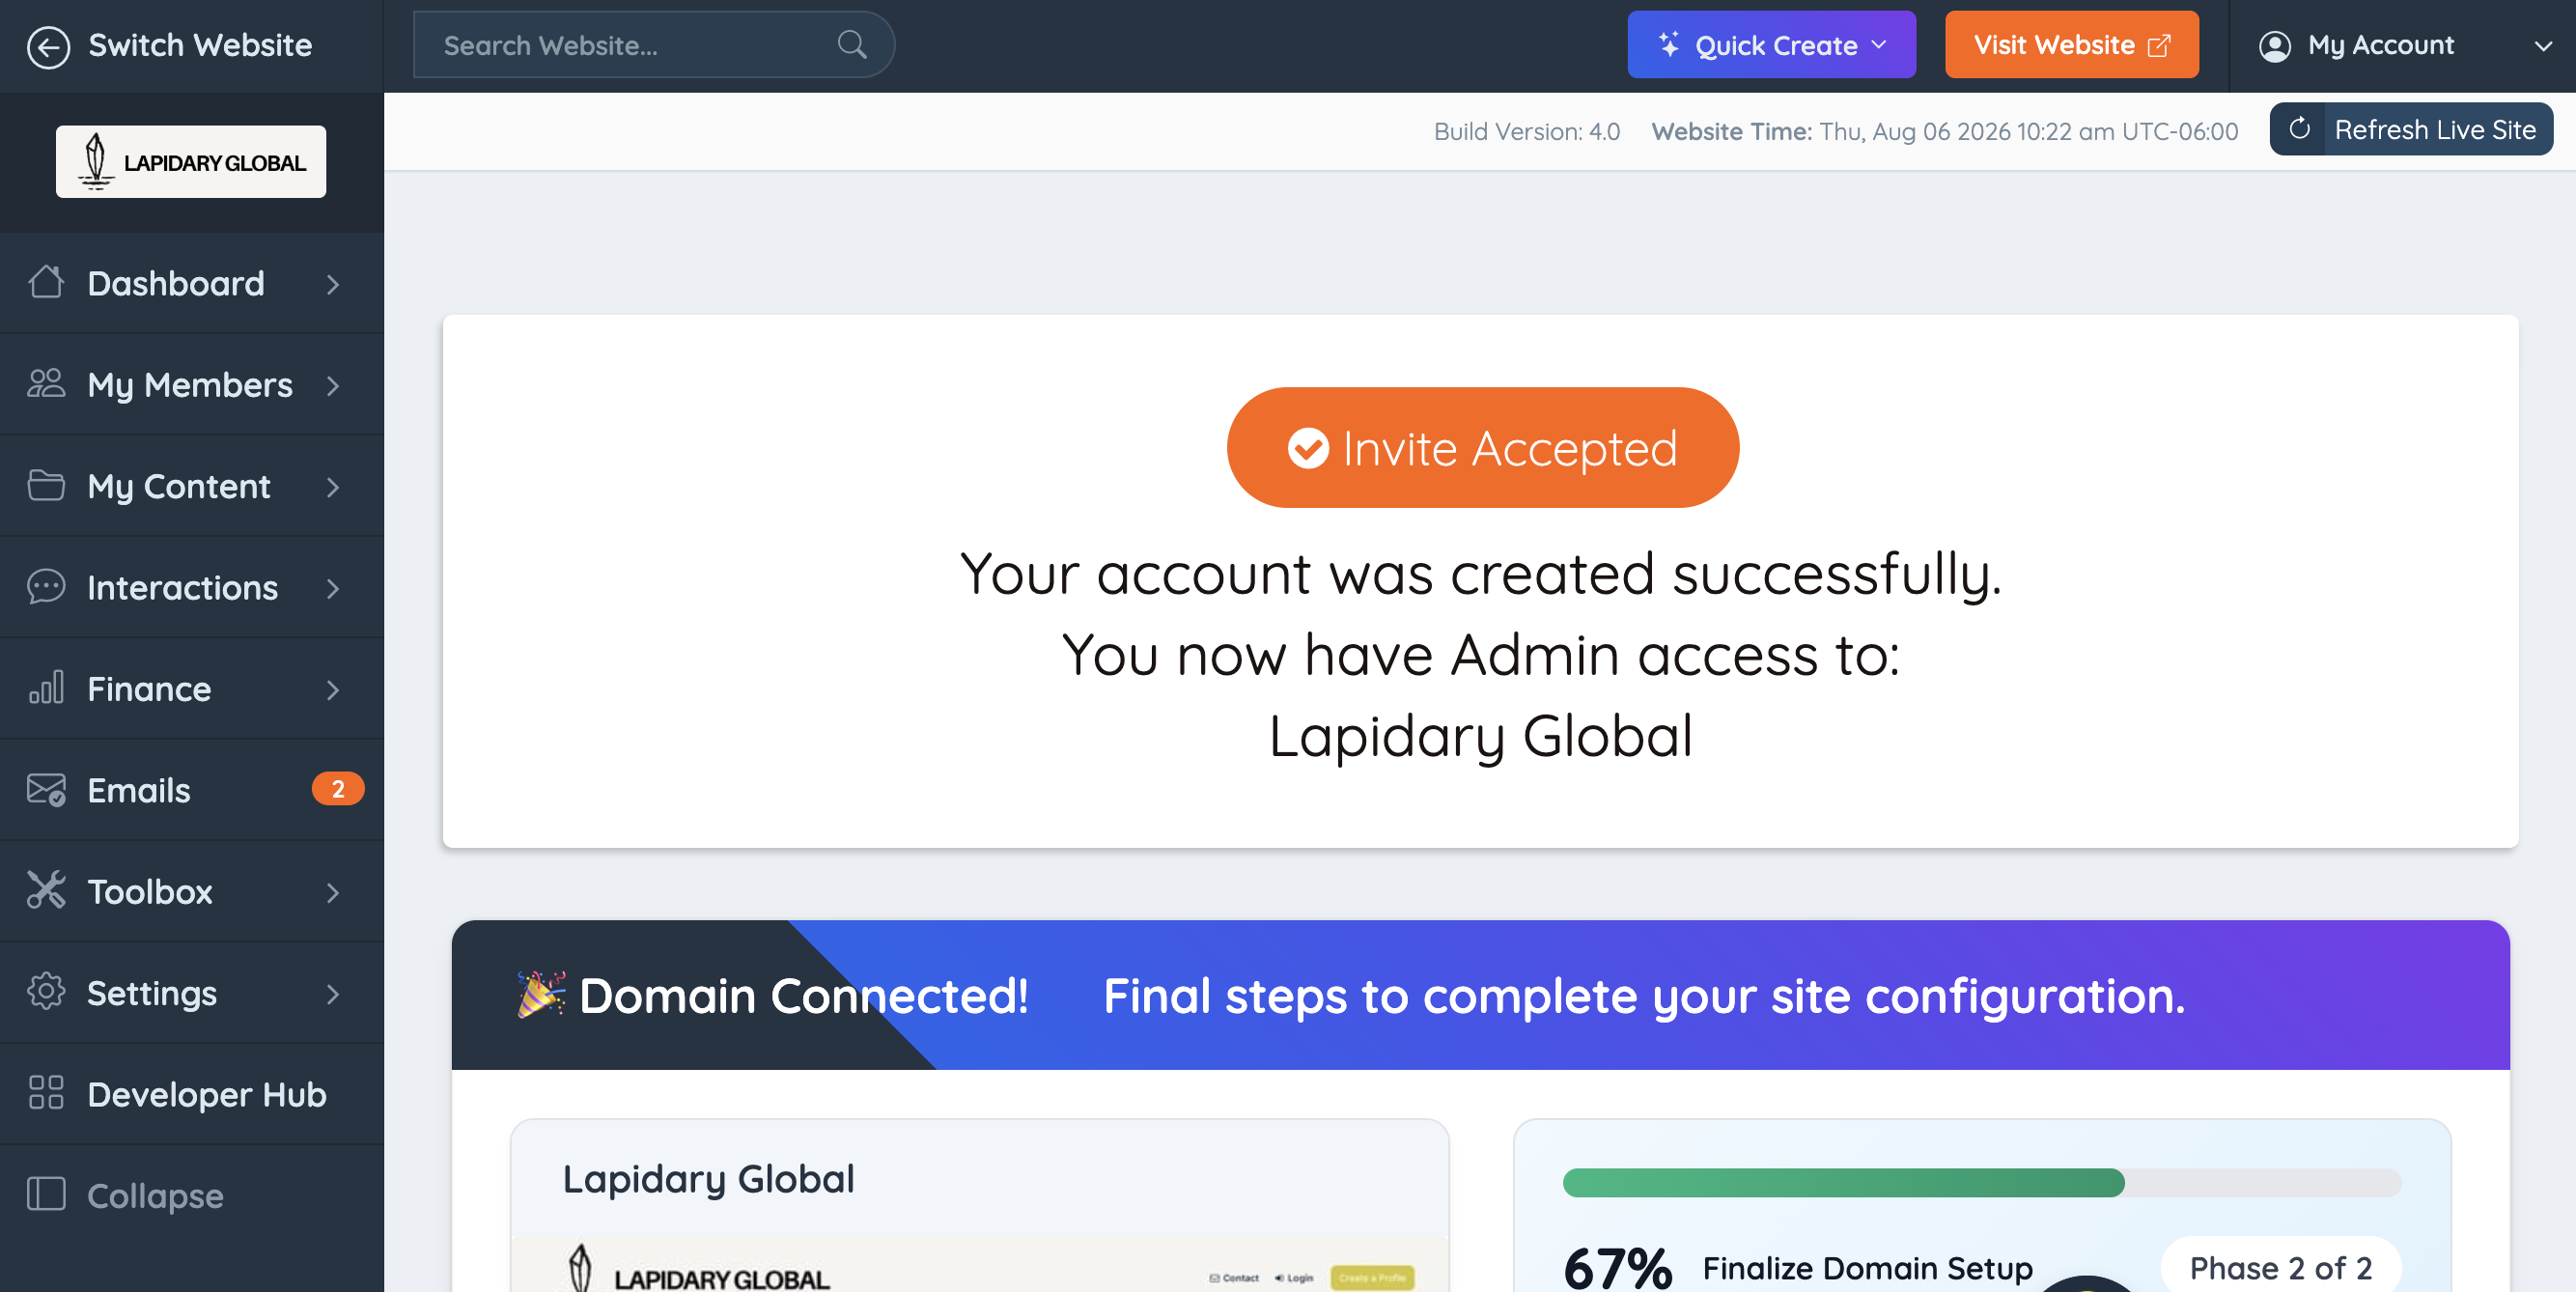
After the invitation is accepted, the new admin will be logged in to their admin account.
Admin Invite Email Template
The admin invitation email uses the following email template:
admin-invite-linkThis email template controls the content of the admin invite email sent to new admin users. To edit the admin invite email, go to Emails >> Email Templates and search for admin-invite-link.
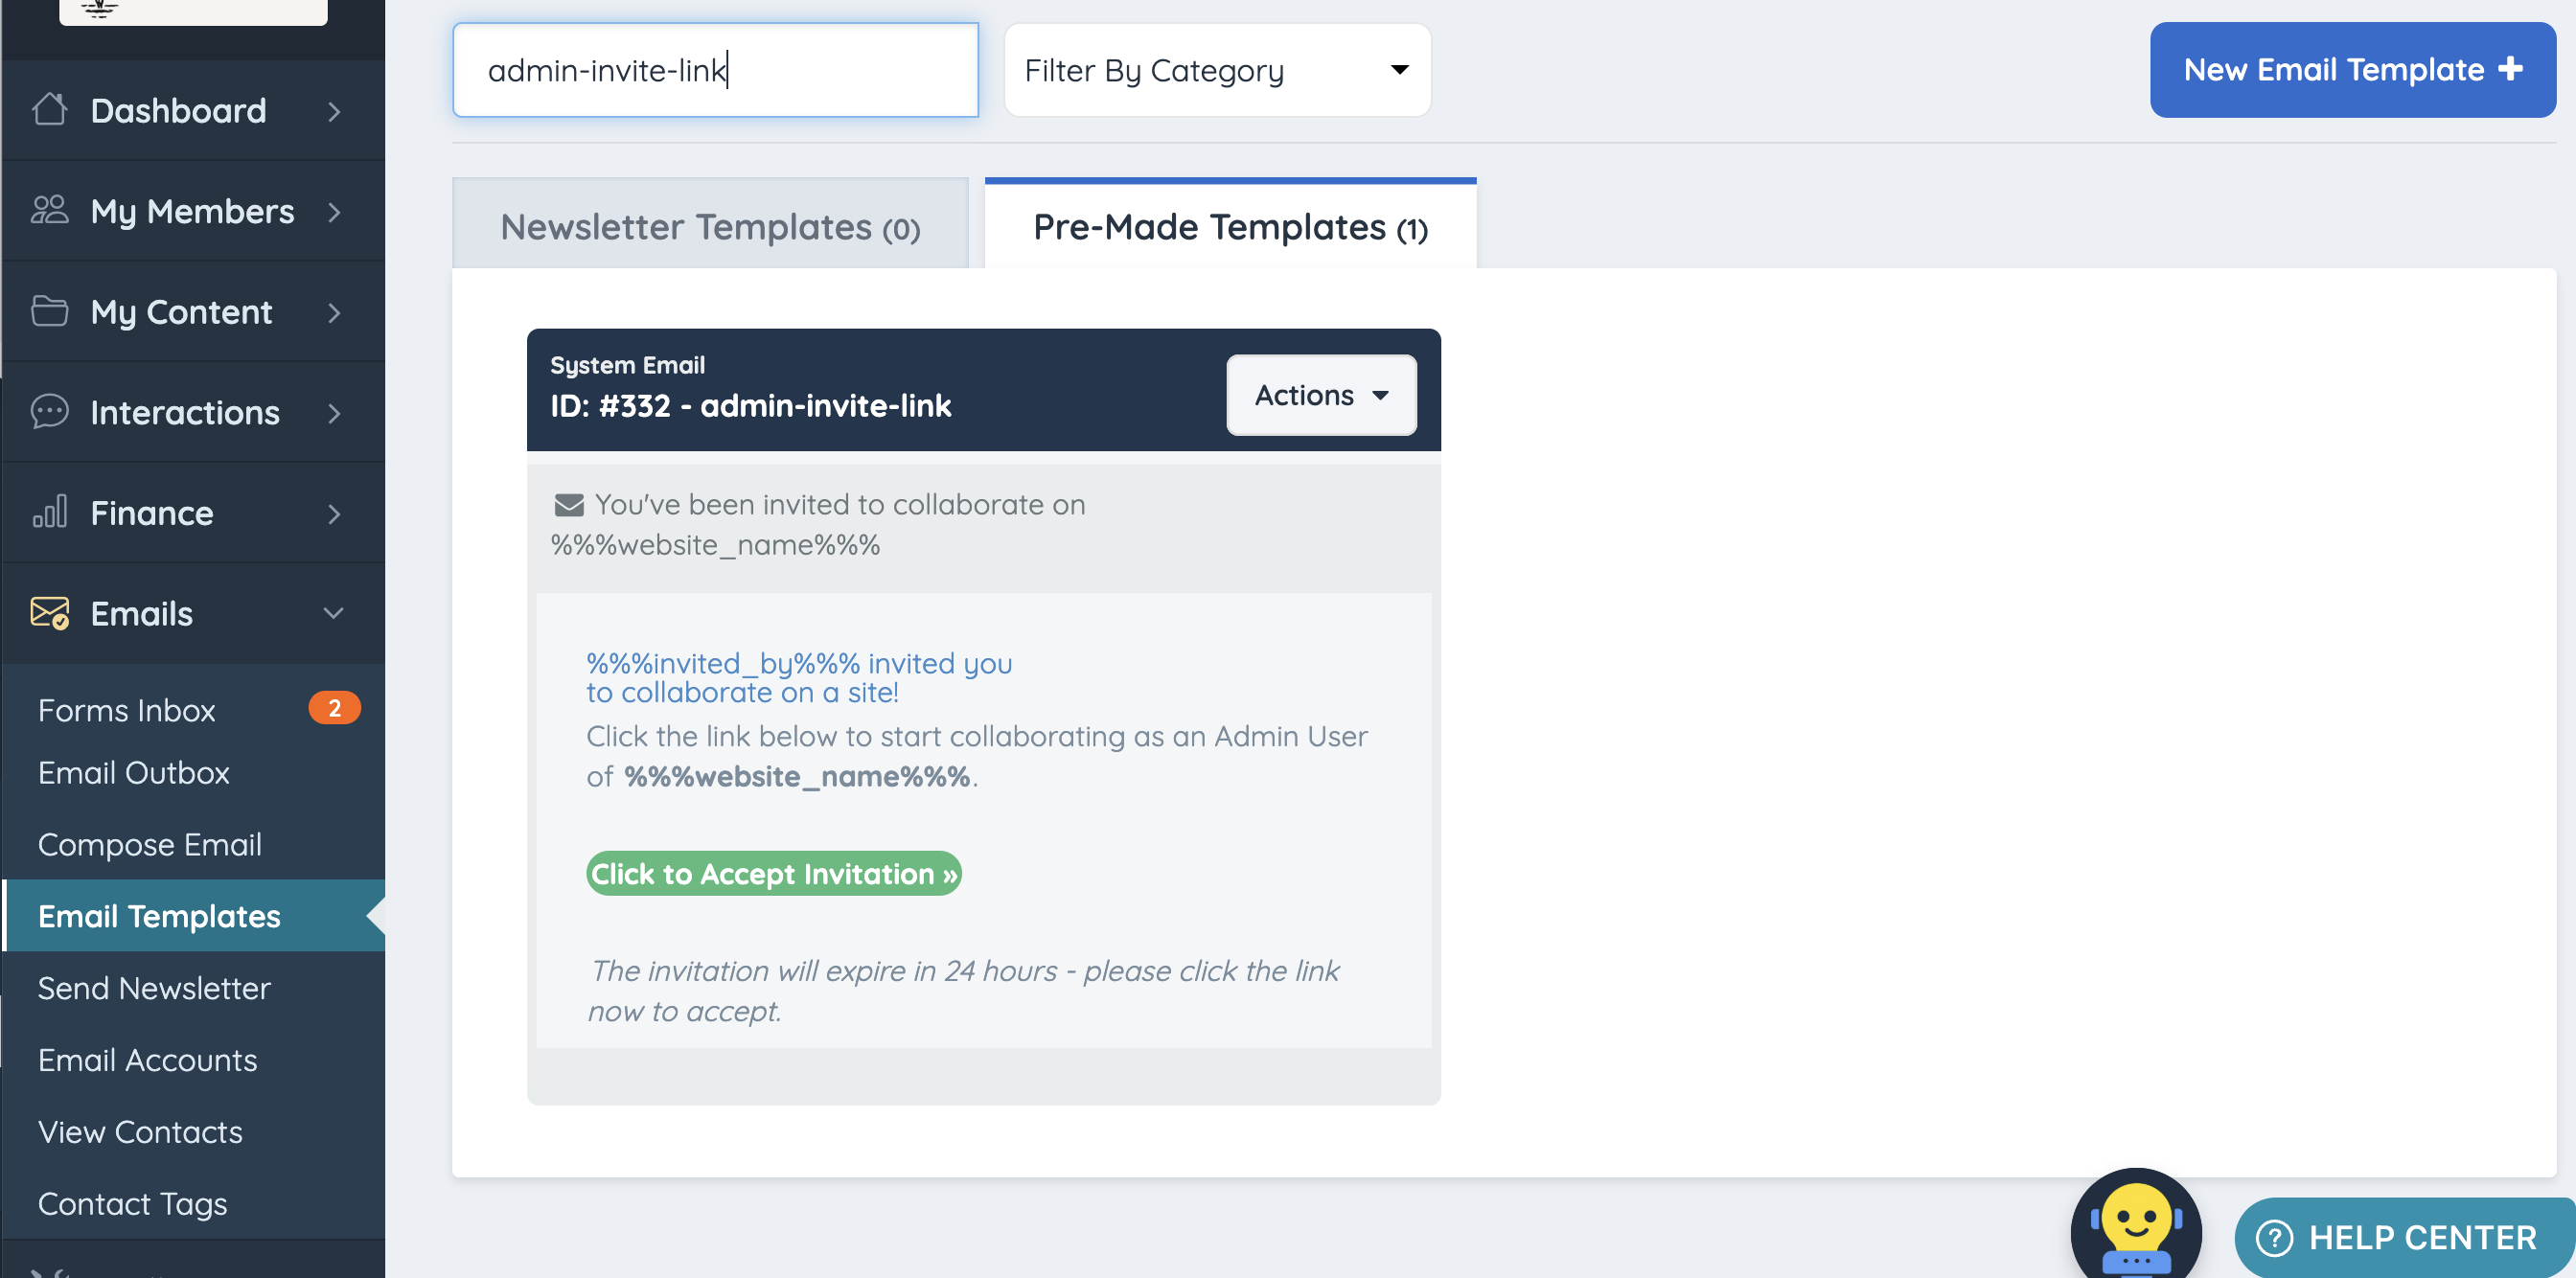
For more information about editing email templates, see the following article:
Emails >> Email Templates >> New Email Template
Important Notes
- Admin invitations expire after 24 hours if they are not accepted.
- Expired invitations can be resent or revoked.
- The assigned role controls which areas of the admin the invited user can access.
- If multiple invite rows are added, each row must be completed or removed before sending.
- The invite email is controlled by the admin-invite-link email template.
