
Developer Hub » Image Settings
Link: https://support.brilliantdirectories.com/support/solutions/articles/12000019278
What are the Image Settings?
The Image Settings of the website determine the final size that images will be saved after being uploaded to the website by members.
The default settings that come with a Brilliant Directories website are designed so that images will fit well in all of the areas of the website in which they display while being optimized for load speed and meeting minimum requirements for social media sharing.
IMPORTANT NOTE: Unless doing heavy customizations to the underlying code of the website's design, there is no need to touch these settings as they will already be optimized for use on a Brilliant Directories website.
How to Access the Image Settings
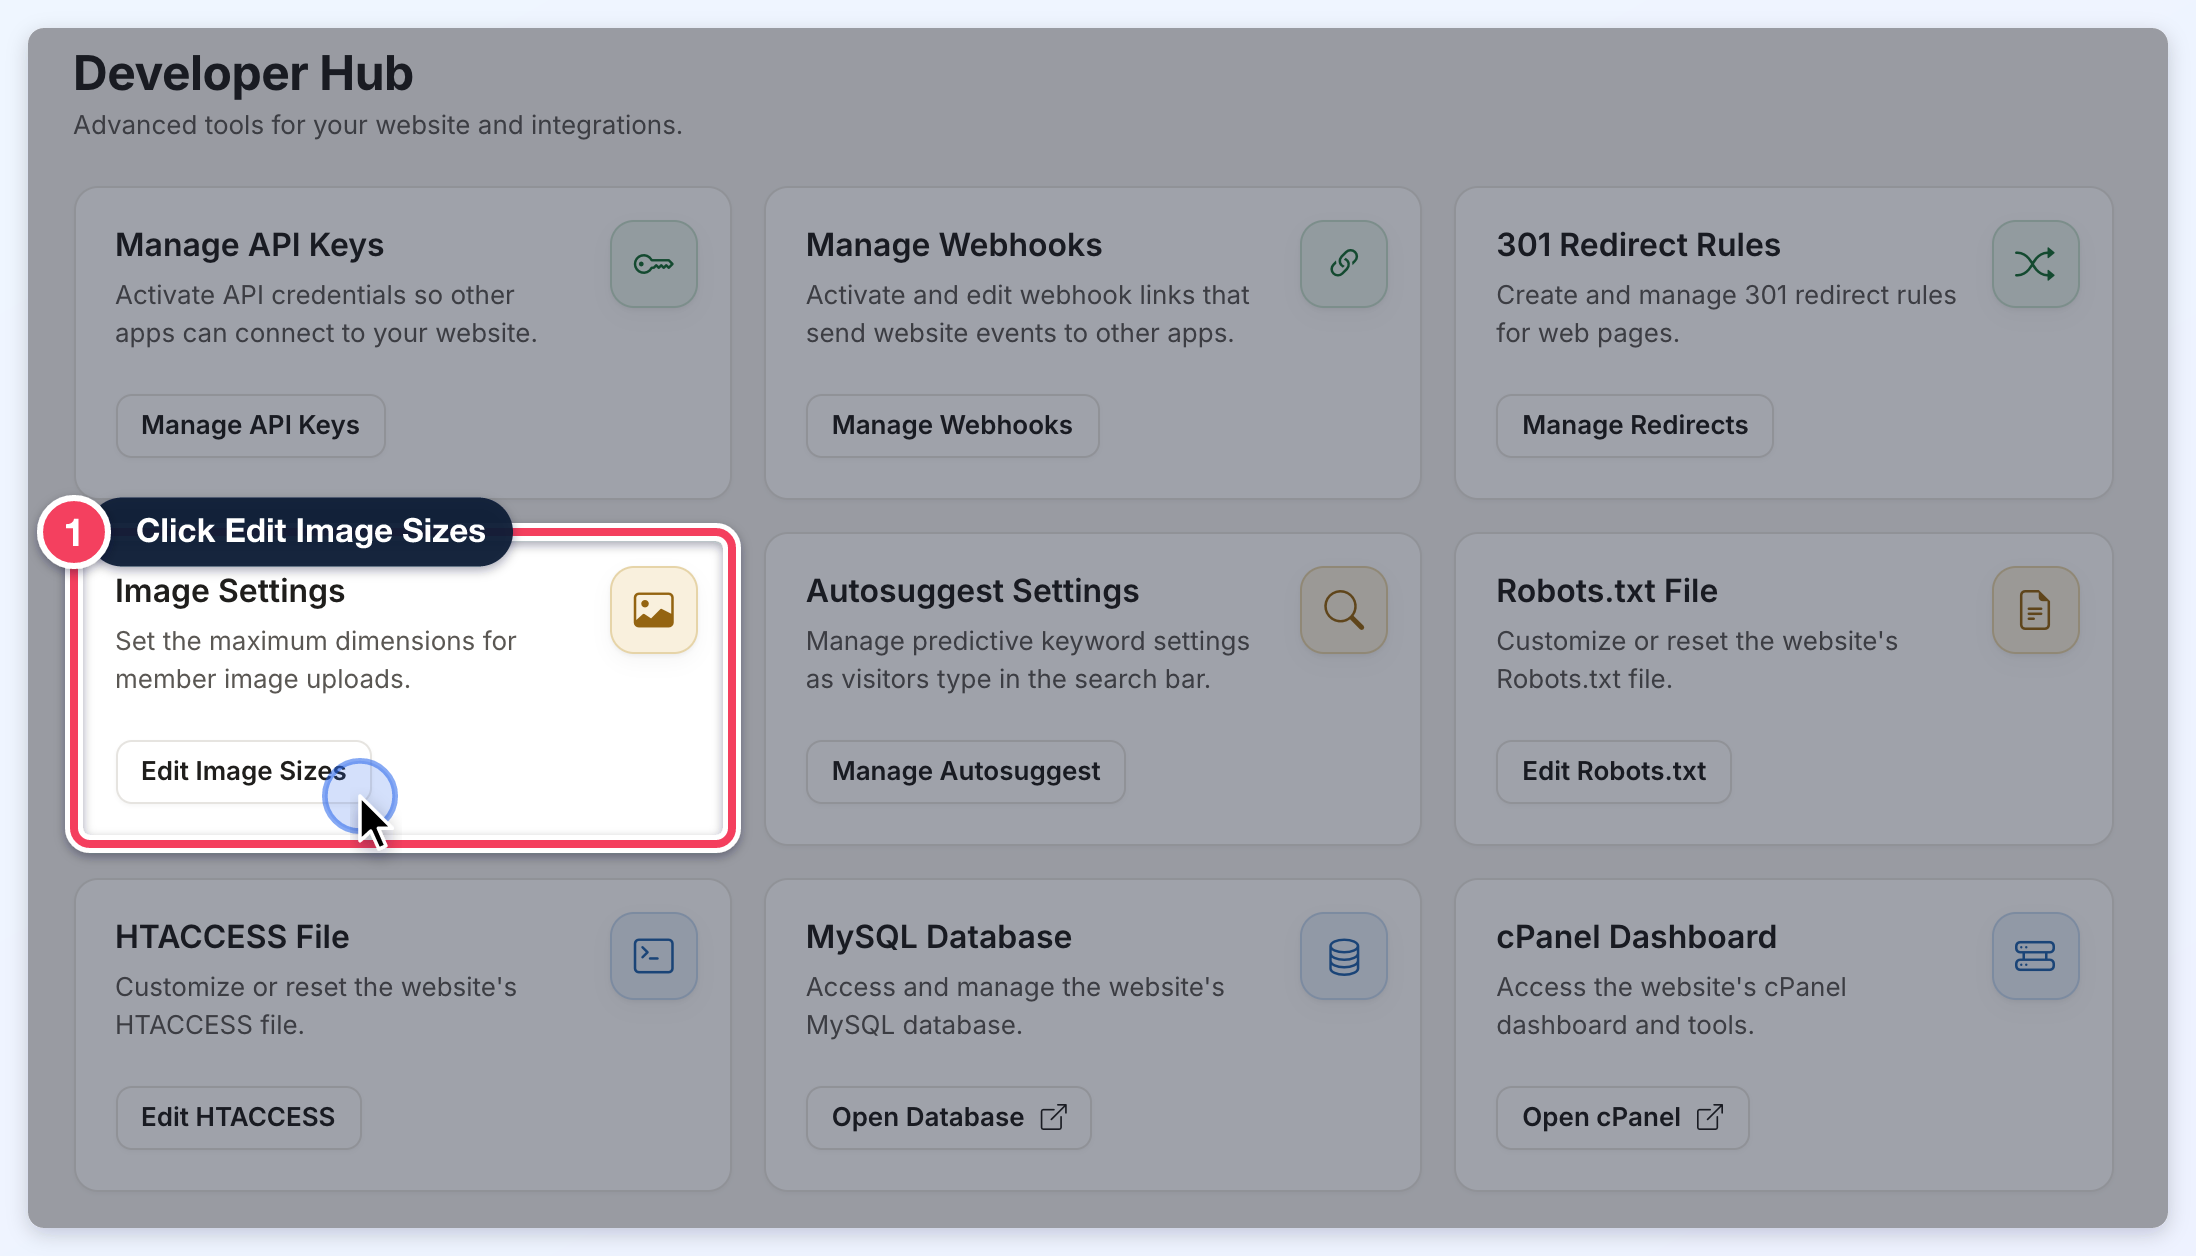
Go to ADMIN » DEVELOPER HUB and click Edit Image Sizes on the Image Settings card:
Using the Image Settings Page
The page lists every image size in one place, grouped into sections:
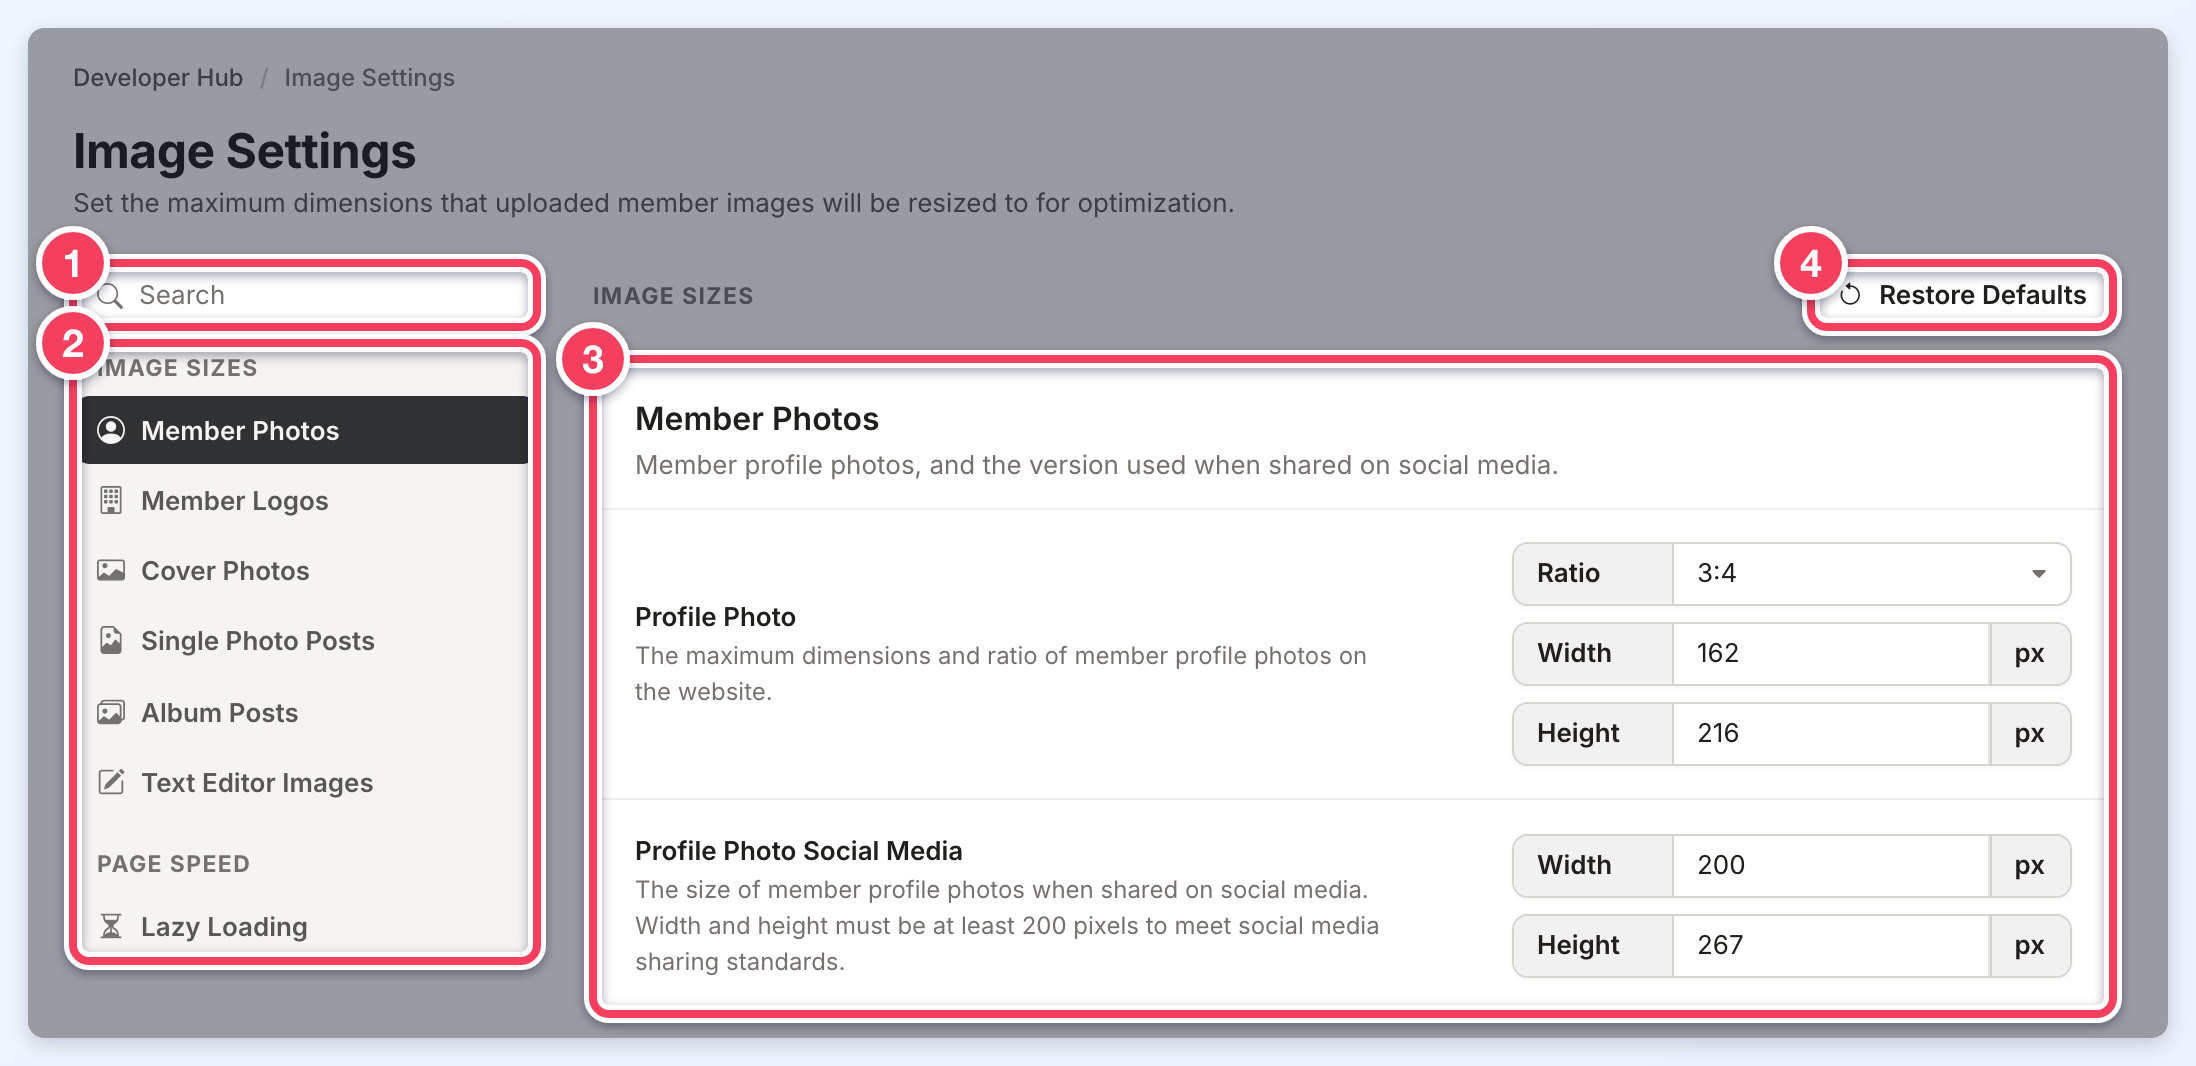
- Search — type part of a setting's name to show only the matching settings. The number of results appears below the box, and Clear (or the X in the box) shows every setting again.
- Side menu — click a section to jump to it. The Image Sizes group holds Member Photos, Member Logos, Cover Photos, Single Photo Posts, Album Posts and Text Editor Images. The Page Speed group holds Lazy Loading.
- Settings — each section lists its image sizes with a Width and Height in pixels, plus a Ratio for the member photo and logo sizes.
- Restore Defaults — puts every image size and the lazy loading setting back to the platform defaults (see below).
Searching for a setting:
Saving Changes
Changes on this page are not saved until Save is clicked. As soon as a value changes, the edited setting is marked with a dot and a save bar appears at the top of the page with the message Unsaved changes and two buttons:
- Save — saves every change on the page at once, including the Lazy Loading setting. The button briefly shows Saved when the save is complete. Ctrl+S (Cmd+S on a Mac) does the same while the save bar is showing.
- Discard — asks Discard Unsaved Changes? and, after Discard Changes is clicked, puts back the values that were last saved. Keep Editing closes the question without losing anything.
Changing a size and then discarding the change:
Some values are checked as they are entered. A width or height below the minimum allowed for that image (EG 162 pixels for the Profile Logo width) shows a Warning message and the value is reset to the minimum. The articles linked at the end of this page cover the limits for each image size.
Restore Defaults
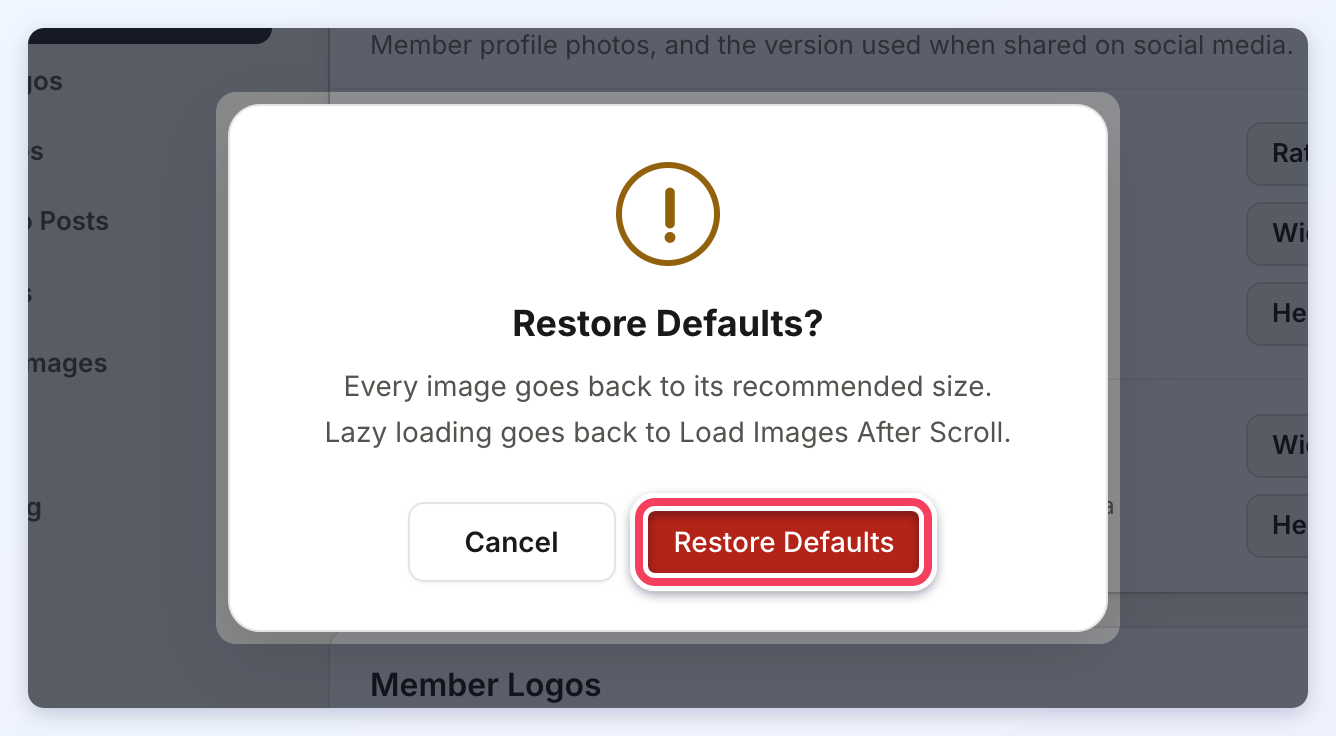
Clicking Restore Defaults asks for confirmation first. After Restore Defaults is clicked in the confirmation, every image size goes back to its recommended size and Lazy Load Images goes back to Load Images After Scroll. These values are saved right away, with no separate Save step, and the website uses the new sizes immediately. Click Cancel to leave the settings unchanged.
General Image Settings Information
Lazy Loading
(Load Images After Scroll / Load Images After Page Load / Disabled)
The Lazy Load Images setting is in the Lazy Loading section, under Page Speed in the side menu. Like every other setting on the page, a new choice takes effect only after Save is clicked in the save bar.
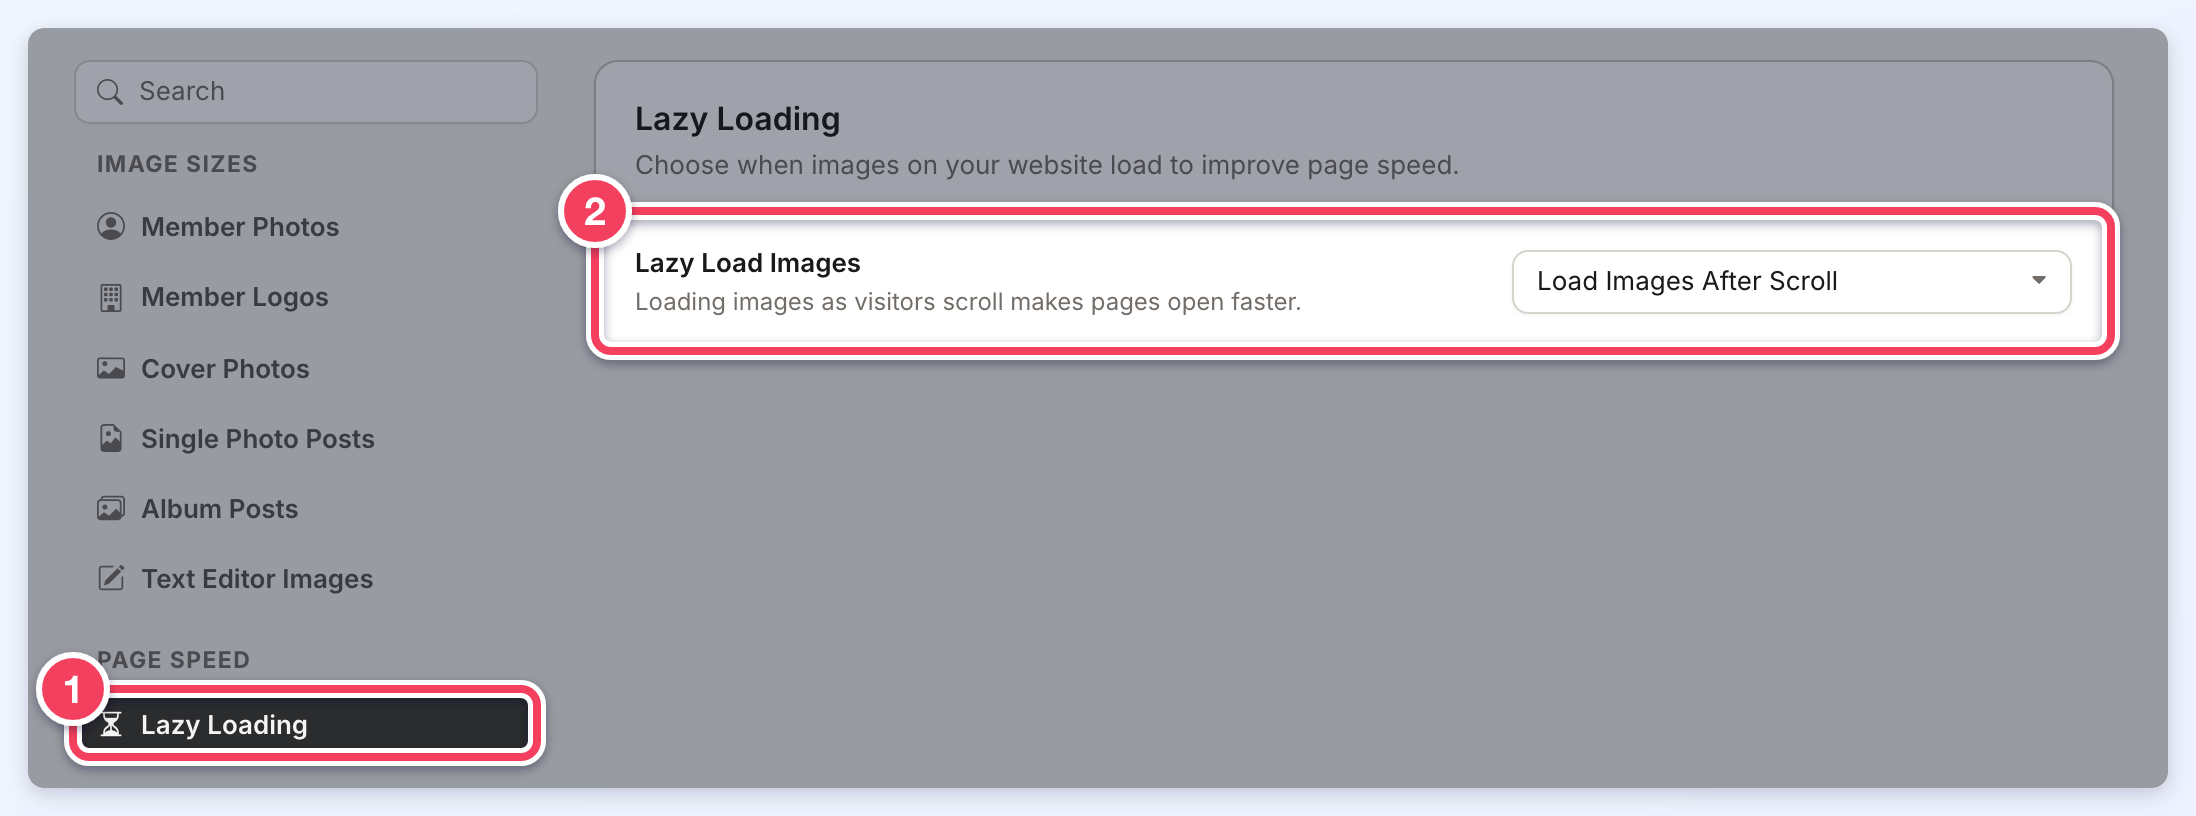
1 — Lazy Loading in the side menu, under Page Speed. 2 — the Lazy Load Images setting.
Lazy Loading is a set of techniques in web and application development that defers the loading of resources on a page to a later point in time—when those resources are actually needed instead of loading them upfront. These techniques help in improving performance, better utilization of the device’s resources, and reducing associated costs with bandwidth consumption.
- Load Images After Scroll: Images will only start loading once the page scrolls showing new data and images (Best bandwidth consumption efficiency)
- Load Images After Page Load: Once the first images Above the fold are loaded, it starts loading images below the fold (quickly loads pages, but consumes more bandwidth) Best for Carousels and Streaming Widgets.
- Disabled: Loads all images by default.
Ratio
The "Ratio" refers to the Aspect Ratio of the image, which is how large the height of an image will be relative to the width of the image and vice-versa.
For example, a 1:1 aspect ratio means it will be a square - for every 1 pixel of width, the image will have 1 pixel of height. As another example, the Aspect Ratio of an HD television is 16:9 (a rectangle that is wider than it is tall), meaning the image on the television will have 16 pixels of width for every 9 pixels of height.
An "Open" aspect ratio means there is no set aspect ratio at all, meaning the image can be any shape.
For more information about Aspect Ratios, please see the Wikipedia article on the topic.
Width
The maximum width of the final image in pixels.
Height
The maximum height of the final image in pixels.
Social Media Sharing
When uploading an image, two copies of the image will be saved: one that is optimized for display on the website, and one that is optimized for social media sharing. Currently, Facebook and many other popular social media sites require images to be at least 200px x 200px to be shared on their platform.
One copy of the image will be saved to be at least this size, and another will be saved that is optimized for displaying on the website where a smaller size is required.
Adding Images for Members
Users can upload Logos and Profile Photos through the member dashboard:
How to Complete a Profile as a Member
Admins can import members with Logos and Profile Photos through the import file:
These images are added as links into an import file that is uploaded and then added to the corresponding member profile.
Using links to add member Logos and Profile Photos is only available through the member import file.
Specific Image Settings Information
- Developer Hub » Image Settings » Profile Photos, Logos & Cover
- Developer Hub » Image Settings » Member Post Types - Single Photo
- Developer Hub » Image Settings » Member Post Types - Multiple Photos
- Developer Hub » Image Settings » Froala Text Editor Images
